
Subscribe to Our Youtube Channel
Related Manuals for Shimadzu EP-110


Summary of Contents for Shimadzu EP-110
- Page 1 321-78184 Mar.2015 Shimadzu Electronic Printer Instruction Manual EP-110 Read the instruction manual thoroughly before you use the product. Keep this instruction manual for future reference.
-
Page 2: Table Of Contents
Content 1 Introduction ......................1 2 Specifications ......................5 Features ......................5 Characteristic ....................6 Installation ......................7 3.1 Package......................7 Preparation ....................7 Appearance ....................8 Connect Printer to Balance ................9 Install Printing Paper ................... 10 Auto-Set ....................... 12 Clock setting ....................... - Page 3 5.11 Print Model/Serial Number/Device ID ............46 5.12 User-defined Report ..................46 5.13 Using balance's application quickly ............. 47 5.14 Parameter settings ..................48 5.15 Restore Default Settings ................52 5.16 Print Self-check report ................. 53 5.17 Using printer with WindowsDirect ............... 54 Using Rechargeable battery ................
-
Page 4: Introduction
GLP, GMP standard certifications. From the most basic printing needs to the variety of applications, the EP-110 printer provides users with a flexible choice. Read this instruction manual carefully and use the printer correctly in accordance with the directions in the manual. - Page 5 ・Shimadzu does not guarantee that the WindowsDirect communication function will operate without problems on all PCs. Shimadzu will accept no responsibility for any trouble that arises as a result of using this function. You are recommended to back up all important data and programs in advance.
- Page 6 Prohibitions You could sustain an electric shock or the product could operate abnormally. If you believe that the printer is defective, contact your Shimadzu representative. Use the balance with the specified power supply and voltage. Using the printer with an incorrect power supply or voltage will lead to fire or damage the printer.
- Page 7 If the printer has to be stored for a long time, store it in the packaging box in which it was delivered. Do not connect anything other than balance specified by Shimadzu. Prohibitions In order to avoid trouble, always connect balance in accordance with the directions in this manual.
-
Page 8: Specifications
2 Specifications 2.1 Features High-speed dot printing; printed pages are suitable for long-term preservation. 128x64 OLED displayer. With TARE key. Built in clock: the printer is able to print out date & time, even be connected to a balance without clock. Direct mode: print the original output of balance without any additional information, or with time/signature added... -
Page 9: Characteristic
Automatic timing print: print weighing data automatically due to set interval and iteration time, and can be enabled under any mode. User-defined output equation: through y=kx+b linear equation, can recalculate the result, and re-define the unit. Auto-Set: can automatically identify and set communication parameters, to solve communication problem. -
Page 10: Installation
Printing paper (Two) Data cable (One) User Guide (Three(English/Japanese/Chinese)) Hint: Ink ribbon cartridge is already installed in printer. 3.2 Preparation There are 5 adaptor converters provided in EP-110, please choose and install the proper adaptor converter according to the located country/region. -
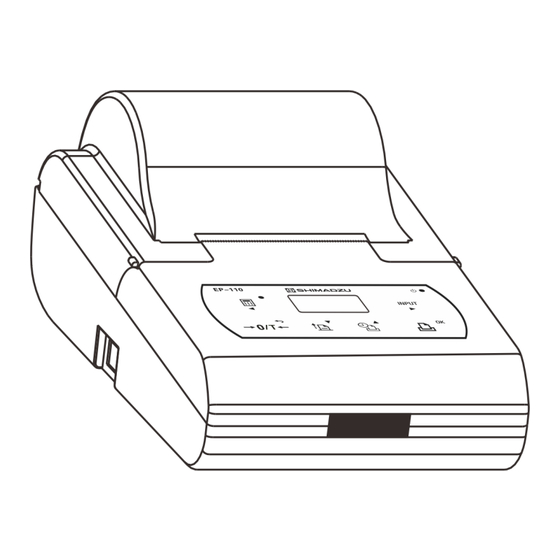
Page 11: Appearance
6. USB port 7. RS232 port 8.OLED display ※USB port is used for upgrading the printer’s firmware by connecting it to a PC with an USB cable. You can download the latest firmware and instruction manual from the URL link : http://www.an.shimadzu.co.jp/balance/index.htm... -
Page 12: Connect Printer To Balance
3.4 Connect Printer to Balance 1. Disconnect the power supply before connecting the printer to the balance with the data cable. The cable has a unique direction, please connect them correctly and tighten the screw. Please refer to the figure below. 2. -
Page 13: Install Printing Paper
Install Printing Paper 1. Lift the paper cover as shown in the figure below. 2. Insert the printing paper shaft into the center of the paper roll as shown in the figure below: Put the paper shaft correctly into the paper slot. The front end of the paper must be at the bottom and facing towards you. - Page 14 (b)Wrong fitment (a) Correct fitment 4. Keep pressing key while inserting the printer paper end into the slot of the printer mechanism as shown in the figure. Feed the paper until its end comes out Note: Damaged paper or ribbon is not allowed for usage. Do NOT use unspecified paper, ribbon, cable or adaptor, to avoid possible damage to the printer.
-
Page 15: Auto-Set
3.6 Auto-Set The communication parameters of printer and balance need to be completely compatible to allow normal operation. This function can automatically recognize the communication parameters and set the parameters in the printer to be compatible with a balance, thereby eliminating common issues caused by incorrect communication parameter settings. -
Page 16: Clock Setting
working status. Note: If you can’t print after Auto-set, set communication parameter between the printer and the balance manually by referring to“COMM.set” of ”Section 5.8 Parameter setting”. If you use ELB、 、 、 、 MOC63u without the print key, you can’t use Auto-set function. -
Page 17: Date And Time Format
3. Press key to change the cursor position. Press key to decrease or increase the value. Press confirm and set the next item. Then, without pressing If you keep the cursor position on 1st digit and hold key, automatically 2nd digit is changed. After setting is completed, press key to return. -
Page 18: Password Protection
After setting is completed, press key twice to return. 4.3 Password Protection EP-110 allows you to set a length of 6-digit password, which will prevent unauthorized changes on the date and time. Set the password: 1. Please refer to “5.14. Parameter Settings”, then enter into “Normal set”... - Page 19 Press key to set the numerical digits, press key to switch the input position, press key to confirm. To avoid input error, the system will request to enter the password again, as shown in the figure below: Upon completion of password setting, the figure below will be displayed.
- Page 20 in the figure below: To assist the user, the system will automatically display the first and last digit of the password. If the password entry is successful, you can set a new password according to the above "Set the password". Set the password as "888888"...
-
Page 21: Operation
5 Operation Interface ① : Tare state indication :Disable Auto-tare, this is default state after printer is power on. : Enable Auto-tare: command ‘tare’ will be sent to balance automatically each time a weighing data is received. ② : Sample ID/sample name/lot number output When appears, the items selected in INPUT function are activated, INPUT function includes sample ID/name/... -
Page 22: Led Indicator
③ : Power indicator Currently using AC adapter, with batteries installed. : Currently using AC adapter, without batteries installed. : Currently using batteries, battery with the highest remaining capacity. : Currently using batteries, battery remaining capacity lower than 10%. ④:Current mode DIRECT: Original output mode WEIGHING:... -
Page 23: Keys
5.3 Keys :Under Direct mode, press this key to choose mode. Press this key again to complete current mode and return to the Direct mode (when the “Hold run mode” option is disabled, please refer to “5.14 Parameter settings”). hold this key for longer than 2 seconds to turn on the “balance’s application”(refer to “5.13 Use balance’s Application Quickly”). -
Page 24: Language Settings
In parameter setting interface, press the key to enter current setting item or confirm the parameter change. 5.4 Language settings Turn on the printer, when the “EP-110” logo appears on the display then press the key. Then the language selection list appears,press to choose language,then press... -
Page 25: Printing Mode
5.6 Printing Mode 5.6.1 DIRECT Mode Under this mode, the data from balance would be printed directly, without any information added. This mode is usually used for printing balance calibration data. When the printer is just power on, or complete from other mode, it will all return to DIRECT mode (when the “Hold run mode”... - Page 26 Operation: Press key , when the selection list appears, press to choose WEIGHING mode and press to confirm. Press or the output key on balance to print data. Press key to end. Hints: If time is needed before each weighing data, please set the item “weighing data format”...
-
Page 27: Tare, Gross, Net Weighing Mode
5.6.3 Tare, Gross, Net weighing Mode Under this mode, the printer can output tare, gross and net weight, the print format is as follows: Operation method 1: Focus on gross weight Press key , the selection list appears, as shown in the figure below: Press key to switch the item, selected “T, G, N”... -
Page 28: Statistical Mode
the display. Press key to print gross weight and automatically calculate/print net weight, net weight= gross weight – tare weight. Operation method 2: Focus on net weight Press key the selection list appears, as shown in the figure below: Press to switch the option, selected “T, G, N”... - Page 29 The output items in the statistical report are listed below: Statistic Symbol Description Measuring time Maximum value Minimum value Range = MAX – MIN Mean value MEAN = T / N Standard deviation SQRT(∑(Xi-MEAN) /(N-1)) Coefficient of deviation (SD / MEAN x 100)%...
-
Page 30: Sum Mode
Operation: Press key , when the selection list appears, press to choose STAT. mode and press to confirm. Load first sample on the balance, press key ‘Print’ on balance or on printer when the weight value is stable. The printer will print sample weight, and add it into statistical queue. Repeat Step 2 for each subsequent sample. -
Page 31: Mean Mode
Press key , when the selection list appears, press to choose SUM mode and press to confirm. Put the first sample on balance, press key ‘Print’ on balance or on printer when the weighing data is stable. The printer will print sample weight, and add it into statistical queue. Repeat Step 2 for each subsequent sample. - Page 32 Operation: Press key , when the selection list appears, press to choose Mean mode and press to confirm. Put the first sample on balance, press key ‘Print’ on balance or on printer when the weighing data is stable. The printer will print sample weight, and add it into statistical queue. Repeat Step 2 for each subsequent sample.
-
Page 33: Fmlt Mode (Formulation Mode)
5.6.7 FMLT Mode (Formulation Mode) Output the weight of each component in the formulation, and print the net weight of all the components (Formulation weight). There are 2 types of report format: 1.Print Tare 2.Print Net. The following describes the 2 printing format. - Page 34 Press key to choose FMLT mode and press to confirm. 2. Press key the selection list appears as below: Press key to select “1. Print Tare” and press key to confirm. The tare weight and gross weight will be printed in the Formulation result. 3.
- Page 35 2. Print Net report When this option is selected, only the net weight of the components in formulation is printed. Below is a sample report of Print Net: Print NET operation: Press key , when the selection list appears, as shown in the figure below : Press key to choose FMLT mode and press...
-
Page 36: Pipette (Volumetric Flask) Cal Mode
Press key to select “2. Print Net” and press key to confirm. 3. Load sample container on the weighing pan of balance, press key to tare the weight of sample container. 4. Load first sample in the container, press key ‘Print’ on balance or on printer when the weight value is stable. - Page 37 Operation: Select mode: Press key , the selection list appears. 2. Press key to select "PipetteCAL" and press to confirm. Set pipette information: Use for printing out the report of pipette information in header, including the manufacturer, model, serial number. Press key , the selection list appears as below:...
- Page 38 Press key to select " 3 Input INFOR." and press key to confirm, then the selection list appears as below: Please refer to "5.9 Input method of string", set pipette manufacturer, model and serial number. After setting,press key to return. 6.
- Page 39 8. Set/Select calibration point: when appears the selection list as below. 9. Then press key to choose "Select Points" and press key to confirm, the selection list appears as below. 10. Press key to change calibration point, and press to confirm or press to cancel the selection and return.
-
Page 40: Comparator Mode
balance, and press after the weight value is stable. Add distilled water to flask until calibration line is reached, and wait until the weight value is stable then press “PRINT” on balance or on printer. The printer would print weight and volume under standard temperature (20 degree). - Page 41 Press key to select “COMP” then press key confirm the selection. Set High/Low threshold, as shown in the figure below: If no modification, press key to return; press key to select the items you want to modify, by pressing key .
-
Page 42: Automatic Timing Print
Note: Under Comparator Mode, printer only deals with values, and shall not make judgments on weight unit, in other words, 100g and 100mg is the same for the printer. 5.7 Automatic Timing Print Automatic data transfer in indicated interval and iteration time is realized in this automatic timing print. - Page 43 4. Start timing print Returned from the previous step, then the display will show as the figure below: Press key to choose "Start Timing PRN", press key to start. Once timing print begins, then the display will show as the figure below: When iteration time is set to 0, the printer is set to continuous repetitive mode, as shown in the figure below:...
-
Page 44: User- Defined Equation
Press key to choose "Stop Timing PRN", press key to confirm. 5.8 User- defined Equation Through Y=K*x+B linear equation, can recalculate the output results, and re-define output unit, in this equation, K and B can be set by user, x is the value transport from the balance, Y is output value, an example is as follows: In this sample, K=2.0000, B=1.0001, the value x is transported from... - Page 45 Press key , the display appears as shown in the figure below: To change K value, press key , press key to modify value, press key to change input position, press key to save; press key to switch between “ Constant: B”, “unit”, “Printout Format”...
-
Page 46: Input Method Of String
Input sample ID, name and lot number User-defined label Others EP-110 support input of alphanumeric characters (capital and small) and symbols, and can automatically limit the selectable range to speed input. As to the function of each key in inputting string, please refer to the... -
Page 47: Print Sample Id/Name/Lot Number
: Move the cursor position to the left. Hold this key for more than 2 seconds can switch letter between upper and lower case : Move the cursor position to the right. Hold this key for more than 2 seconds can replace the current symbol by space which is used for deleting current position character. - Page 48 press key to customize the Header report. If “Header” checkbox to be set as , the current selected item will be automatically printed in header. Press key to edit selected item, please refer to “5.9 Input Method of String”. Upon completion, press key to save and return, if “header”...
-
Page 49: Print Model/Serial Number/Device Id
5.12 User-defined Report Generally, a report is composed of header, data and trailer. The report may include many printout items, EP-110 allows these items to be optional in the print out report which can user defined. Header: User-defined character string: user-defined input... -
Page 50: Using Balance's Application Quickly
Please set the items in “Printout” menu referring to “5.14. Parameter Settings”, then obtain expected report format. 5.13 Using balance's application quickly SHIMADZU balance with many built-in useful applications, using EP -110 can quickly open the application. Operation method: Under the standby interface, press... -
Page 51: Parameter Settings
Title on header” of “Normal Set” menu Print MFGR in report √ √, × Print “Shimadzu header Corporation” in report header Print model in report √ √, × Print model in report header... - Page 52 Print SN in REP. √ √, × Print S/N in report header header Print ID in REP. × √, × Print ID in report header header Print date in report √ √, × Print date in report header header Print time in report √...
- Page 53 Maximum number of 2-300 End statistical immediately if statistics the number of weighings is larger than this number Printout Language English English/Chinese Printing language Weighing data format xxx: xxx: increment count xxx: d: weight value hh:mm:ss u: weighing unit xxx hh:mm:ss d hh:mm:ss: time Parameters setting of ‘Normal set’...
- Page 54 Parameters setting of ‘COMM. set’ Warning: wrong setting may lead to abnormality of printer. Please do not change the parameters listed below if it is unnecessary. Item Factory setting Setting options Memo Baud 1200 300,600, Must be set according to baud rate of 1200,2400, balance, please modify it carefully.
-
Page 55: Restore Default Settings
Parameters setting of ‘Power manager’ Item Factory Setting options Memo setting Battery manage The battery remaining capacity can be confirmed. Screen save 10 minutes (1-120) minutes Screen save time, when this time is time surpassed without operation on printer, or without received data, the printer will turn off the display Screen brightne. -
Page 56: Print Self-Check Report
5.16 Print Self-check report A self-check report can be used in fault diagnosis, the operation of which is as follows: Turn off the printer. 2. Hold key and turn on the printer, do not release the button until the printer start printing. 3. -
Page 57: Using Printer With Windowsdirect
5.17 Using printer with WindowsDirect EP-110 can still work when the WindowsDirect function is enabled in balance, this feature allows data transfer to both computer and printer concurrently. Certain settings are needed before using this feature: Manual Set: refer to “5.14. Parameter Settings”, set the “Baud” of printer to 300bps, “Terminate char”... -
Page 58: Using Rechargeable Battery
6 Using Rechargeable battery 6.1 Installing the Rechargeable Batteries The batteries are not required when the printer is powered by AC adapter. If connected AC adapter, AC adapter is given priority to battery. Prepare 4 AA NI-MH rechargeable batteries and charge by specified battery charger. -
Page 59: Check The Battery Capacity
6.2 Check the battery capacity The battery status will be shown on the display, LED indicator also has the corresponding instructions, please refer to “5.1 Display Interface” and “5.2 LED Indicator” Confirmation of battery capcity • Press key and hold longer than 2 seconds, to enter into set menu, as shown in the figure below: press key to select “Power Manage”... - Page 60 Press key 3 times to return to standby condition. Low battery warning: • When battery capacity is lower than 10%, LED Indicator flash quickly (please refer to “5.2 LED Indicator”),remove the batteries and charge by specified battery charger. When battery capacity is lower than 5%, the printer will appear the following figure: The printer will emit beep sounds and automatically shuts down after a few seconds.
-
Page 61: Trouble Shooting
7 Trouble shooting Symptom Cause Remedy Printer do not print Incorrect cable connection Re-install the cable referring while Print key is between printer and balance to ”3.4 Connect Balance to Printer” pressed Balance isn’t in transferable Set the balance in transferable status status Incompatible communication... - Page 62 Letters jumble together Paper jam Refer to above content to solve paper jam The printing paper is set in a Refer to “3.5 Install Printing Paper” wrong direction Incompatible printing paper is Replace the printing paper with a used, such as thermal paper compatible one The paper shaft inside printing Install the paper shaft...
-
Page 63: Maintenance
8 Maintenance 8.1 Replacing printing paper When printing paper runs out, replace a new one. Refer to procedure of ‘3.5 Install Printing Paper‘ 8.2 Replacing Ink ribbon cartridge Replace the ink ribbon cartridge when the printing becomes unclear or faint. Open the paper cover and remove the ink ribbon cartridge by pressing at the right end marked with “Push”... -
Page 64: Maintenance
Check if the Ink ribbon cartridge is installed correctly. Rotate the knob clockwise if the ribbon is bent or outside of the Ink ribbon cartridge, press key to flatten and tighten the ribbon, until it’s completely in the cartridge. Close the paper cover and the installation is finished. -
Page 65: Physical Dimensions
9 Physical Dimensions 10 Part List Item Specifications Printer paper 57(width)x50(diameter)mm, S321-73902 10 rolls/package. Label roll paper 57(width)x50(diameter)mm, S321-73904 10 rolls/package Ink ribbon Black ink, long life, 5pcs S321-61111-06 (long-life) AC adapter 12V / 1.5A, 5 plugs S321-73901 Cable_DIN262 DB9 female - DIN8-262 male S321-73903... -
Page 66: Menu Map
11 Menu Map :Move to next menu within the same hierarchy :Move to previous menu within the same hierarchy :Move down to the next menu hierarchy or to confirm setting :Move up to the next menu hierarchy Print stand-by 1 Print out ______ Print label in header ____ ON /OFF Print MFGR in report head... - Page 67 |____ Lot Auto INCR ____ ON/OFF |____ Maximum number of statistics ____ 300 Setting value(2~300) |____ Printout language ____ English /Chinese |____ Weighing data format ____ d u |____ xxx d u xxx: increment number |____ hh:mm:ss d: weighing data |____ xxx hh:mm:ss d u u: weighing unit hh:mm:ss: time...
Need help?
Do you have a question about the EP-110 and is the answer not in the manual?
Questions and answers