Table of Contents
Advertisement
Quick Links
MONITORING - T1S/ T2S/ CANDIS
User Manual V1.2
BEYOND THE INVERTER
THE NEW GENERATION OF POWER CONVERTERS
DUAL INPUT INVERTER
Commercial Power as default source
AC BACKUP IN A DC ENVIRONMENT
Leverage your existing DC infrastructure
ONE STOP SHOP
Wide output power range
HARSHEST AC INPUT CONDITIONS
Without compromising the quality of the AC output
Copyright © 2013. Construction electroniques & telecommunications S.A.
All rights reserved. The contents in document are subject to change without notice.
The products presented are protected by several international patents and trademarks.
Address: CE+T S.a, Rue du Charbonnage 12, B 4020 Wandre, Belgium
www.cet-power.com - info@cet-power.com
Important Safety Instructions
Save these Instructions
www.cet-power.com
Advertisement
Table of Contents
Troubleshooting

Subscribe to Our Youtube Channel
Summary of Contents for CE+T Power T1S
- Page 1 MONITORING - T1S/ T2S/ CANDIS User Manual V1.2 BEYOND THE INVERTER THE NEW GENERATION OF POWER CONVERTERS DUAL INPUT INVERTER Commercial Power as default source AC BACKUP IN A DC ENVIRONMENT Leverage your existing DC infrastructure ONE STOP SHOP Wide output power range...
-
Page 2: Table Of Contents
6.3.2 Inserting ............................... 6.4 Monitoring by CANBUS & CANOPEN ........................6.5 Monitoring by MODBUS ............................ 6.6 Install a new T1S and T2S Monitoring in the system ..................6.6.1 If system powered ..........................6.6.2 If system not powered .......................... 6.7 PASSWORD in T2S Monitoring .......................... - Page 3 6.9.2 Security Access (Protected Menus) ....................... 6.9.3 Receive configuration from T2S ......................6.9.4 Changing the Configuration ........................6.9.5 List of factory settings (Default Values) ....................6.9.6 Sending configuration to the system ..................... 6.9.7 Changing the System Parameters ......................6.9.8 Displaying Operating Parameters ......................6.9.9 Update texts and constants ........................
- Page 4 Release Note: Release date Modified page Version Modifications (DD/MM/YYYY) number 08/08/2016 First release of the Manual. 18/04/2018 Added CS141. 07/02/2019 Updated digital input information. – Monitoring – User manual – v1.2...
-
Page 5: Ce+T Power At A Glance
„ „ „ „ Maintenance free „ „ Battery friendly CE+T power puts 60+ years expertise in power conversion together with worldwide presence to provide customized solutions and extended service 24/7 - 365 – Monitoring – User manual – v1.2... -
Page 6: Abbreviations
Abbreviations 2. Abbreviations Twin Sine Innovation Enhanced Power Conversion Regular Digital Signal Processor Alternating current Direct current Electro Static Discharge Main Earth Terminal Manual By-pass TCP/IP Transmission Control Protocol/Internet Protocol Universal Serial Bus Protective Earth (also called Main Protective Conductor) Neutral Printed Circuit Board True Redundant Structure... -
Page 7: Warranty And Safety Conditions
Warranty and Safety Conditions 3. Warranty and Safety Conditions WARNING: The electronics in the power supply system are designed for an indoor, clean environment. When installed in a dusty and/or corrosive environment, outdoor or indoor, it is important to: „ „... -
Page 8: Installation
Warranty and Safety Conditions „ „ CAUTION – Risk of electric shock. Capacitors store hazardous energy. Do not remove cover until 5 minutes after disconnecting all sources of supply. CAUTION – Risk of electric shock. This Inverter / UPS receives power from more than one source. Disconnection of the AC „... -
Page 9: Surge And Transients
Warranty and Safety Conditions 3.3.2 Surge and transients The mains (AC) supply of the modular inverter system shall be fitted with Lightning surge suppression and Transient voltage surge suppression suitable for the application at hand. Manufacturer’s recommendations of installation shall be adhered to. Selecting a device with an alarm relay for function failure is advised. -
Page 10: Monitoring - T1S
4.1 Introduction The T1S is a basic monitoring unit for the TSI inverter range. By default it is provided with the NOVA, VEDA and MEDIA ranges. If the information or monitoring function are not enough this unit should be replaced by a T2S monitoring device (see following sections). -
Page 11: Dipswitch Configuration
When an inverter fails or is removed from the shelf the T1S gives an alarm. If one or more inverters must be removed for any reason, the T1S must be unplugged and plugged back (in the live system) to reset the inverter recognition and cancel the alarms. Each new inverter will be automatically detected. -
Page 12: Monitoring - T2S
The T2S is an extended monitoring unit for the TSI inverter range. By default it is provided with all BRAVO solution. For NOVA, VEDA, MEDIA PACK designs, the inverters are by default monitored through basic T1S (see T1S section for more information). -
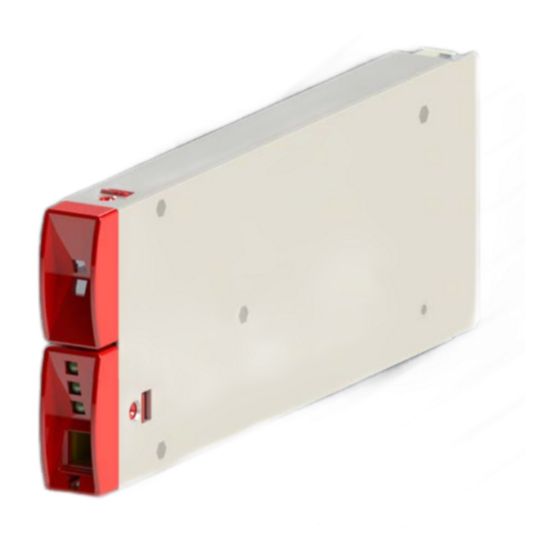
Page 13: Visual Information
T322050000 TSI-T2S-Bravo - 2C - RS485 T322050485 TSI-T2S-Bravo - 2C - CANOPEN T322050050 B) Filler (Closing part to fill up empty slot) TSI-T1S T2S -NOVA VEDA FILLER T312010001 TSI-T2S-MEDIA FILLER (Dummy Box) T332010001 TSI-T2S-BRAVO FILLER (Red Plastic Front) T322010001 Please check that the operating manual version you are reading is corresponding to TSI version running in your installation. -
Page 14: T1S And T2S Characteristics
Minor Alarm (contact 8-9 closed when No alarm) User selectable Alarm (Applicable only on T2S) „ „ Those alarms are available on the main shelf. They are reported on the front through the T1S. User Selectable Alarm is available only in T2S T1S - One Digital Input T2S - Two Digital Inputs All alarms are qualified in Minor alarm except the one configurable by T2S. -
Page 15: Digital Output
„ „ Use a small screw driver to release the latch keeping the T1S/T2S in position. Take care when inserting screw driver in T1S/T2S. If tip is not well engaged, there is a chance to damage dip switches. „ „... -
Page 16: Monitoring By Canbus & Canopen
RS232 is supplied. 6.6 Install a new T1S and T2S Monitoring in the system When one system is working with a T2S, the current customer configuration is saved both in the inverters and in the T2S. -
Page 17: If System Not Powered
T1S and T2S Characteristics 6.6.2 If system not powered When a new T2S monitoring unit is inserted in a non running system, it will not contain the correct configuration as this is stored in the old T2S and in the inverters. So if you start the system at this point, it is the configuration of the new T2S that will be uploaded to the inverters, hence replacing the correct one. -
Page 18: Inverter System Configuration
T1S and T2S Characteristics 6.9 Inverter System Configuration The T2S together with a laptop must be used for configuring the TSI system and for advanced diagnostic. Three important tasks can be performed: „ „ Changing the system configuration Project Engineer customizes the TSI system Configuration file. - Page 19 T1S and T2S Characteristics Note: Start the TSI system without any cable connected to the front connection of the T2S Wait for the T2S to be completely. The two LED’s in the upper part are lighting. Connect the USB cable to the laptop and to the T2S.
- Page 20 T1S and T2S Characteristics Open “HyperTerminal®” from your Microsoft Windows Application and configure “COMx” as shown hereby. Baudrate: 115200 Databits: Parity: Stop Bit: Flow Control: Such screen should appear (when the T2S Menus are not yet protected). The software version of the T2S as well as its serial number is displayed on this screen.
-
Page 21: Root Menu
T1S and T2S Characteristics 6.9.1 Root Menu Root Menu 1 > System configuration 0 > Return to previous menu 1 > Send config file to T2S 2 > Read config file from T2S 3 > Restore default settings (not available since version 2.5) 4 >... -
Page 22: Security Access (Protected Menus)
T1S and T2S Characteristics 6.9.2 Security Access (Protected Menus) To secure access to Menu of T2S, use HyperTerminal as explained before. Available since SW 2.4 version 1. Select (4) as « Security Access » Menu 2. After, select (1) on Security access menu 3. - Page 23 T1S and T2S Characteristics On this Menu, type “0” to return to « Root Menu » There, every menu are accessible and menu protection is not validated. On this Menu, “1” is used to remove the secured option. Type “2” for changing the password.
-
Page 24: Receive Configuration From T2S
T1S and T2S Characteristics Note: it is not possible to choose which menus are protected or which menus are free. 6.9.3 Receive configuration from T2S Select (1) in root menu « System configuration » Menu, then Select (2) « Read Configuration file from T2S »... -
Page 25: Changing The Configuration
T1S and T2S Characteristics If you want to copy-paste this configuration to another system, go directly to section 6.9.8.5, page 41. 25 – Monitoring – User manual – v1.0 6.9.4 Changing the Configuration The configuration file can be splitted in two parts: „... -
Page 26: List Of Factory Settings (Default Values)
T1S and T2S Characteristics 1: The content of the first column is used as an identifier for the parameter. It can never be changed. 2: The second column is a parameter description. It is just skipped by the T2S compiler. It should not be changed but any modification has no consequences. - Page 27 T1S and T2S Characteristics Inverter parameters (ID : 51 - 550) AC common setting (ID : 51 - 100) Input Source (AC : 0, DC :100) Acin Mode (0 : normal , 1 : safe) Walk-in Mode ( 0 : No ; 600 : progressive) Number of phase Mode ( 0 : Star ;...
- Page 28 T1S and T2S Characteristics Values TEXTUAL DESCRIPTION Default UNIT DC Input Related (ID : 260 – 369) DC 1 : vdc_in Low Start DC 1 : vdc_in Low Transfer DC 1 : vdc_in Low Stop DC 1 : vdc_in High Start...
- Page 29 T1S and T2S Characteristics DC 6 : vdc_in High Start DC 6 : vdc_in High Transfer DC 6 : vdc_in High Stop DC 7 : vdc_in Low Start DC 7 : vdc_in Low Transfer DC 7 : vdc_in Low Stop...
- Page 30 T1S and T2S Characteristics Values TEXTUAL DESCRIPTION 24 VDC 60 VDC 110 VDC 220 VDC UNIT Default Max Min Default Max Min Default Min Default Max DC 3 : vdc_in High Start 18.5 31.0 71.0 150.0 280.0 DC 3 : vdc_in High Transfer 18.5...
- Page 31 T1S and T2S Characteristics Values TEXTUAL DESCRIPTION Default UNIT AC Input Related (ID : 370 – 550) AC : Fac_in Low Start 47.3 AC : Fac_in Low Stop AC : Fac_in High Start 52.7 AC : Fac_in High Stop AC 1 : Vac_in Low Start 191.5...
- Page 32 T1S and T2S Characteristics Saturation alarm threshold AC in is present (1:true 0:false) Log near. Full thresh. (100-200) Alarm Type (ID : 601 - 900) : Minor (1) - Major (2)- No Alarm (0) 80 . Brownout Derating 227 . DIG INP1 FAILURE 228 .
-
Page 33: Sending Configuration To The System
T1S and T2S Characteristics 6.9.6 Sending configuration to the system Select (1) in root menu « System configuration » Menu Select 1 “Send configuration file to T2S” „ „ The T2S prompts to send configuration „ „ Click “Transfer” and then “Send File”... -
Page 34: Changing The System Parameters
T1S and T2S Characteristics 6.9.7 Changing the System Parameters Addressing modules Modules inside the TSI system have an internal address that is not visible to the users. Thanks to this as soon as the power is turned on, the system starts operation normally. - Page 35 T1S and T2S Characteristics This address sticks to the module. It has nothing to do with the slot. Consequently if the module is replaced by a new one the configuration process needs to be repeated for the new module.. Changing Date-Time From the root menu …...
-
Page 36: Displaying Operating Parameters
T1S and T2S Characteristics Changing Operating Mode (EPC/On Line) Refer to configuration file. Parameters ‘60’ sets the operating mode: Equal to “0” „AC input default feeding (100% AC feed the load) Equal to 100 „DC input default feeding (100% DC feed the load) 6.9.8... - Page 37 T1S and T2S Characteristics Set #2: Set #3: Second and third columns show groups and phase ownership. Next columns show module serial number and software version. Last columns show the alarm code and the status of each module port: The list of alarm codes is available at the end of present manual „...
- Page 38 T1S and T2S Characteristics Set #4: „ „ Status acronyms are as such: 1. EPC = inverter is designed for ACin and DCin 2. REG = inverter is only fed with DCin 3. EPC-L = inverter is designed for ACin and DCin BUT for PACK system (6 inverters maximum per system) 6.9.8.2 Phase Information...
- Page 39 T1S and T2S Characteristics ƒ „ Plus a string of digits showing the list of modules recognized by the system in this particular phase: Number of module configured „ Number of module in operation „ Number of modules set manually to off state „...
- Page 40 T1S and T2S Characteristics The last column displays a string of digits showing the list of modules recognized by the system in this particular group: Number of module configured „ „ Number of module in operation „ „ „ „...
- Page 41 T1S and T2S Characteristics „ „ Message check log file will generate when to much plug unplug are made on system, and we request the user to analyze the log file. To delete the message you have to clear the log file.
-
Page 42: Update Texts And Constants
T1S and T2S Characteristics 6.9.9 Update texts and constants From the root menu … Select (3) “System Actions” … then (3) “T2S actions menu” Following screen is displayed: By default the T2S detects automatically when more recent TSI modules are inserted in the system. It updates accordingly the internal description of parameters and messages. -
Page 43: T2S Configuration Parameters
T2S Configuration Parameters 7. T2S Configuration Parameters All available parameters are described bellow, not all of them are used in a basic installation. Caution: Bad configurations will shutdown the system and the load will be lost. 7.1 Global Settings (ID 1 – 50) ;Number of module in phase 1;... -
Page 44: Inverter Parameters (Id 51 - 550)
T2S Configuration Parameters ;40; ;Number of DC input groups; Number of DC groups ¾ ¾ Allows to feed several groups of inverters from several sets of batteries physically separated ;41; ;Number of AC input groups; ¾ Number of AC groups Allows to feed several groups of inverters from different Mains physically separated (i.e : Main network and ¾... - Page 45 T2S Configuration Parameters ;61; ;ACin Mode (0 : normal, 1 : Safe); Allows to open the ACin inlet relay ¾ ¾ 0 normal running in EPC mode ¾ 1 ACin inlet relay is open and so the system is insulated from the Mains In our circuit, the neutral is common in the whole installation.
- Page 46 T2S Configuration Parameters ;75; ;Free running Frequency ; ;50.0; ;Hz; ¾ Sets the Inverters system frequency. CAUTION: When the running frequency is set to 60Hz, parameters 370 to 373 MUST BE ADAPTED ;80; ;Short Circuit Voltage Threshold ; ;80; Minimum Voltage Threshold where module considers that outlet is in short circuit ¾...
- Page 47 T2S Configuration Parameters ;94; ;Pdc Max (0 : function disabled); ¾ This feature allow to limit or reduce the INRUSH DC current when the system work on battery. To limit the current this configuration line should limit the inrush DC current. To allow for the high capability this inverter is build with extra capacitor running on 400VDC to provide the requested energy.
- Page 48 T2S Configuration Parameters ;103; ;External clock (0 : OFF, 1 : ON); Records the “External Clock” mode configuration Available from 177sw version ¾ ¾ Only used in 3 phase systems considered as single phase using a clock. ¾ Prevents any phase drift outside 120° between phases to protect delta 3 phase loads. 0 ...
-
Page 49: Dc Groups Parameters Settings
T2S Configuration Parameters ;190; ;OUT 4 : phase shift ; ;deg; ;191; ;OUT 4 : Nominal Output Voltage ; ;230.0; ;200; ;OUT 5 : phase shift ; ;deg; ;201; ;OUT 5 : Nominal Output Voltage ; ;230.0; ;210; ;OUT 6 : phase shift ; ;deg;... - Page 50 T2S Configuration Parameters ;265; ;DC 1 : Vdc_in High Stop ; ;61.0; ¾ High DC voltage where a higher value stops the DCin converter. Value increased from sw 173 to 62 VDC ;270; ;DC 2 : Vdc_in Low Start ; ;44.0;...
-
Page 51: Synchronization With Acin Source
T2S Configuration Parameters ;310; ;DC 6 : Vdc_in Low Start ; ;44.0; ;311; ;DC 6 : Vdc_in Low Transfer ; ;39.0; ;312; ;DC 6 : Vdc_in Low Stop ; ;39.0; ;313; ;DC 6 : Vdc_in High Start ; ;58.0; ;314; ;DC 6 : Vdc_in High Transfer ;... -
Page 52: Parameters For Ac Groups
T2S Configuration Parameters ;373; ;AC : Fac_in High Stop ; ;53.0; ;Hz; ¾ Frequency where a higher value leads the inverters outlet to stop to synchronize with ACin Caution: WHEN PARAMETER 75 IS SET ON 60Hz, 370 to 373 must be adapted (add 10Hz) 7.3.2 Parameters for AC groups ;380;... - Page 53 T2S Configuration Parameters ;390; ;AC 2 : Vac_in Low Start ; ;191.5; ;391; ;AC 2 : Vac_in Low Transfer ; ;181.5; ;392; ;AC 2 : Vac_in Low Stop ; ;181.5; ;393; ;AC 2 : Vac_in High Start ; ;258.5; ;394; ;AC 2 : Vac_in High Transfer ;...
-
Page 54: Alarm Settings (Id 551 - 950)
T2S Configuration Parameters 7.4 Alarm Settings (ID 551 – 950) - Global Parameters (ID : 551 - 600) ;551; ;Alarm on prog. relay (255 is NU); ;255; Replace the “255” value by the Alarm Code you wish for activating the user selectable relay 3 ¾... -
Page 55: Configuration Of Alarms Types
T2S Configuration Parameters 7.5 Configuration of alarms types - Alarm Type (ID : 601 - 900) : Minor(1) - Major(2) - No Alarm(0) ¾ Choice for type of alarms as detailed hereafter No Alarm = 0 / Minor = 1 / Major = 2 ¾... - Page 56 T2S Configuration Parameters ;835; ;234. T2S BUS FAIL; ¾ Type of alarm when Bus communication with T2S is lost ;836; ;235. T2S FAILURE; ¾ Type of alarm when the T2S is no more running ;843; ;242. LOG NEARLY FULL; Type of alarm when the “logfile” is nearly full ¾...
-
Page 57: Configuration For User Alarms
T2S Configuration Parameters 7.6 Configuration for User Alarms - User Input Alarm Labels (ID : 901 - 950) ;901; ;Digital input 1 label; ;DIG INP1 FAILURE; ;; Replace the « DIG INP1 FAILURE » by a text corresponding to the User Alarm 1 ¾... -
Page 58: Monitoring - Candis
Monitoring - CanDis 8. Monitoring - CanDis 8.1 Introduction The CanDis is an optional interface allowing the user to get information concerning the running system on display(s) and/or to access to the TSI inverter system from a remote computer/site using a web browser or SNMP protocol. Depending on the requirements the CanDis would consist in one, two or three displays and/or TCPIP interface (Optional). -
Page 59: Candis System Identification Plate
Monitoring - CanDis The CanDis dimensions are: Length: 445mm (for 19” cabinet). ƒ „ Depth: 160 mm. ƒ „ ƒ „ Height: 44 mm (1U). Weight: 1 to 3 kg according to options. 8.2.1 CanDis System Identification plate: Part Number and Serial Number on Shelf Part Number and Serial Number on Display and TCP IP The PART NUMBER, SERIAL NUMBER and BURN IN DATE are essential information when you contact CE+T Power to get help in commissioning, in troubleshooting or when items are sent back for repair. -
Page 60: Installation
Monitoring - CanDis 8.3 Installation The CanDis is designed to be installed in 19” inches frame, it takes 1U height. The CanDis is usually installed above the highest Inverter modules shelf and must be fastened with screws. (see picture on section 8.1, page 58) RJ45 Cable Connect the RJ45 cable placed on the top of the inverter shelf (when top cabling cabinet) on the first display’s top plug. -
Page 61: Display's User Interface And Configuration
Monitoring - CanDis 8.4 Display’s User Interface and Configuration 8.4.1 Display and Buttons (Use a tip pen or a soft edge stick to push on buttons 2 ; 3 or 4) „ Display (2 lines provided to display information). Up button to scroll UP in the menus. „... -
Page 62: Variable Available On Display
Monitoring - CanDis 8.4.2.2 Configuration When more than one display is used on the same system, the CANBUS ID must be different and include values from 124 to 264 (i.e as 134; 144 ; 154, …264). The other information that can be configured are the related phase, the AC group or DC group, and the adjustment the backlight. If the installed system is multi-phase or has multiple DC groups, the T2S and the inverter modules must be correctly configured to display the correct value by phase or DC group. -
Page 63: Tcp/Ip Interface And Configuration
MODBUS network when the TCPIP interface is foreseen. The settings must be adapted with your LAN to give access through the firewall. Make sure to have it done by someone knowledgeable in the configuration of IT networks! CE+T POWER SYSTEM SNMP Agent TCP-IP... -
Page 64: Description
It has a high performing graphical analysis tool. There is a live system on CE+T Power premises of which anyone can access the remote monitoring screens. Password and access address can be obtained from your sales representative. - Page 65 Monitoring - CanDis If the settings are correct this home page should be displayed. Select the menu “Network and security” to set the LAN parameters. User name is: admin. Password is: cs121-snmp. – Monitoring – User manual – v1.2...
- Page 66 Monitoring - CanDis The screen here below must appear after clicking on OK. Set the new parameter in relation with typical address used on the network where your device is installed. Let say that typical IP address in this area is “xxx.xxx.xxx.xxx”. All new settings must be applied with clicking and will take them into account only after saving and rebooting.
-
Page 67: Configuration - Cs141
Monitoring - CanDis 8.5.4 Configuration - CS141 This configuration procedure must be done through a web browser and requires a crossover Ethernet cable. Connect the cross Ethernet cable between the Web-SNMP interface and your computer. At least one TSI inverter module and the T2S monitoring unit must be in function. -
Page 68: Cs121 - Hardware Default Setting
Monitoring - CanDis Set the new parameter in relation with typical address used on the network where your device is installed. Let say that typical IP address in this area is “xxx.xxx.xxx.xxx”. All new parameters will be taken into account only after clicking the “Apply”... - Page 69 Monitoring - CanDis Please note that, in “Normal position” Dipswitch “1” is on the “ON” position and Dipswitch “2” is on “OFF” position. These are the positions when TCP IP in mounted on CanDis in the CE+T Factory. Reconnect the RJ45 RJ45 CAT straight. Connect the Ethernet cable between the Web-SNMP interface and your computer.
-
Page 70: Cs141 - Hardware Default Setting
Monitoring - CanDis 8.5.6 CS141 - Hardware Default Setting This configuration needs a crossover Ethernet cable. Remove the screws that fix the CANDIS shelf on the cubicle frame. Remove the shelf and disconnect the RJ45 CAT straight cable connected on the TCPIP interface. Here picture shows localisation of DIP SWITCH. -
Page 71: Web User Interface
Monitoring - CanDis 8.5.7 Web User Interface. 8.5.7.1 CS121 Fix in your computer an IP address close to the new IP address you have chosen in relation with area where device is installed i.e. “xxx.xxx.xxx.xxx” Web-SNMP. Following screen will appear on your notebook. By clicking on the followings box “Commercial network”, “Battery”... - Page 72 Monitoring - CanDis Green LEDs mean there is no alarm at the moment. If LEDs turn red one or more alarms are present. A click on the Major or Minor alarm line will bring up the following screen (information concerning a minor alarm in this case). The box on the middle “AC/DC/AC”...
- Page 73 Monitoring - CanDis One click on the middle “TSI” box gives the inverter details screen. Inverter details are as follows: When clicking on “TSI System History”, the screen displays the T2S History log. – Monitoring – User manual – v1.2...
- Page 74 Monitoring - CanDis Up to 200 events are recorded and the newest supersedes the oldest. Customer can copy the history log file in an .xls file. Procedure: After retrieving the history log file. Press on right mouse button. Press on “select all” menu. Press on right mouse button again.
- Page 75 Monitoring - CanDis 8.5.7.2 CS141 Fix in your computer an IP address close to the new IP address you have chosen in relation with area where device is installed i.e. “xxx.xxx.xxx.xxx” Web-SNMP. Following screen will appear on your notebook. By clicking on the followings boxes “Commercial network”, “Battery” , “Load” and the information screens appear.
- Page 76 Monitoring - CanDis Green LEDs mean there is no alarm at the moment. If LEDs turn red one or more alarms are present. A click on the Major or Minor alarm line will provide the corresponding alarm in a new page. (The following image is minor alarm).
- Page 77 Monitoring - CanDis When clicking on Logfile > UPS Alert History, T2S History screen will appear. Up to 200 events are recorded and the newest supersedes the oldest. Customer can copy the history log file in an Excel file (.xls). Procedure: After retrieving the history log file.
-
Page 78: Control Snmp Functionalities
Monitoring - CanDis 8.5.8 Control SNMP functionalities. SNMP Reliability Please pay also attention to the fact that SNMP trap is not 100% a secure way to rely on for monitoring. Traps should be considered (and that’s the way they are defined according to SNMP protocol) as a notification service of a particular SNMP agent to catch attention from the monitoring station on a special event. - Page 79 Monitoring - CanDis Test Polling OID Test traps receiver. Following setting must applied be (SNMP V1 or V2). – Monitoring – User manual – v1.2...
- Page 80 Monitoring - CanDis 8.5.8.2 CS141 SNMP Configuration SNMP: In the main menu select Services > SNMP Agent, set or check the SNMP parameters. A Test functionality ƒ „ will be use to check the Trap. Email: In the main menu select Services > Email, configure the email parameters. ƒ...
-
Page 81: Tcpip Troubleshooting Procedure
Monitoring - CanDis Modbus: In the main menu select Services > Modbus, set the Modbus parameters. ƒ „ 8.5.9 TCPIP Troubleshooting Procedure. If there is NO ACCESS TO THE TCPIP INTERFACE: ƒ „ Check the IP setting on your laptop ƒ... -
Page 82: Defective Situations Fixing
„ „ „ Be aware that products shipped back to CE+T Power without being registered first will not be treated with high priority! „ „ Information on failure occurrence as well as module status given through Menu 2-1 shall be attached to defective unit return package or recorded in RMA. -
Page 83: Service
Service 10. Service For Service Check Service Level Agreement (SLA) of your vendor. Most of the time they provide assistance on call with integrated „ „ service. If such SLA is in place, you must call their assistance first. If your vendor doesn’t provide such assistance (*) you may call CE+T directly. Toll free Number 1(855) 669 - 4627(**) „... -
Page 84: Maintenance Task
* It is not recommended because when you perform a By-pass procedure, generally there is no back up on AC input line, and the load shutdown if mains disappear. 1 This section is not relevant for T1S, T2S, and Candis. But it is applicable for all other CE+T power products. – Monitoring – User manual – v1.2... -
Page 85: Annexe
ANNEXE 12. ANNEXE 12.1 CS121 Vs CS141 CS141 CS121 Feature Customer advantage Feature Restrictions • Higher performance in comparison to CS121 (app. 10 • No compatible source code Processor ARM Cortex times faster) 32-Bit RISC-Processor available A8 800 MHz • The CS141 uses open Source •... - Page 86 ANNEXE • Connecting UPS devices USB Port with USB is possible in future No USB port • Tools only available via COM2 versions • Robust against UPS noise through RS232 • Prone for UPS noise AUX Port with Serial AUX Port with •...
Need help?
Do you have a question about the T1S and is the answer not in the manual?
Questions and answers