Table of Contents
Advertisement
Quick Links
Advertisement
Table of Contents

Summary of Contents for API THUNDER 125
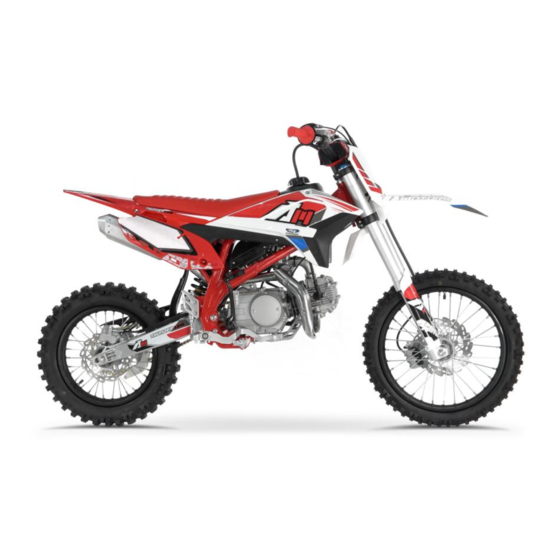
- Page 1 THUNDER 125/140/150 PIT BIKE USER MANUAL...
- Page 2 Introduction It is important to realize that your warranty for This motorcycle has no cooling fan. For this Congratulations on choosing your off- road your motorcycle applies to defects in material or reason, engine overheating will occur if the motorcycle. factory workmanship.
- Page 3 A Few Words About Safety Your safety, and the safety of others, is very important. And operating this motorcycle safely is an important responsibility. To help you make informed decisions about safety, we have provided operating procedures and other information on labels and in this manual. This information alerts you to potential hazards that could hurt you or others.
-
Page 4: Table Of Contents
Contents Service Procedures.......... 18 MOTORCYCLE SAFETY.......5 Crankcase Breather........18 Important Safety Precautions......5 Throttle............19 Loading............5 Clutch System..........20 Accessories & Modifications......6 Brakes............21 Safety Labels..........7 Wheels............25 OPERATING CONTROLS......8 Tires & Tubes..........26 Operation Component Locations....8 TIPS.............. -
Page 5: Motorcycle Safety
Important Safety Information exhaust system. Wear clothing that fully covers Keep Your Motorcycle In Safe Condition. It’s Important Safety Precautions your legs. important to keep your motorcycle properly Do not wear loose clothing which could catch on maintained and in safe riding condition. Having the control levers, kickstarter, footpegs, drive Your motorcycle can provide many years of a breakdown can be difficult, especially if you... -
Page 6: Accessories & Modifications
Accessories & Modifications Accessories Modifications Accessories & Modifications We strongly recommend that you use only We strongly advise you not to remove any genuine accessories that have been specifically original equipment or modify your motorcycle Modifying your motorcycle or using non-original designed and tested for your motorcycle. -
Page 7: Safety Labels
Safety Labels Motorcycle Safety... -
Page 8: Operating Controls
Operation Component Locations Clutch lever Ignition Key Hour meter Front brake lever throttle grip Engine stop button Start button Choke knob Fuel valve Shift lever Kick starter Rear brake pedal Operation Controls 8... -
Page 9: Before Riding 9
Are You Ready to Ride ? Before riding your motorcycle for the first time, Competitive riding can be tough on a motorcycle, WARNING we recommend that you read this owner’s so it’s important to inspect your motorcycle correct any problems you find before each ride. manual, make sure you understand the safety Not wearing a helmet increases the messages, and know how to operate the controls. -
Page 10: Basic Operating Instructions
Basic Operating Instructions Safe Riding Precautions Side Stand IgnitionKeyandtheEngineRunningHourMeter The side stand (1) is used to support your Before riding your motorcycle for the first time, The Ignition key (1) is used to switch ON /OFF please review the Important Safety Precaution the bike power and switch ON the head light . -
Page 11: Starting & Stopping The Engine
Starting & Stopping the Engine 4. Warm up the engine; don’t operate Starting Procedure Always follow the proper starting procedure the throttle. described below. 5. About 15 seconds after the engine starts, push the choke knob back all the way to Always follow the proper starting procedure Your motorcycle can be started with the fully OFF. - Page 12 Starting & Stopping the Engine How to Stop the Engine (1) Throttle grip (2) engine stop button Normal Engine Stop 1. Shift the transmission into neutral. 2. Turn the fuel valve OFF. 3. Lightly open the throttle (1) 2 – 3 times, and then close it.
-
Page 13: Shifting Gears
Shifting Gears Remember to close the throttle and pull the clutch lever in completely before shifting. NOTICE Improper shifting may damage the engine, transmission, and drive train. Learning when to shift gears comes with experience. Upshift to a higher gear or reduce throttle before engine rpm (speed) gets too high. -
Page 14: Braking
Braking & Parking Braking ground first, then your right foot when you’re through braking. To slow or stop, apply the front brake and rear Parking brake smoothly, while down shifting to match your speed. Gradually increase braking as you feel the brakes slowing your speed. To prevent Lower the side stand to support your motorcycle. -
Page 15: Servicing Your Motorcycle
The Importance of Maintenance A well-maintained motorcycle is essential for Maintenance Safety over, park it on a firm, level surface, using the side stand or a work stand to provide support. safe, economical, and trouble-free riding. It will also help reduce air pollution. Careful pre-ride This section includes instructions on how to . -
Page 16: Maintenance Schedule
Maintenance Schedule To maintain the safety and reliability of your Each item on the maintenance schedule requires motorcycle, regular inspection and service is some mechanical knowledge. Certain items required as shown in the Maintenance (particularly those marked *and**) may require Schedules that follow. - Page 17 Maintenance Schedule Summary ofMaintenance Schedule Notes and MAINTENANCE SCHEDULE – REGULAR OFF-ROAD USE (NON-COMPETITION) Procedures; FREQUENCY Intrial Whichever NOTES: Regular Maintenance Interval Comes First Maint 1. Service more frequently when ridden in 1,200 1,800 2,400 wet or dusty conditions. 1,000 2,000 3,000 4,000...
-
Page 18: Service Procedures
Crankcase Breather Crankcase Breather Service more frequently if your motorcycle is ridden in the rain or often at full throttle. Service the breather if you can see deposits in the transparent section of the drain tube. 1. Remove the crankcase breather tube wire band (1) from the tube (2). -
Page 19: Throttle
Throttle 1. Pull the dust cover (2) back. Throttle Freeplay Throttle Inspection 2. Loosen the upper lock nut (4). 3. Turn the upper adjuster (3). Turning the adjuster in clockwise direction will decrease freeplay and turning it in counterclockwise direction will increase freeplay. -
Page 20: Clutch System
Clutch System 3. Turn the integral cable adjuster (3) to Turning the cable end adjuster (2) in clockwise obtain the specified freeplay. direction will increase freeplay and turning it in counterclockwise direction will decrease 4. Tighten the lock nut(4). Check the freeplay. freeplay. -
Page 21: Brakes
Brakes Rear Brake Pedal Height 1. Loosen the lock nut (1). Both the front and rear brakes are the hydraulic disc type. As the brake pads wear, the brake 2. To position the front brake lever farther away from the handgrip, turn the adjuster (2) fluid level will drop. - Page 22 Brakes Rear Brake Fluid Level Check Fluid Level Inspection Front Brake Fluid Level Check (2) LOWER level mark (1) LOWER level mark With the motorcycle in an upright position, With the motorcycle in an upright position, check the fluid level. check the fluid level.
- Page 23 Brakes Adding Rear Brake Fluid Other Inspection Adding Front Brake Fluid • Make sure there are not fluid leaks. When adding brake fluid be sure the reservoir is When adding brake fluid be sure the reservoir is horizontal before the cap is removed or brake •...
- Page 24 Brakes Rear Brake Pads Brake Pad Wear Inspect the brake pads (4) from the rear side of Brake pad wear depends on the severity of usage the caliper to determine the pad wear. If either and track conditions. (Generally, the pads will pad is worn anywhere to a thickness of 0.04 in wear faster on wet and dirty tracks) Inspect the (1 mm), both pads must be replaced.
-
Page 25: Wheels
Wheels Axles & Wheel Bearings Maintenance of spoke tension and wheel trueness (roundness) is critical to safe motorcycle operation. During the first 100 miles (150 km), See the motorcycle dealers for inspection spokes will loosen more rapidly due to the initial seating of the parts. -
Page 26: Tires & Tubes
Tires & Tubes be higher. If you let air out of warm tires to reduction in traction. To safely operate your motorcycle, the tires must be the proper type (off-road) and size, in good match the recommended cold pressures, the tires •... -
Page 27: Tips 27
Transporting Your Motorcycle If you use a truck or motorcycle trailer to To secure your motorcycle, brace the front wheel transport your motorcycle, we recommend that against the front of the truck bed or trailer rail. you follow these guidelines: Attach the lower ends of two straps to the tie- •... -
Page 28: Storing Your Motorcycle
Storing Your Motorcycle 4. Lubricate the drive chain. If you won’t be riding for an extended period, Removal from Storage 5. Remove the battery and charge it fully. Store such as during the winter, thoroughly inspect in an area protected from freezing your motorcycle and correct any problem before temperatures and direct sunlight. -
Page 29: Technical Information 29
Vehicle Identification The engine number (2) is stamped on the left Serial Numbers crankcase. The VIN frame and engine serial numbers are LEFT SIDE required when you register your motorcycle. They may also be required when ordering replacement parts. The VIN (vehicle identification number) (1) appears on the Safety Certification Label attached to the right side of the frame. -
Page 30: Specifications
Specification AGB35 AGB35 AGB35 Model THUNDER 125 THUNDER 140 THUNDER 150 Item 125CC 140CC 150CC Engine Optional: 140CC or 150CC Optional: 125CC or 150CC Optional: 125CC or 140CC Kick Start Kick Start Starting System Kick Start Optional: Electric Start Optional: Electric Start... -
Page 31: Wiring Diagram
Diagram Technical Information 31... - Page 32 Diagram Technical Information 32...
Need help?
Do you have a question about the THUNDER 125 and is the answer not in the manual?
Questions and answers