Table of Contents
Advertisement
Quick Links
Advertisement
Table of Contents

Summary of Contents for Night Owl QSG-FWIP3-FL
- Page 1 Quick Setup Guide Let’s get started...
-
Page 2: What's Included
What’s Included (1) Floodlight (1) Metal Mounting (4) Bracket Camera Bracket Screws (1) Camera Mount (1) Ground Wire (3) Wire Screw Screw Nuts (1) Silicone (1) Waterproof (1) Hook Cushion NOTE: You may need a drill, screwdriver and ladder to properly install/mount the camera. -
Page 3: Camera Details
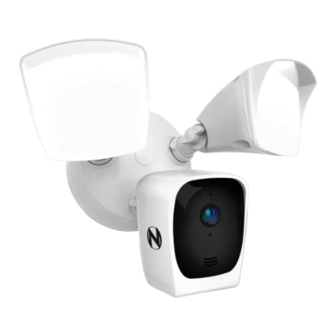
Camera Details Floodlights (2500 Lumens) Light Adjustment Knob Light lock Collar Microphone Lens LED Indicator Camera Lock Speaker Collar Motion Detection Sensor (PIR) microSD Card Reset Slot... - Page 4 Download the Night Owl App If you are a first-time user, go ahead and download the Night Owl app. Quickly create an account and log in. Already have an account? Simply log in.
-
Page 5: Installation Location
Installation Location Choose where you will be mounting the floodlight camera. The recommended installation height is 9 ft. for optimal performance and to minimize tampering. 9 ft. -
Page 6: Turn Power Off
Turn Power Off Locate the breaker and shut the power off for the area where you will be connecting the camera. IMPORTANT: If you do not know where the breaker is or how to shut off the power, consult a professional electrician. WARNING: Risk of Electrical Shock •... - Page 7 Camera Assembly Diagram Silicone Cap Camera Mount Light Adjustment Screw Knob Camera Lock Collar Light Lock Collar Waterproof Cushion Wire Nuts Bracket Screws Ground Wire Screw Junction Box Metal Mounting (Not Included) Bracket...
-
Page 8: Install Mounting Bracket
Install Mounting Bracket Attach the metal mounting bracket to your junction box. -
Page 9: Wiring The Camera
Wiring the Camera If needed, use the provided hook to hang the camera from the mounting bracket. Simply remove the small rubber plug from the bottom of the camera and insert the hook. With the waterproof cushion in place, use the wire nuts to attach the wiring from the junction box to the camera. -
Page 10: Mount Your Camera
Mount your Camera Place the camera on the mounting bracket and use the camera mount screw to secure it. Once secure, place the silicone cap over the screw to make it watertight. IMPORTANT: If you used the hook to hang the camera during wiring, please place it back into the bottom of the camera at this time. - Page 11 Restore Power to the Breaker With the camera wired and mounted, you can now restore power at the breaker.
- Page 12 Add your Camera To begin viewing your camera and adjust the floodlights, add it to the Night Owl app or to a compatible recorder. For more detailed setup steps, scan the QR codes below. Standalone Ecosystem (Add to the App)
- Page 13 Adjust your Camera With the camera now paired, you can use live view to adjust the camera viewing angle and floodlight angles. Loosen the adjustment knobs to get the perfect positioning for each. Once acquired, retighten the knobs and use the lock collars to lock them into place.
-
Page 14: Microsd Card
microSD Card If using the camera as a standalone (no recorder), you will need to insert a microSD Card (up to 128GB) for video storage. microSD Card microSD Card Slot... -
Page 15: Additional Tips
• Maintenance: Periodically check and clean your camera lens for clear video quality. • Electrical Safety: If at any point you feel unsure about the electrical aspects of installing this camera, Night Owl STRONGLY RECOMMENDS you consult with a professional electrician. - Page 16 This equipment should be installed and operated with a minimum distance of 8 inches between the radiator and your body. QSG-FWIP3-FL 5-010324...


Need help?
Do you have a question about the QSG-FWIP3-FL and is the answer not in the manual?
Questions and answers
Two questions. 1. I tried adding additional users through the app…but they could not login to the recorder. Do I need to get a screen and use the mouse to enroll them? 2. I bought a wireless, AC powered flood light/cam (FLFWIP3G64-B). Can I plug in an SD card to have redundant storage, meaning record at the camera and dvr?