Table of Contents
Advertisement
Advertisement
Table of Contents

Subscribe to Our Youtube Channel
Summary of Contents for JoyBerri UPSURGE PRO
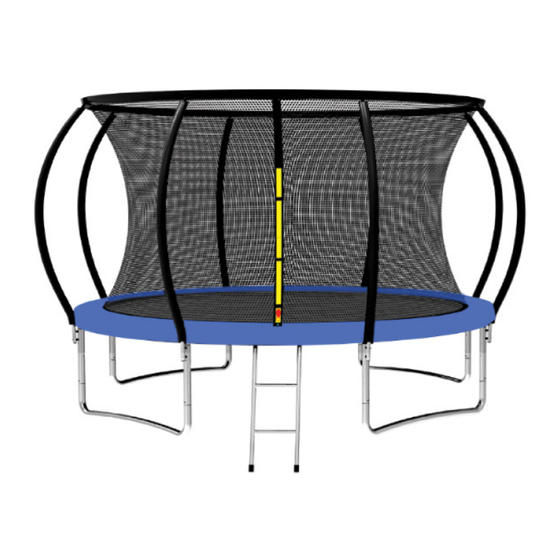
- Page 1 Product Manual UPSURGE PRO 12ft Trampoline...
-
Page 2: Product Warranty
7 days of purchase to activate the five-year warranty. Joyberri warranties this product against defects in material and workmanship for normal use following the published product manual for a period of FIVE (5) years following the date of purchase. This... -
Page 3: What's In The Box
M6 Wrenches (Hex & Open) Spring Installation Tools another, we highly recommend disassembling the trampoline. To disassemble, follow the assembly prevent lost items. steps on pages 6–20 in reverse order. Joyberri | Upsurge Pro 12ft Trampoline Joyberri | Upsurge Pro 12ft Trampoline... -
Page 4: Assembly Guide
3. Insert a second rail into the other end of the T-connector. 4. Continue connecting T-connectors and rails until you’ve built the round trampoline frame. Each T-connector will connect two rails. See Figure 1. Figure 2 Figure 1 Joyberri | Upsurge Pro 12ft Trampoline Joyberri | Upsurge Pro 12ft Trampoline... - Page 5 Spring installed in a previous step Marks one end of the frame rail Side 1 Side 2 Side 2 Side 1 V-ring Slot Figure 4 Figure 3 Joyberri | Upsurge Pro 12ft Trampoline Joyberri | Upsurge Pro 12ft Trampoline...
- Page 6 9. You will form a perfect circle at the top of the net when all poles and T-connectors have been 7. Repeat steps 3–6 to attach the remaining lower poles. inserted. See Figure 6. Figure 5 Figure 6 Joyberri | Upsurge Pro 12ft Trampoline Joyberri | Upsurge Pro 12ft Trampoline...
- Page 7 Be careful not to pinch or damage the sprinkler hose as you continue the assembly steps. Zip Tie Lights Zip Tie Sprinkler Garden Hose Hose Quick-Connect Joint Hose Water Flow Adapter Valve Figure 8 Figure 7 Joyberri | Upsurge Pro 12ft Trampoline Joyberri | Upsurge Pro 12ft Trampoline...
- Page 8 3. Repeat steps 1–2 to install the remaining upper poles. 3. Repeat step 2 until all of the upper poles are installed. Spring Button Figure 10 Figure 9 Correct Incorrect Joyberri | Upsurge Pro 12ft Trampoline Joyberri | Upsurge Pro 12ft Trampoline...
- Page 9 V-rings. V-ring V-ring Figure 11a Figure 11b NOTE: These views are from underneath the trampoline. Figure 12 Joyberri | Upsurge Pro 12ft Trampoline Joyberri | Upsurge Pro 12ft Trampoline...
- Page 10 1. Locate the two ladder legs (V), two ladder steps (W), four M6 × 40mm bolts (X), four nuts (T), of security for jumpers while using the trampoline. We strongly advise you to complete this step. JoyBerri, LLC takes no responsibility for damage occurred to the trampoline or users if the and the open wrench (Y).
-
Page 11: Safety Warnings
• All JoyBerri trampolines incorporate numerous safety features that meet and or exceed safety guidelines. Ultimately, buying a trampoline to use in your residence means you are assuming some risk, so please follow... -
Page 12: Care, Maintenance, And Storage
See Storing and Securing the Trampoline in Inclement Weather on the next page. Wind trampoline, ensure all parts are dry and packed securely. damage is not covered in the warranty of your trampoline. Joyberri | Upsurge Pro 12ft Trampoline Joyberri | Upsurge Pro 12ft Trampoline... -
Page 13: Product Specs
• Check that the LED light string is properly secured to the fiberglass poles at the top of the trampoline and that the zip ties are in good condition. Replace any worn zip ties and do not use the light string until it is properly secured again. Joyberri | Upsurge Pro 12ft Trampoline Joyberri | Upsurge Pro 12ft Trampoline... -
Page 14: Product Spotlight
QR code or go to facebook.com/groups/joyberri PS: Email support@joyberri.com with your FB name and we will send you a 10% DISCOUNT CODE on your next order! Joyberri | Upsurge Pro 12ft Trampoline Joyberri | Upsurge Pro 12ft Trampoline... - Page 15 Questions? Comments? Email us at support@joyberri.com...
Need help?
Do you have a question about the UPSURGE PRO and is the answer not in the manual?
Questions and answers