Table of Contents
Advertisement
Quick Links
Advertisement
Table of Contents

Summary of Contents for Glowforge Spark GFD100
- Page 1 Glowforge Spark™ User Manual...
- Page 2 This manual covers just about everything you need to know about your Glowforge Spark. We’ll show you how it works and how to set it up — super quickly. We’ll introduce you to the Glowforge App — the powerful, easy-to-use software that brings your imagination to life.
-
Page 3: Before You Start
Ensure that you comply with all applicable rules. ● Do not touch the head or arm of the Glowforge unit while the power is on. If you do so by accident, turn it off, then back on again to prevent the possibility of damage. -
Page 4: Fire Safety
Under some circumstances, it is possible for the material inside the Glowforge unit to ignite and for the flame to spread outside of the area being cut or engraved. If ignited, the flame could destroy your unit and spread, potentially se ing fire to the building. -
Page 5: Laser Safety
● If there is a lasting flame inside the Glowforge unit that does not extinguish when the laser has moved past: 1. Pull the plug on the back of the unit. 2. If it is safe to do so, extinguish the fire with a wet towel. Note that water may damage your Glowforge. -
Page 6: Additional Laser Safety Information
Do not modify or service. CAUTION ! A empting to modify or service the Glowforge unit may result in hazardous laser light exposure. To reduce the risk of injury: ● Do not a empt service. All service must be performed only by the Glowforge factory or by factory-authorized technicians. - Page 7 Figure 1: Glowforge Spark with Laser Head location shown.
- Page 8 Figure 2: Laser Beam path as viewed from inside the safety enclosure.
- Page 9 CAUTION! Do not modify or tamper with the safety enclosure, viewing window or interlocks of your Glowforge. CAUTION! Do not a empt to use a Glowforge unit that has suffered physical damage to the safety enclosure, viewing window or interlocks.
- Page 10 Because Glowforge Spark uses a blue, 6-wa , solid-state diode laser, it is not compatible with glass, clear acrylic, white acrylic, blue acrylic, vinyl, or Draftboard® materials.
- Page 11 Material Sizes Glowforge Spark fits material up to 12 in x 12 in (30.4 cm x 30.4 cm), but we recommend materials sized at 8 in x 12 in (30.4 cm x 20.32 cm) or smaller to optimize your print experience.
- Page 12 (20mm) in height and should be no more than 12 in (30.4 cm) in length or 12 in (20.3 cm) in width. ● Do not place rolled-up material in the Glowforge. It may be too tall, or unroll during printing, obstructing operation.
-
Page 13: Operating Environment
Operating Environment To prolong the life of your Glowforge unit and to reduce the risk of fire or mechanical failure, do not put the Glowforge unit where it could experience: ● Extreme temperature or humidity ○ Temperatures below 55 degrees Fahrenheit (13 Celsius) or over 110 degrees Fahrenheit (43 Celsius) ○... - Page 14 ● There are any cracks in the case, lid, or trim ● You see any moisture present inside the Glowforge unit ● You see any damage to the interior components of the Glowforge unit ● You notice unusual light coming from the unit that was not occurring...
- Page 15 For more information or support, contact us through our Help & Learning Center at support.glowforge.com. The following label information applies to the Glowforge Spark. The Manufacturer’s Label will appear on the back of every Glowforge Spark, with an appropriate serial number, in the position indicated.
- Page 18 Glowforge Spark FCC Warning Statements FCC ID 2A83C-BZQ6R The Glowforge Spark complies with part 15 of the FCC Rules. Operation is subject to the following two conditions: (1) This device may not cause harmful interference, and (2) this device must accept any interference received, including interference that may cause undesired operation.
- Page 19 Glowforge Spark Innovation, Science and Economic Development Canada (ISED) User Notification This device contains licence-exempt transmi er(s)/receiver(s) that comply with Innovation, Science and Economic Development Canada's licence-exempt RSS(s). Operation is subject to the following two conditions: 1. This device may not cause interference.
-
Page 20: Let's Get Started
Ge ing Acquainted Let's Get Started Now that you’ve read about safety and know how to operate your Glowforge Spark, it’s time to start creating! In just a few minutes, you’re going to have a working laser in your home (or office, classroom, workshop, or design studio)! Of course, if you encounter any challenges along the way, you can find more information by visiting our Help &... -
Page 21: Unboxing And Assembly
We’re here to help, though! If any part of your Glowforge Spark is visibly damaged out of the box, we want to make it right as soon as possible! Send photos of the damage to support@glowforge.com and wait until you hear back from us. - Page 22 3. Lift your printer out of the box and place it on your stable surface. Remove the clear plastic bag. In the box where your printer was, you’ll find a cardboard sleeve containing your cu ing tray. Remove this sleeve from the box and set it aside — you’ll need it shortly!
- Page 23 5. Open the lid and remove the foam sheet to reveal more boxes containing the laser head, power cable, and vent hose. If you don’t spot your power cable right away, check inside the vent hose!
- Page 24 Remove the exhaust hose and power cord and set them aside. You can also remove the bo om cardboard piece. 7. Next, you’ll set up your Glowforge Spark’s laser head. It’s packed snugly in the black foam cube in the top left area of the printer bed. The laser head is already a ached to your printer with a laser ribbon cable, so take care not to disconnect it.
- Page 25 Remove the top piece of foam, and carefully lift the laser head out of the foam block. Take care not to pull or twist the laser ribbon cable.
- Page 26 Set the laser head on the dock with the laser ribbon cable at the back and the Glowforge logo reading left to right. You’ll feel it magnetically snap into place.
- Page 28 12. Once you’ve a ached the laser head, it’s time to align the rails! It’s likely that your laser arm is already si ing perfectly straight, but just in case there’s any skew there, these steps will take care of it. Place your hands on the black end caps on either side of the laser arm.
- Page 29 Remove the foam sheet at the bo om of the printer, then slide the cu ing tray into your Glowforge Spark. The handles on the left and right sides will slide into the notches on either side of your printer. It should fit...
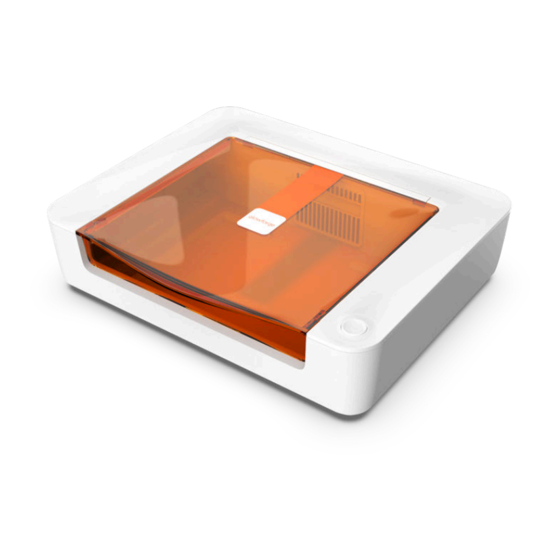
- Page 30 Almost done! Your Glowforge Spark should look like this.
- Page 31 18. Save everything! If you need to move your Glowforge Spark or ship it (for warranty service for example), you’ll need all the original parts: boxes, foam, plastic covering, cardboard inserts, so make sure you store them safely. Exhaust Setup Connect your exhaust hose to the back of your printer by sliding the rubber ring over the exhaust connection.
- Page 32 2. If you’re using a Glowforge Personal Filter, connect the other end of the hose to the lip on the top, and refer to the Glowforge Personal Filter Manual to complete setup. 3. To vent outdoors, connect the other end of the hose to the outdoors through a window or a vent that connects directly outside.
-
Page 33: Connect To Electrical Power
3. Depending on your computer and browser, you may be prompted to download the Glowforge Setup app. If prompted, download and install it (this should take less than a minute). Open the Glowforge Wifi Setup app and log in with your Glowforge account email address and password. You’ll... - Page 34 6. Your Glowforge Spark is now connected to the internet and ready to print! Welcome to Glowforge Premium Your new Glowforge account includes a free trial of Glowforge Premium, an optional suite of powerful tools to take your creations to the next level.
- Page 35 Proofgrade® Material Your Glowforge Spark comes with a sample of Proofgrade® material. Proofgrade® materials are specially designed for your Glowforge Spark to help you get perfect prints every time. For your peace of mind, Proofgrade Materials are lab tested for creating perfect prints safely at home.
-
Page 36: Power Off
Cleaning, Service, and Moving Power Off Always turn your Glowforge Spark off before cleaning or moving it by disconnecting from power at the outlet. Printer Floor and Cu ing Tray Remove leftover cu ing and engraving bits from the floor and the crumb tray whenever there is buildup. - Page 37 wipe (such as a Lysol wipe or similar). Use a co on swab to gently remove any bits that have go en caught in the metal grid. With the cu ing tray removed, remove, sweep, or vacuum out any tiny remains of past projects that have fallen onto the printer floor.
- Page 38 Laser Rails If the rails get dirty, you’ll experience misaligned prints and double images. You should clean the rails once for every ten hours of printing, but you may need to clean them more often depending on what you're printing.
- Page 39 ● Wipe down the silver laser rails with a lint-free cloth and some isopropyl alcohol. We recommend using 90% or higher isopropyl alcohol. ● Be sure to clean all around the rail as you go — don't forget the underside of the rails! ●...
- Page 40 Diffuser and Lid Camera Lens If you notice buildup on the diffuser, or if your camera images are dark, gently use a lens cleaning wipe (such as a Zeiss lens wipe) to wipe it. Take care not to apply excess pressure to the diffuser when cleaning. You can also use a lens cleaning wipe to remove any dust and buildup from the lid camera lens.
- Page 42 Packaging your Glowforge Spark to move Whether it’s for a big move, taking your Glowforge Spark to an event, or for a warranty repair, you’ll need to package your printer properly with the original boxes, cardboard blocks, and foam. The original packaging is specially designed to protect your Glowforge Spark in transit.
- Page 43 4. Carefully move the laser head to the center of the laser rails.
- Page 44 Find the two foam pieces that fit against the laser arm caps. They each have a cut-out corresponding to the shape of one end cap. Place each foam piece over the laser rails, then slide it to the side until it fits over the end cap.
- Page 45 With the secured laser head in one hand, use your other hand to place the top cardboard insert into your Glowforge Spark. 8. Put the packed laser head into the left-hand side of the cardboard insert.
- Page 46 Put the bo om cardboard insert into your Glowforge Spark.
- Page 47 11. Place the Glowforge Spark back into its box. Put the top piece of foam over the printer. 13. Close the box. Your Glowforge Spark is now snug and ready to move! Changing to a New Wi-Fi Network 1. Using a web browser on a laptop or desktop, navigate to setup.glowforge.com and sign in.
- Page 48 Start Creating! To help you get started with your new Glowforge Spark, we’ve prepared a tutorial series that’ll teach you (almost) everything you need to know. From selecting materials, to working with our collection of designs, to printing photos, and turning everyday objects into one-of-a-kind gifts, these guides will give you a taste of all the great things your Glowforge Spark can do.
- Page 49 After you sign in, you will see your Dashboard, featuring designs you’ve recently worked with, as well as some designs from the Glowforge Catalog to get you started. 2. Get the Greetings from Sea le LED Tealight Holder design One of the first designs in your Starter Designs is the “Greetings from Sea le LED Tealight Holder design.”...
- Page 50 Tip: If you don’t see the Greetings from Sea le LED Tealight Holder, use the search box on the left to find it. 3. Open your design to print it. After you get your design, the design will appear in the Recent Designs section.
- Page 51 We’ll be printing the first part of this design on 20lb Copy Paper (Printer Paper) and Proofgrade Light Cherry Plywood. Open the lid of your Glowforge Spark. Take a sheet of any household Printer Paper, and place it into the printer bed. It should lay flat against the cu ing tray. Then close the lid.
- Page 52 Paper” into the search bar. Place and size your design You will see an image of your material in the workspace of the Glowforge App. Click and drag your design to place it where you want it on your material. The design will print approximately where you place the outline on the workspace.
- Page 53 Notice that this new artwork became a step in the sidebar. You are able to control whether portions of your design are cut, scored, or engraved just by selecting the step. Because this is a design from the Glowforge Catalog, all the se ings have already been set for you.
- Page 54 Push the magic bu on! Click “Print” at the top of your Workspace. The software will take a moment to prepare your design. When everything is ready, you’ll see the estimated printing time.
- Page 55 The bu on on your Glowforge Spark will blink. If you’re using a Glowforge Personal Filter, its bu on will also blink when a print is ready to start. Press the bu on on your Glowforge Spark to start your first print!
- Page 56 If you need to walk away for any reason, press the bu on on your Glowforge Spark once to pause the print, and once again to unpause When your print is complete, the Glowforge App will show an updated image of the material in the Glowforge Spark, now featuring your printed design.
- Page 57 Print the base From the top menu, select Part 2 from the dropdown menu to open the second part of this design.
- Page 58 Place Proofgrade Material on the Cu ing Tray We’ll be printing this base on Proofgrade Light Cherry Plywood. Open the lid of your Glowforge Spark. Take a sheet of Proofgrade Light Cherry Plywood, and place it into the printer bed. It should lay flat against the cu ing tray, with the QR code facing up.
- Page 59 Because you are using Proofgrade material, the Glowforge App has automatically detected the type of Proofgrade material in your printer thanks to the QR code, and automatically loaded the right se ings for a perfect print. Push the magic bu on!
- Page 60 Remove the protective masking from both sides (a piece of Gorilla tape can speed this along). Follow the step-by-step assembly instructions shown on the right side of the Glowforge App. If you do not see the instructions, click the 3-dots menu at the top and select “Design Details”.
- Page 61 13. Finishing touches Congratulations, you’ve just created your first Glowforge Spark print! After assembling your design, place an optional LED tea light into it and enjoy!
- Page 63 Glowforge owners post each day. You’ll find some incredibly talented (and helpful) folks who can provide assistance, suggestions, and ideas. The Made on a Glowforge section is a great place to go for inspiration. You can also get help with many common questions from helpful community members in the Community Support section.
- Page 64 ● A description of the steps you took, what happened and what you expected ● The date and time of the issue ● The name of your file, if there was a file involved ● The name of your Internet browser and Operating System ●...
Need help?
Do you have a question about the Spark GFD100 and is the answer not in the manual?
Questions and answers