Advertisement
Quick Links
Advertisement

Summary of Contents for IQ IQVideo LCS910
- Page 1 IQVideo Lecture Capture System LCS910 ——User Manual——...
-
Page 2: Table Of Contents
Contents 1. Major Package List (Standard)....................... 3 2. Installation..............................3 3. Live Streaming............................3 4. Director View Control..........................6 5. Recording Settings..........................7 6. DIY Lecture:............................8 7. Station Operation Guidance........................ 10 2 / 15... -
Page 3: Major Package List (Standard)
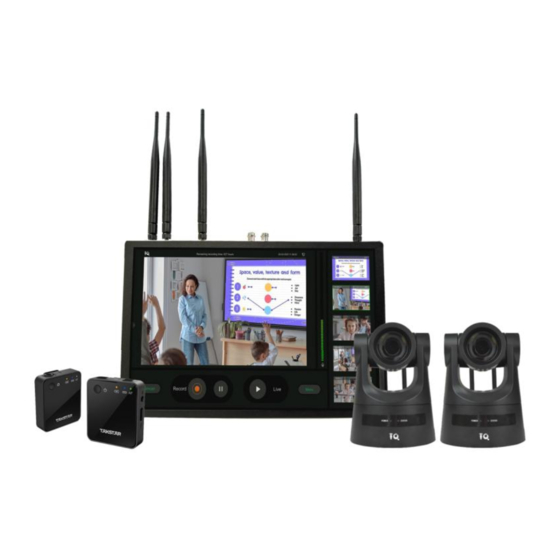
1. Major Package List (Standard) Name Amount 15.6 inch Station Station Power Adaptor&Cable PTZ Camera 2(3、4 optional) Camera Antenna Station WIFI Antenna Station RF Antenna Camera Remote Camera Power Adaptor&Cable Camera Tripod Microphone(1 receive、1 Sender) 2. Installation Set the camera tripod and install the camera over the tripod. Connect 2 Camera antenna with Camera,power on cameras. - Page 4 4.Click Start(LIVE) by the WEB 4 / 15...
- Page 5 Or click Start(LIVE) by the Station: Login the Station: User: admin Password: admin Menu->Set: Advance: User: admin Password: admin 5 / 15...
-
Page 6: Director View Control
Live: Change the Live Server address. Click Live: 4. Director View Control. 8 Layout types to choose: 6 / 15... -
Page 7: Recording Settings
Drag by mouse directly, if you want to change the view or change the view position. Or you could change the layout by the station: 1. Choose the layout. 2. Choose the Channel. 3. Click OK. 5. Recording Settings Support File Name DIY. Format:MP4/TS. Support changing : Resolution、BitRate、FrameRate、Code. -
Page 8: Diy Lecture
Support :Auto Recording after start. Support :Set a video segment : 10 minutes,15 minutes,30minutes and so on. (Reach time segment,generate a file and stop recording.) Support :Set a Max video duration.(Reach record max duration,generate a file and stop recording) Support :Select the recording schedule: Everyday or every Monday,every Tuesday etc. 6. - Page 9 Beginning and Ending pictures: Customize 5 Beginning and Ending presets. Customize Beginning and Ending file. Customize Beginning and Ending duration. 9 / 15...
-
Page 10: Station Operation Guidance
Date and Time: Customize your time format. Customize the color. 7. Station Operation Guidance 1. Start Recording& Stop Recording & Pause Recording. 2. Start Live Streaming&Stop Live Streaming. 10 / 15... - Page 11 3. Director-Manual-Layout:(Change Views) Click the channel you want to change and choose the right channel you need, then click “OK “. 4. Change Station Language: Go to Manu-Setting-Device set 11 / 15...
- Page 12 5. Check Recorded Files: Menu-Files: 6. Schedule Power: 12 / 15...
- Page 13 7. Lock Screen Setting: 8. Time Format: 9. Record Strategy: Delete Priority or Stop Priority. 13 / 15...
- Page 14 10. Network Information: 14 / 15...
- Page 15 15 / 15...
Need help?
Do you have a question about the IQVideo LCS910 and is the answer not in the manual?
Questions and answers