Table of Contents
Advertisement
Quick Links
Advertisement
Table of Contents

Summary of Contents for Ayelix ImageOnMap
- Page 1 ImageOnMap Panorama KIT (Xphase) SPECIFICATION AND START GUIDE...
-
Page 2: Table Of Contents
Photo capturing in ImageOnMap........................ 11 Panorama capturing on ImageOnMp ......................15 Camera height adjustment ......................... 17 Synchronization ............................21 Data deletion from camera and tablet ....................... 25 Built in manual ............................32 ImageOnMap – Panorama KIT SPECIFICATION and START GUIDE Revision 1.22.1 2023.03.30... -
Page 3: Kit Elements
In the last tab ( i ) in the application there is complete and detailed instruction for the application Contact list: Inge Byrkjeland Inge.Byrkjeland@applycapnor.com +47 975 51 563 Piotr Dronszczyk Piotr.Dronszczyk@applycapnor.com +48 728 414 028 Ayelix Support support@ayelix.com ImageOnMap – Panorama KIT SPECIFICATION and START GUIDE Revision 1.22.1 2023.03.30... -
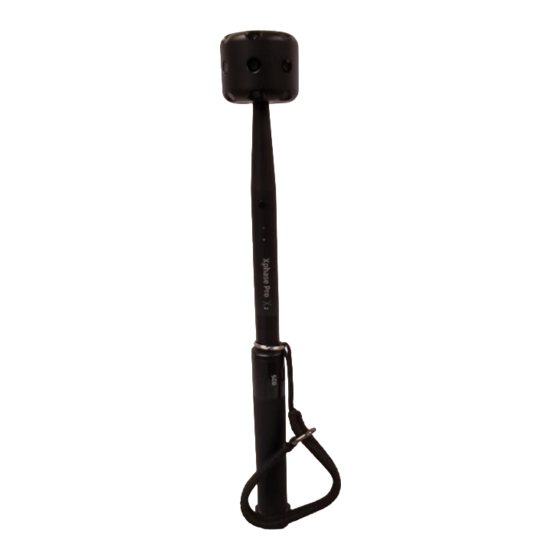
Page 4: Panorama Kit Photos
Panorama KIT General Interior Details On tripod North orientation Power button Power cable ImageOnMap – Panorama KIT SPECIFICATION and START GUIDE Revision 1.22.1 2023.03.30... - Page 5 Camera basics ImageOnMap – Panorama KIT SPECIFICATION and START GUIDE Revision 1.22.1 2023.03.30...
- Page 6 Color meaning of the battery (top) indicator: • Blue 80% • Cyan 60% • Green 40% • Yellow 20% • Red 20% • Purple means the remaining battery is exhausted, it will be shut down ImageOnMap – Panorama KIT SPECIFICATION and START GUIDE Revision 1.22.1 2023.03.30...
- Page 7 Red - up to 10 or less, or the USB disk is not inserted The storage space required for each photo in different scenes is quite different, so the number of remaining shots is only an estimate. ImageOnMap – Panorama KIT SPECIFICATION and START GUIDE Revision 1.22.1 2023.03.30...
-
Page 8: Safety And Protective Equipment
• Camera if not attached to the tripod should be attached to your wrist • For additional explanation of the safety strap for equipment watch the following video: https://www.youtube.com/watch?v=7aF1yttJ9jw ImageOnMap – Panorama KIT SPECIFICATION and START GUIDE Revision 1.22.1 2023.03.30... -
Page 9: Spherical Photos Capturing Workflow
UPLOAD DATA TO SERVER (online) (offline) (online) On the tablet: Open ImageOnMap application (application logo may be changed according to particular portal while the name will remain the same) ImageOnMap – Panorama KIT SPECIFICATION and START GUIDE Revision 1.22.1 2023.03.30... - Page 10 Log-in with Ayelix account or with use of PIN authentication. (PIN can be generated on AYELIX) Where to find PIN? You need to Log-in to Ayelix web portal and go your account details (right top corner). Open menu and press “PIN Auth”...
-
Page 11: Photo Capturing In Imageonmap
Photo capturing in ImageOnMap 1. Download maps (left side: available on server, right side: synced local and the local ones are used during photo capturing) 2. Create project and session ImageOnMap – Panorama KIT SPECIFICATION and START GUIDE Revision 1.22.1 2023.03.30... - Page 12 (we suggest using DATE + SHORT DESCRIPTION) You need to choose facility and on what level this photo session will take place 4. Select created session and click “Open session plot plan” ImageOnMap – Panorama KIT SPECIFICATION and START GUIDE Revision 1.22.1 2023.03.30...
- Page 13 Press it to choose Xphase Camera Wi-Fi and connect to the camera (no password is required) • After connection go back to the application. Wi-Fi banner will be green ImageOnMap – Panorama KIT SPECIFICATION and START GUIDE Revision 1.22.1 2023.03.30...
- Page 14 Logging in to the Ayelix account are not possible. To connect to the internet choose other Wi-Fi network When you get following notification. Press “Cancel” to keep the connection with the camera. ImageOnMap – Panorama KIT SPECIFICATION and START GUIDE Revision 1.22.1 2023.03.30...
-
Page 15: Panorama Capturing On Imageonmp
For additional camera orientation check: led lights and power button on camera stick is facing south while the north sign arrow on top should point opposite -> towards north (port side). ImageOnMap – Panorama KIT SPECIFICATION and START GUIDE Revision 1.22.1 2023.03.30... - Page 16 Setting up the north in the application. Click on the right side image on the “Specify camera direction” section. • Slide left/right to set correct camera orientation and click on Save orientation. ImageOnMap – Panorama KIT SPECIFICATION and START GUIDE Revision 1.22.1 2023.03.30...
-
Page 17: Camera Height Adjustment
There is default camera elevation over the deck set to 180 cm. In case panorama is captured on a different elevation: lower or higher, it is possible to adjust it and give unique camera height over the deck value. ImageOnMap – Panorama KIT SPECIFICATION and START GUIDE Revision 1.22.1 2023.03.30... - Page 18 If you wish you can update the location of the camera and the final photo on the map with exact X, Y ,Z coordinates. Check the box next to the “Specify X, Y, Z position” and scroll down the view to input values in [mm] ImageOnMap – Panorama KIT SPECIFICATION and START GUIDE Revision 1.22.1 2023.03.30...
- Page 19 Making Photo Step 1. Capturing panorama. You need wait few seconds. Step 2. When photo is ready you will hear sound “bip” twice. Status will change into “Panorama transferring”. ImageOnMap – Panorama KIT SPECIFICATION and START GUIDE Revision 1.22.1 2023.03.30...
- Page 20 Step 3. When photo is transferred to tablet you will see status: “Panorama processing”. Press if you do not want to see the final result on this step. Panorama will be available on the photo details. ImageOnMap – Panorama KIT SPECIFICATION and START GUIDE Revision 1.22.1 2023.03.30...
-
Page 21: Synchronization
OPTION_1: synchronization directly to AYELIX PORTAL (default option) • Connect tablet to Wi-Fi with INTERNET connection • Go to the SYNC tab in the ImageOnMap application • Synchronize all or select just needed sessions. ImageOnMap – Panorama KIT SPECIFICATION and START GUIDE Revision 1.22.1 2023.03.30... - Page 22 Important note: to synchronize to server you need to be connected with wifi with internet connection ImageOnMap – Panorama KIT SPECIFICATION and START GUIDE Revision 1.22.1 2023.03.30...
- Page 23 Once data are synchronized cannot be synchronized again and you can “clear synchronized” list OPTION_2: backup to local drive / USB and later synchronization to AYELIX PORTAL from PC ( to use that you need separate application: ImageOnMap uploader to be used only in special conditions with low internet on site.
- Page 24 ImageOnMap – Panorama KIT SPECIFICATION and START GUIDE Revision 1.22.1 2023.03.30...
-
Page 25: Data Deletion From Camera And Tablet
All data Press three horizontal dots at the top of the screen You will get following screen when you can remove all data from tablet ImageOnMap – Panorama KIT SPECIFICATION and START GUIDE Revision 1.22.1 2023.03.30... - Page 26 By pressing three dots n from of the project name you will get similar button but to remove just the one selected project Sessions In a similar way if you wish to delete just the single session, press three dots next to it and press “Delete….” ImageOnMap – Panorama KIT SPECIFICATION and START GUIDE Revision 1.22.1 2023.03.30...
- Page 27 ImageOnMap – Panorama KIT SPECIFICATION and START GUIDE Revision 1.22.1 2023.03.30...
- Page 28 1) Open session plot plan 2) Select camera position on the plot plan or on the list in the left menu Press the position details at the bottom of the screen ImageOnMap – Panorama KIT SPECIFICATION and START GUIDE Revision 1.22.1 2023.03.30...
- Page 29 ImageOnMap – Panorama KIT SPECIFICATION and START GUIDE Revision 1.22.1 2023.03.30...
- Page 30 Press “Delete all panoramas form the camera”. It is not possible to choose single photos. Important note: all photos after capturing are being synchronized with tablet. On the camera there is just a backup but without their locations on the plot plan ImageOnMap – Panorama KIT SPECIFICATION and START GUIDE Revision 1.22.1 2023.03.30...
- Page 31 ImageOnMap – Panorama KIT SPECIFICATION and START GUIDE Revision 1.22.1 2023.03.30...
-
Page 32: Built In Manual
Built in manual • Under the information tab you can find information about application version, manual or you can contact support ImageOnMap – Panorama KIT SPECIFICATION and START GUIDE Revision 1.22.1 2023.03.30... - Page 33 Additional settings • It is possible to change units for the camera height position, possible options between centimeters and inches ImageOnMap – Panorama KIT SPECIFICATION and START GUIDE Revision 1.22.1 2023.03.30...
Need help?
Do you have a question about the ImageOnMap and is the answer not in the manual?
Questions and answers