Table of Contents
Advertisement
Advertisement
Table of Contents

Subscribe to Our Youtube Channel
Related Manuals for Vaonis VESPERA II


Summary of Contents for Vaonis VESPERA II
- Page 1 VESPERA II VE50-II Instruction Manual v1.0 EN 2023-06...
-
Page 2: Table Of Contents
I. Package contents ..........................2 II. Poduct presentation ........................2 III. Warnings ............................2 IV. Installation ............................3 Attaching Vespera II to the tripod and positionning the tripod ..........3 Power supply ..........................4 Mains charging .......................... 4 V. Operation ............................4 Getting started ........................... -
Page 3: Package Contents
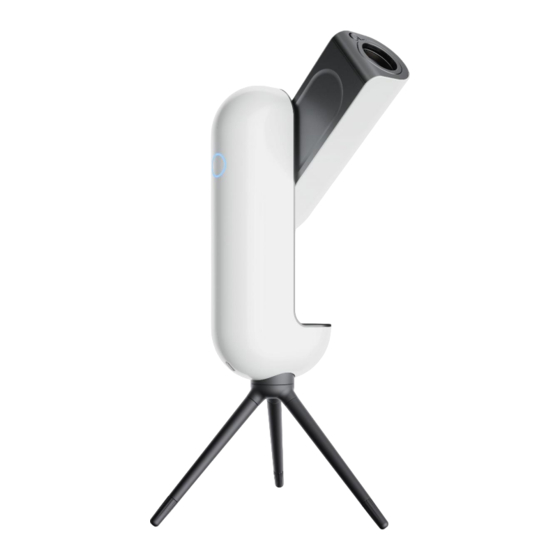
Vespera II is a new generation telescope, a perfect hybrid between a connected telescope camera. Intelligent and fully automated, Vespera II is a revolution in the world of astronomy. With a completely redesigned observing experience, replacing the eyepiece with a mobile application, it becomes easy for everyone to access the wonders of the Universe. -
Page 4: Installation
IV. Installation Attaching Vespera II to a tripod and positioning the tripod Consider a tripod compatible with Vespera II, i.e, a tripod with a UNC 3/8 thread that can support a 5kg load. 1. Screw a base of a compatible tripod to the black attachment of Vespera II... -
Page 5: Power Supply
Charge the product to 100% before first use To start the instrument, press the button on the side of the instrument. The button flashes blue at first and then becomes static when Vespera II is ready to be used (WiFi network available). -
Page 6: Control From The Mobile App
How to turn off Vespera II Shut down the product either via the app or by pressing the button on the side of the instrument. The light on the button will go out, indicating that Vespera II is shut down. VI. Accessoires (options) -
Page 7: Light Pollution Filter Ac023
Only handle the filter by its edge to avoid dirtying or damaging it 1. Turn the product on. 2. Connect to Vespera II via the Singularity application. 3. In the application, go to the "space center" page. 4. Go to "Instrument". -
Page 8: Dual Band Filter Ac022
Only handle the filter by its edge to avoid dirtying or damaging it 1. Turn the product on. 2. Connect to Vespera II via the Singularity application. 3. In the application, go to the "space center" page. 4. Go to "Instrument". -
Page 9: Solar Filter Ac021
press the "confirm filter installation" button follow application instructions to properly position the instrument press the "confirm arm orientation" button for Vespera II to start the solar observation 10. If improperly assembled or defective the "confirm filter installation" button will not be available (dimmed) ... -
Page 10: Care And Maintenance
VII. Care and maintenance Vespera II is an optical instrument, it is therefore fragile and requires a lot of precaution during its use. The front lens must not come into contact with fingers, cloths, eyeglass cloths, liquids etc.. Only specific wipes for optical lenses can be used. -
Page 11: Technical Characteristics
3840 x 2160 pixels (8.29 megapixels) File formats JPEG,TIFF, FITS (raw files 16 bits) Field of View 2.5° x 1.4° Filter UV-IR filter integrated Mount Type Alt-Azimuth Pointing Automatic with star field detection Instruction Manual Vespera II v1.0 EU US CA 2023-06... -
Page 12: Warranty
Vaonis warrants that due care has been taken in the design and manufacture of this equipment. Vaonis warrants that the telescope will be free from defects in materials and workmanship for a period of two 2 years from delivery of the equipment. -
Page 13: Disposal And Recycling
- in collection points made available to you locally (waste collection, selective collection, etc.) In this way you are participating in the reuse and recovery of Waste Electrical and Electronic Equipment (WEEE). Instruction Manual Vespera II v1.0 EU US CA 2023-06...
Need help?
Do you have a question about the VESPERA II and is the answer not in the manual?
Questions and answers