Advertisement
Advertisement
Table of Contents

Summary of Contents for HIT FITNESS HIT00346
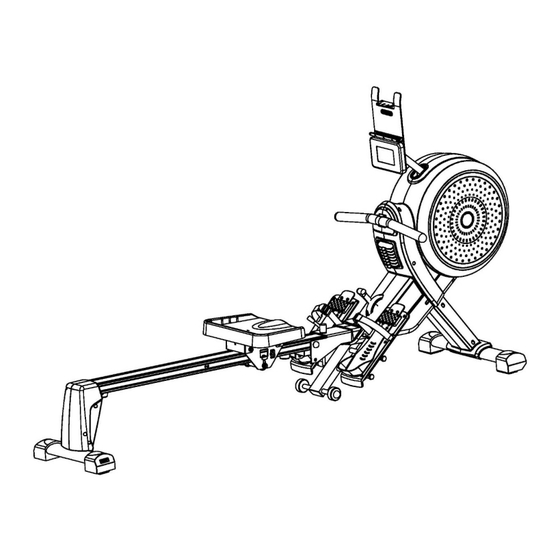
- Page 1 MAGNETIC ROWING MACHINE OWNER’S MANUAL Product Code: HIT00346 IMPORTANT ! Please read all instructions carefully before using this product. Retain this manual for future reference. The specifications of this product may vary slightly from the illustrations and are subject to...
-
Page 2: Important Safety Notice
IMPORTANT SAFETY NOTICE Note the following precautions before assembling or operating the machine 1、 Assemble the machine exactly in accordance with the descriptions in the instruction manual. 2、 Check all the screws, nuts and other connections before using the machine for the first time and ensure that the machine is in a safe condition. -
Page 3: Exploded Diagram
EXPLODED DIAGRAM... -
Page 4: Parts List
NOTE: Most of the listed assembly hardware has been packaged separately, but some hardware items have been preinstalled in the identified assembly parts. In these instances, simply remove and reinstall the hardware as assembly is required. Please reference the individual assembly steps and make note of all preinstalled hardware. PARTS LIST Description Description... -
Page 5: Assembly Instruction
ASSEMBLY INSTRUCTION Attention: Please follow these assembly instructions step by step to assemble this programmable magnetic rowing machine. Step 1: Attach the front bottom tube (2) to the main frame (1) with the inner hex screw (48) and flat washer (17). - Page 6 Step 2: A: Fix the rear support tube (3)to the railway (22) with the inner hex screw (19), spring washer(18)and flat washer(17). B: Lock the L/R rear protective cover (15L/R)to the rear support tube (3) with the cross screw(11). C: Lock the rubber cushion (21)to the railway (22)with the inner hex screw (20). Step 3: A: Firstly, connect the pulse wire (...
- Page 7 Step 4: A: Lock the L/R Pedal (4L/R)to main frame(1)with outer hex bolt(42). B: Pull the connection wire(52)and sensor wire(53)through the smartphone/device holder bracket ( 60 ) and connect with the console ( 61 ) . Then lock the console ( 61 ) and smartphone/device holder bracket(60)to the fixed seat(58)with the cross-pan screw(59).
- Page 8 INSTRUCTION MANUAL 【FUNCTION BUTTONS】 UP▲/ DOWN▼:To press these two buttons through available selection. To adjust the function value upward and downward. ENTER: To confirm your selection. During training, press the button to scan each display function. START / STOP: To start and stop your selected workout program. RESET:...
- Page 9 【OPERATION】 1. Install 2PCS AA batteries → one long beep for 2 seconds →in the meanwhile, segment test for 2 seconds (Fig.1). Then, the monitor enters into the CLOCK & CALENDAR MODE.(Fig.2). 2. Firstly, you may enter into the CLOCK field to set YEAR (in the area of STROKES); MONTH (in the area of CALORIES);...
- Page 10 B. Press START KEY to START and STOP will disappear. The USER & PC will display in the matrix.(Fig.6). The monitor will STOP when one has reached the distance of the race which has been set before, then the matrix displays “PC WIN or USER WIN” (Fig.7) and may display the state of the energy after 6 seconds.
Need help?
Do you have a question about the HIT00346 and is the answer not in the manual?
Questions and answers