
Related Manuals for VIMUKUN CM7033-UL

Summary of Contents for VIMUKUN CM7033-UL
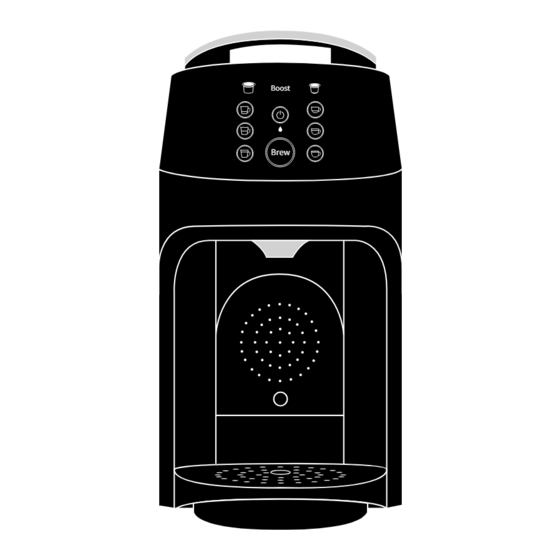
- Page 1 3 in 1 COFFEE MAKER Boost Brew FOR HOUSEHOLD USE ONLY CM7033-UL DO NOT IMMERSE IN ANY LIQUID...
-
Page 2: Table Of Contents
TABLE OF CONTENTS Important Safeguards..........Pg� General Safety................pg2 Electrical Safety................pg2 Heat Safety.................pg3 Pod Safety..................pg4 Additional Safeguards...............pg5 Additional Important Safeguards......Pg� Notes on the Plug..............pg6 Notes on the Cord..............pg6 Plasticizer Warning..............pg6 Electric Power................pg6 Know Your Coffee Maker........Pg� Before First Use............Pg� Assembly..................pg8 Initial Cleaning Cycle..............pg9 Coffee Brewing.............Pg��... -
Page 3: Important Safeguards
IMPORTANT SAFEGUARDS WARNING! To avoid the risk of serious injury, carefully read all instructions before operating your coffee maker. When using any electrical appliance, basic safety precautions should always be observed, including the following important information. GENERAL SAFETY Close supervision is necessary when any appliance is used by or near children. Keep cord out of reach of children. -
Page 4: Heat Safety
Contact VIMUKUN Customer Service for assistance at support@vimukun.com. The use of attachments not recommended or sold by VIMUKUN may cause fire, electric shock, or injury. A short power-supply cord (or detached power-supply cord) is provided to reduce risks resulting from becoming entangled in or tripping over a longer cord. -
Page 5: Pod Safety
Any significant spillage onto the surface under or around the appliance, or onto the appliance itself, should be cleaned and dried before continuing to use the appliance. DURING BREWING: The liquid coming out of the coffee spout will be HOT. USE CAUTION when touching the coffee maker. -
Page 6: Additional Safeguards
ADDITIONAL SAFEGUARDS Remove and safely discard any packaging material or promotional labels before using this appliance for the first time. To eliminate a choking hazard for young children, remove and safely discard the protective cover fitted to the power plug of this appliance. Keep the appliance clean. -
Page 7: Additional Important Safeguards
ADDITIONAL IMPORTANT SAFEGUARDS NOTES ON THE PLUG This appliance has a polarized plug (one blade is wider than the other). To reduce the risk of electric shock, this plug will fit in a polarized outlet only one way. If the plug does not fit fully into the outlet, reverse the plug. -
Page 8: Know Your Coffee Maker
KNOW YOUR COFFEE MAKER Top Ring Handle Pod Brew Area Reusable Capsule Capsule Holder Water Reservoir Control Panel Power Button Brew Button Coffee Spot Pod Disposal Basket Espresso Platform Tall Cup Platform Unit Base Drip Tray Plate Boost Ristretto (25 ml / 0.85oz) Espresso 10oz (40 ml / 1.35oz) -
Page 9: Before First Use
BEFORE FIRST USE Before using your coffee maker for the first time, please take a moment to perform the steps below. 1. UNPACK Open the box and remove the appliance with its various components, placing all parts on a flat, level, and dry heat-resistant surface. Remove and/or discard any packaging material, promotional labels, and tape from the unit. -
Page 10: Initial Cleaning Cycle
Fill the Water Reservoir. Before brewing, ensure there’ s enough water in the Water Reservoir. WARNING: Be careful not to overfill the Water Reservoir. NOTE: When the water in the reservoir is less than 12oz, the blue water droplet will illuminate and flash on the Control Panel. -
Page 11: Coffee Brewing
COFFEE BREWING Fill the Water Reservoir. Before brewing, ensure there’ s enough water in the Water Reservoir. When the Water Reservoir is less than 12oz, there will be a water shortage alarm to remind, and other buttons do not work except for the Power button. WARNING: Be careful not to overfill the Water Reservoir. - Page 12 WARNING: Only *K-Cup® pods should be inserted in left inlet. Each side is designed to fit only one type of pod. Close the Pod Brew Area. Pull the Top Ring Handle down to close (see Fig.3). Once secured, it will click. The unit will not begin the brew cycle unless this lid is fully closed. NOTE: After the machine has warmed up, all icon and coffee brew size buttons will illumi- nate white.
-
Page 13: Espresso Brewing
ESPRESSO BREWING Fill the Water Reservoir. Before brewing, ensure there’ s enough water in the Water Reservoir. When the Water Reservoir is less than 12oz, there will be a water shortage alarm to remind, and other buttons do not work except for the Power button. WARNING: Be careful not to overfill the Water Reservoir. - Page 14 Fig.6 Fig.7 WARNING: Only **Nespresso® pods should be inserted in right inlet. Each side is designed to fit only one type of pod. Close the Pod Brew Area. Pull the Top Ring Handle down to close (see Fig.7). Once secured, it will click.
- Page 15 Coffee maker will alert you when the brew cycle is complete. Remove your mug and enjoy! NOTE: Remember to dispose of any used pods left in the Pod Brew Area after each brew cycle. After the brewing of espresso, the **Nespresso® pod will automatically fall into the Pod Disposal Basket after open the lid.
-
Page 16: Blended Coffee Brewing
BLENDED COFFEE BREWING Squeeze in an extra boost of caffeine by adding a shot of espresso to your coffee. When activated, Boost will illuminate on the Control Panel. Fill the Water Reservoir. Before brewing, ensure there’ s enough water in the Water Reservoir. When the Water Reservoir is less than 12oz, there will be a water shortage alarm to remind, and other buttons do not work except for the Power button. -
Page 17: Additional Information
ADDITIONAL INFORMATION BREW TYPE & BREW SIZE • If the *K-Cup® Pod Icon on the left side is illuminated, you’ re brewing coffee. • If the **Nespresso® Pod Icon on the right side is illuminated, you’ re brewing espresso. You must select a brew size. -
Page 18: Care & Maintenance
• Press and hold the "8oz" and "10oz" buttons at the bottom of the panel simultaneously to start the forced descaling program. • If the brewer still doesn’ t have power, contact Customer Service at support@vimukun.com. - Page 19 • The brewer may need to be descaled. If you have repeated the descale procedure on your brewer two times and it is still only brewing a partial cup, contact Customer Service at support@vimukun.com. Brew basket overflowed. • Check that the basket is in place with the lid secured. If the lid is in place, the bottom of the filter basket may be clogged.
-
Page 20: Customer Service
• Press and hold the "8oz" and "10oz" buttons at the bottom of the panel simultaneously to start the forced descaling program. • If the problem persists, contact Customer Service at support@vimukun.com. The coffee is weak. • The capsule is not completely punctured by the upper and lower needles.
Need help?
Do you have a question about the CM7033-UL and is the answer not in the manual?
Questions and answers
I keep getting a water warning. How do I reset this? The machine has been scared and it clean.
To reset the water warning on the VIMUKUN CM7033-UL machine, press and hold the "8oz" and "10oz" buttons at the bottom of the panel simultaneously to start the forced descaling program. If the problem persists, contact Customer Service at support@vimukun.com.
This answer is automatically generated
@Mr. Anderson
@Mr. Anderson I tried this and I still get the water warning. Also the email you provided for support is bouncing back.
Coffee machine not heating up water what i should look for?
I just opened the box and tried to do the initial cleaning but I keep getting a low water warning and the reservoir is full. I tried resetting it but it continues to happen. Please help.
coffee maker spurts steam instead of hot water
My machine has been de escalating since yesterday 2/3. I had to stop and restart it 2 times and it is still running