Advertisement
Quick Links
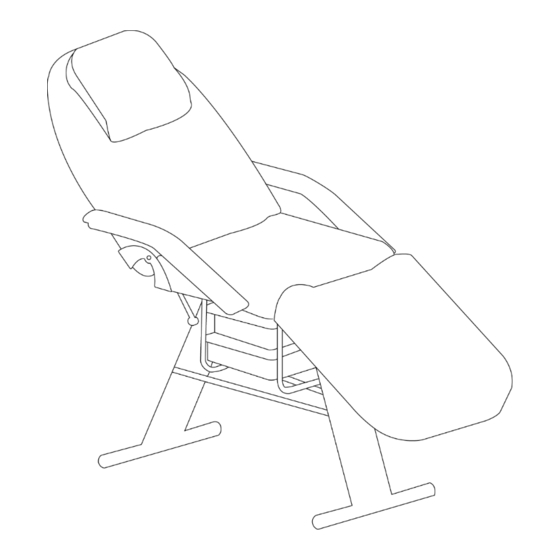
PARKER II Facial Chair
ATTENTION!
NOTICE
:
If your package is missing parts or you are having issues with installation, please call us directly. Our
customer service team will address any questions or concerns you may have.
Have this manual open and ready for reference.
SAFETY
To reduce risk of injury when installing & using the chair, follow these precautions:
• Read all these instructions before installing and using your salon chair.
• Preferably have 2 people for installation and turning the chair upright after installing.
• Do not over-extend the bed. The weight of the client should not exceed 150 kg, to avoid creating the
risk of falls or tipping the chair, resulting in injury
OTHER ITEMS YOU WILL NEED (not included)
• Hand Tools: Wrench, Rubber Mallet, Screwdriver (Phillips), a Sturdy box
PLEASE READ THESE INSTRUCTIONS BEFORE USING THIS DEVICE
Model# HZI-FCCHR-215
PRODUCT MANUAL
Advertisement

Summary of Contents for Dermalogic PARKER II
- Page 1 PARKER II Facial Chair Model# HZI-FCCHR-215 PRODUCT MANUAL ATTENTION! PLEASE READ THESE INSTRUCTIONS BEFORE USING THIS DEVICE NOTICE If your package is missing parts or you are having issues with installation, please call us directly. Our customer service team will address any questions or concerns you may have.
-
Page 2: Parts And Features
PARTS & FEATURES... -
Page 3: Installation Instruction
Installation instruction Step: Install B to A Remove the 4 bolts which are pre- fixed on B Install B to A by the 4 bolts r emoved from A Step: Install C to A and B Remove the 6 bolts which are pre- fixed on A Install C to A by 6 bolts which removed from A... - Page 4 Step: Install F to H Remove the 4 bolts which are pre- fixed on A and remove the 2 bolts which are fixed on F. Install F to A by the 4 bolts which were removed from A. Install H in the middle of F by the 2 bolts which were removed from H.
- Page 5 Step: Install D to B and A Install D to B and A Step: Install E to B and A Install E on the bottom of seat (A) and in the middle of F one by one...
-
Page 6: Function Description
Function description Adjustment of backrest and seat Adjusting the support bar on the back of the seat, and the underside of the leg section, will allow you to adjust the incline to your desired level. Please make sure that the support bar fits well into grooves for any adjustments before use.
Need help?
Do you have a question about the PARKER II and is the answer not in the manual?
Questions and answers