Advertisement
Quick Links
Advertisement

Related Manuals for iGenix IG2430

Summary of Contents for iGenix IG2430
- Page 1 USER MANUAL 400W Bagless Upright Vacuum Cleaner Grey/Blue IG2430 Batch code: Please read these instructions carefully before use and retain for future reference Before switching on your appliance, always check for any damage which may have been caused in transit...
-
Page 2: Table Of Contents
CONTENTS Important Safety Instructions ..........3-4 Appliance Overview ..............5 Operating Instructions ............6-7 Cleaning and Maintenance ..........8-11 Trouble Shooting Guide ............12 Fuse Replacement ..............13 Disposal Information ............... 13 Terms and Conditions and Warranty Information ..14-15... -
Page 3: Important Safety Instructions
IMPORTANT SAFETY INSTRUCTIONS Read and follow all of the instructions even if you feel you are familiar with the product, and find a place to keep this manual handy for future reference. Important: This appliance is intended for use in a domestic environment only. - Page 4 may result in damage or injury to the user. The correct voltage is listed on the ratings label. • If abnormal noise, smell, smoke or any other failure or breakage is found during the operation, you should turn off the switch and unplug it.
-
Page 5: Appliance Overview
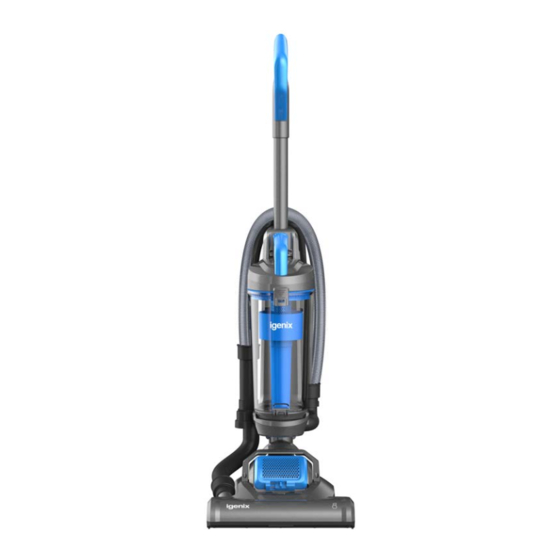
APPLIANCE OVERVIEW 1. Handle 2. Dust container release button 3. Dust container 4. Extension hose 5. Power button 6. Brush assembly 7. Exhaust filter 8. Wheel(s) 9. Floor brush suction hose 10. Crevice brush 11. Power cord 12. Power cord holder Features 3L capacity 3m flexible extension hose... -
Page 6: Operating Instructions
OPERATING INSTRUCTIONS Before first use, please wipe all the parts with a soft, damp cloth and dry thoroughly. Do not immerse the vacuum in any liquid. Assembly Step 1: Insert the handle into the body, and rotate the screw to secure. Step 2: Place the dust container onto the machine and push until it clicks into place. - Page 7 Using the Vacuum Step 1: Twist the quick release cord hook to release the power cord. Step 2: Step on the floor brush cover and straighten the body of the machine. Step 3: Plug in your machine and push ON/OFF button to switch on. WARNING: Do not over fill the dirt container to avoid clogging your filter.
-
Page 8: Cleaning And Maintenance
CLEANING AND MAINTENANCE WARNING: The plug must be removed from the power socket before any maintenance or replacement. If the power cord is damaged, it should only be replaced by a maintenance centre or similarly qualified persons. Emptying and Cleaning the Dust Container Before emptying the dirt container, cleaning the sponge or cleaning the dust filter, ensure the vacuum is either off or the plug is disconnected. - Page 9 Cleaning the Sponge Keeping the sponge clear of dust and dirt will preserve the suction of the machine and so will prolong its lifespan. Step 1: Pull open the dust container by lifting the lock on the handle. Step 2: Rotate the filter to remove. Step 3: Separate the filter so that you have the sponge and the HEPA.
- Page 10 Cleaning the Dust Filter Step 1: Remove the centre of the dust container. Step 2: Turn the dust filter, and remove. Step 3: Wash the dust filter under running water. Step 4: Leave to fully dry for at least 24 hours before placing back in the machine. WARNING: Do not use detergent to clean the dust filter.
- Page 11 Changing the Drive Belt Check the drive belt carefully for wear, cuts and stressed areas. If the drive belt appears worn, you will need to replace it. To remove the drive belt, read the instructions and follow the drawings below: Ensure the machine is switched off and unplugged.
-
Page 12: Trouble Shooting Guide
TROUBLE SHOOTING GUIDE If you experience difficulties with the appliance, please check the suggestions below before contacting customer services on 01473 271272: Problem Possible Cause Possible Solution Disconnect the attachments and The hose is blocked. remove the blockage. Empty the dust container following The dust container is the instructions in the section almost full. -
Page 13: Fuse Replacement
MAINS PLUG FUSE REPLACEMENT Fuse Cover Fuse Replacement (Class II) Remove the fuse cover with a small flat head screw driver. Take out the fuse and replace with a new fuse of the same Amp. Replace the fuse cover and push back into place. DISPOSAL INFORMATION This marking indicates that this product should not be disposed with other household wastes throughout the EU. -
Page 14: Terms And Conditions And Warranty Information
lgenix Warranty Terms & Conditions This product is guaranteed for a period of 12 months as standard from the date of purchase against mechanical and electrical defects. You can extend your warranty for a further 12 months by registering your product. Upon registration we will cover your product for a period of 24 months from the original purchase date against any mechanical or electrical defects. - Page 15 To qualify for the 2 year warranty you must register your product within 30 days of purchase. The full Terms & Conditions of our warranty policy are shown on the opposite page. They are also available on our website. www.igenix.co.uk...
- Page 16 38 Bluestem Road, Ransomes Europark, Ipswich, IP3 9RR Tel. 01473 271 272 Disclaimer: Igenix operate a policy of continual improvement and development. We therefore reserve the right to change/alter the specification and appearance of our appliances without prior notice. All diagrams and images shown in this manual are for illustration purposes only.
Need help?
Do you have a question about the IG2430 and is the answer not in the manual?
Questions and answers