
Related Manuals for DITTING KDS

Summary of Contents for DITTING KDS
- Page 1 Operating Instructions KDS Coffee Dosing System Voltage: Serial No.: 18.01.06 Art.-no. 64424B...
-
Page 2: Table Of Contents
KDS Coffee Dosing System Contents Contents Introduction ........................1-1 Confirmation of receipt ......................1-2 Safety instructions .......................1-3 Scope of the documentation ....................1-3 Definition of the terms used ....................1-4 Copyright ..........................1-4 Safety and warranty ......................2-1 General safety instructions....................2-1 2.1.1 Electrical power ........................2-2 2.1.2 Use in accordance with the intended purpose ..............2-2... - Page 3 KDS Coffee Dosing System Contents Operation ...........................8-1 Conditions for machine operation ..................8-1 Switching on the machine ....................8-1 Switching off the machine ....................8-1 Setting the scale........................8-2 Refilling the bean hoppers ....................8-3 Operating ...........................9-1 Function level 1 ........................9-2 Function level 2 ........................9-6 Function level 3 ........................9-9...
-
Page 4: Introduction
Introduction To the Customer Congratulations on your purchase of the KDS Coffee Dosing System. We have prepared these Operating Instructions to simplify your use of the Coffee Dosing System. They contain information, advice and instructions to enable you to get the best possible service from your unit. -
Page 5: Confirmation Of Receipt
Introduction Confirmation of receipt To confirm the Operating Instructions are handed to and received by the final consumer. IMPORTANT The following confirmation should be completed by the purchaser. The purchaser undertakes to return this confirmation to us. The purchaser hereby confirms that he has taken note of the contents of the Operating Instructions for art.-no 64424B and that his attention has been drawn in particular to the relevant safety instructions regarding the use of the machine. -
Page 6: Safety Instructions
• Install the machine out of the reach of children. Children and users must on no account reach into the openings or touch the electrical components. • Use only original grinding discs sharpened by DITTING. • Never reach into the hopper opening while the machine is running. -
Page 7: Definition Of The Terms Used
This documentation contains material which is protected by copyright. It may be neither duplicated, copied, microfilmed, nor passed to third parties without the consent of Ditting Maschinen AG. Breaches of copyright give rise to claims for compensation. -
Page 8: Safety And Warranty
Safety and warranty Safety and warranty General safety instructions Take particular note of the following instructions: • Each person who is concerned with the installation, start up, operation and maintenance (inspection, maintenance, repair) of the machine must have read and understood the whole of the Operating Instructions, and in particular the “Safety and warranty”... -
Page 9: Electrical Power
2.1.2 Use in accordance with the intended purpose The sole function of the KDS Coffee Dosing System is to dispense whole or ground, roasted coffee beans. Any other use is deemed to be not in accordance with the intended purpose. -
Page 10: Explanation Of Safety Instructions
Spare parts must conform to the technical specifications of the manufacturer. Use only Ditting – original spare parts. The machine must be operated in the prescribed manner as described in these Operating Instructions. -
Page 11: Description Of The Machine
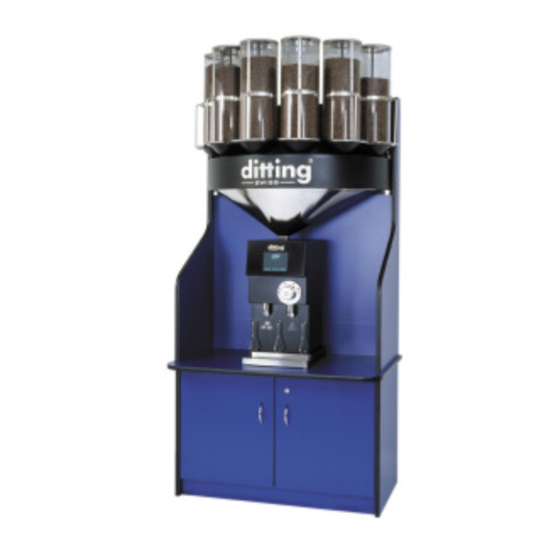
Description of the machine Description of the machine Function principle The machine is supplied with either 4 or 6 bean hoppers. It is a simple matter to change these at any time. An interactive display, which uses a combination of text and symbols, directs the user through all the various operation steps. -
Page 12: Dimensions
Description of the machine 3.2.1 Dimensions Standard model Measurements in mm Fig. 3/2 1 User position 2 Access space IMPORTANT Certain parts of the packaging material can be additionally used as a hole template for wall assembly. Read the chapter entitled "Installation without cabinet (standard)". The dimensions in Fig. -
Page 13: Weights
Description of the machine 3.2.2 Weights Weight of the grinder approx. 36.1 kg Weight of the dosage unit approx. 30.5 kg (without bean hoppers) Bean hoppers empty approx. 3.5 kg Bean hoppers full approx. 9.5 kg Cabinet (optional): Lower part approx. 85 kg Upper part approx. -
Page 14: Packaging And Transport
Packaging and transport Packaging and transport Packing the machine The machine must be packed appropriately to keep it safe during transport. The machine manufacturer recommends the type of packaging material used for dispatch from the factory. Transporting the machine 1. Unscrew and remove the back panel of the machine (1). - Page 15 Packaging and transport IMPORTANT Make a photographic record of the damage. In addition, retain all the packaging material to assist any further clarifications! Place the machine in its final position. Unscrew and remove the back panel of the machine (1). Extract both of the transport safety devices with red markings (2) from underneath the grinder motor.
-
Page 16: Positioning The Machine
Positioning the machine Positioning the machine Installation site requirements The area where the machine is to be positioned must be dry and well ventilated. Place the machine on a flat and non-slip surface. IMPORTANT You must position the machine so that children have no opportunity of playing with it. -
Page 17: Installing The Machine
Installing the machine Installing the machine Remove any adhesive tapes and remaining packaging. Clean the bean hoppers thoroughly. Please refer to the chapter entitled “Cleaning” for instructions on suitable cleaning agents. IMPORTANT It is essential that no foreign matter gets into the grinding chamber! Installation without cabinet (standard) Procedure 1. - Page 18 Installing the machine IMPORTANT The wall assembly must be carried out by a specialist in statics. This specialist must assess the construction of the wall and choose the wall plugs appropriate to the forces indicated. 9. Drill the holes into the wall. 10.
-
Page 19: Installation With Stand (Optional)
Installing the machine Installation with stand (optional) Procedure 1. Please refer to the dimensions illustration Fig. 3/3 in the chapter entitled “Dimensions” for the dimensions of this item. 2. Decide where the machine’s final position will be. Maintain the required access space around the machine. See Fig. 5/1 for the dimensions of this. -
Page 20: Fitting The Bean Hoppers
Installing the machine Fitting the bean hoppers 1. Use the special key (1) (three quarter turn anti-clockwise) to release the locking device of the cover (2). Hold the cover (2) in both hands, then twist and lower it. Fig. 6/7 Fig. -
Page 21: Bags
Installing the machine 8. Swing the cover (2) up again with both hands and fix it in position with the special key (1). (Three quarter turn in a clockwise direction) 9. If the automatic hopper level control is switched on and there is less than 6 kg of coffee beans in the bean hopper, the actual quantity must be input at function level 2. -
Page 22: Electrical Installation
Installing the machine Electrical installation DANGER The machine must be only connected to the mains power supply by a qualified specialist (electrician) in accordance with the local regulations! The machine is supplied ready for use with a three-wire electric cable and mains plug. IMPORTANT Connecting the machine to the mains automatically switches it on. -
Page 23: Start Up
Start up Start up IMPORTANT Start up must only be carried out by Ditting Customer Services or a representative authorized by Ditting! This will be an opportunity for thorough familiarization of your service staff with the machine’s operations. DANGER Carrying out the start up yourself can lead to personal injury and damage to property... -
Page 24: Operation
Operation Operation This chapter contains all the information needed for safe operation of the machine. Conditions for machine operation Before the machine can be operated, the following conditions must first be satisfied: • The machine has been correctly installed and connected as described in the chapter entitled “Installation”. -
Page 25: Setting The Scale
Operation Setting the scale The purpose of setting the scale on the rotary knob is to ensure that the fineness of the ground coffee matches the fineness setting shown on the scale. The machine is supplied complete with a factory setting and is ready for operation. -
Page 26: Refilling The Bean Hoppers
Operation Refilling the bean hoppers 1. Swing the cover down as described in the chapter entitled “Installing the machine”, in the section “Fitting the bean hoppers” (Point 1. Fig. 6/7 and 6/8). 2. Now, first pull out the locking button (1) and then swing the bean hopper forwards to the first catch point. -
Page 27: Operating
Operating Operating These operating instructions are valid for: Software Version V 2.0.xx Function levels Operation of the system is done interactively via the display. Where necessary a keyboard is automatically overlaid for the entry of data. Data can also be entered via an external keyboard (optional). -
Page 28: Function Level 1
Operating Function level 1 Function level 1 is provided for the user. Users obtain the desired product for themselves whilst being guided step by step by means of the display. The masks which are relevant to the user are described here in sequence. - Page 29 If using Ditting scales (optional) the label is printed with the names of the selected hopper as defined in mask 3-4. In connection with this please note the explanation of the labels in mask 3-4 at function level...
- Page 30 Operating You can select whether you want to purchase the coffee as whole beans or as ground coffee. Press the corresponding symbol: Whole beans Ground You are asked here to set the rotary knob on the grinder to the required grind fineness. Set the rotary knob to the desired position.
- Page 31 Operating Here you are advised that the system is processing and filling the desired product. Wait until the next mask appears. With scales (optional) 1-10 Without scales Remove bag! 1-10 The bag is filled and the order is completed. Place the bag on the scales and afterwards attach the price label issued by the printer onto the pack.
-
Page 32: Function Level 3
Operating Function level 2 Function level 2 is intended to be used by service personnel. One of the tasks of the service personnel is the refilling of the bean hopper. The masks for function level 2 are described here in sequence. This display appears when the system is switched on and shows that it is ready to function. - Page 33 Operating The remaining beans fall back from the dosing feeder into the empty hopper. IMPORTANT The amount under the bean hopper is automatically set to 6000 g after refilling. Overwrite this value with the effective weight if you haven’t completely filled up the hopper.
- Page 34 Operating Statistics Shots are documented in the masks "Statistics by hopper" and "Statistics by blend". Statistics by hopper The data in the second column displays the weight of shots from each individual hopper since the last reset in function level 2. The data in the third column displays the weight of shots from each individual hopper since the last reset in function level 3.
- Page 35 Operating Function level 3 Function level 3 is intended for the operator and the maintenance personnel. Amongst the tasks of the respective personnel is the programming of the following parameters: Function checks Language Settings Hopper level control Grinder running times Calibration Scales and Printer Settings Coffee prices and currencies...
- Page 36 Operating By means of this mask you can access all the parameters referred to at the start. The individual buttons and functions are described in the following. Service 2-2 2-3 Calibration System Settings Scales / Printer Set-up menu On / Off System-Info 1-13 Back...
- Page 37 Operating System Settings 1/3 Functions Explanation Day, Month, Year, Time: Date and Time After touching each field a keyboard is overlaid via which the time and date can be updated. Date format: Here you can determine the date display format: MM-TT-JJJJ or TT.MM.JJJJ or JJJJ.MM.TT First click on the arrow button and then on the desired display format.
- Page 38 Operating System Settings 2/3 Functions Explanations Various bag sizes This function should be switched on if various sized bags are available for the coffee. The size and tara of the bags being used have to be defined in mask 3-4 “Scale Settings 2/2”. Two additional buttons Small Bag and Big Bag appear in masks 1- 7 and 1-8, one of the buttons has to be actuated by the operator prior to filling.
- Page 39 Standard EAN-Code Enter the corresponding code here Headline Here you can enter the name of your shop, e.g. "Ditting Swiss". The text entered here is then printed on the label on the scales. Line Here you can enter for example the local place name. The text entered here will be printed on the label on the scales.
- Page 40 • Press the field below Weighed and enter the measured weight. With the Ditting scales connected the weight is automatically entered into the field after pressing Scaled. Using these values the system now calculates the factor, (e.g. 100.4%), which must be used in dosing the corresponding coffee sort.
- Page 41 Operating Block hopper You have the option of blocking individual hoppers. To do this, briefly touch the corresponding hopper twice in succession. This action marks the hopper with a cross. It is now no longer possible to withdraw beans from this hopper and also any blends which may be affected. If you touch 2x a marked hopper then the block is lifted again.
- Page 42 Operating Setup mode In Setup mode the background is coloured blue and all the buttons are shown. Press an occupied button as necessary in order to edit the existing data, or press a blank button to define a new blend. Blank button Occupied button 3-10 (Example)
- Page 43 Operating Terms Explanation EAN-code Here you have the option of entering an individual EAN code for the blend. If you enter a code then the EAN code in mask 3-4 will be overridden and ignored. If you do not enter a code then the EAN code in mask 3-4 will be used. Button title You should actuate the "Button title"...
- Page 44 Operating 3-12 Insert picture If you press a line it is highlighted and the corresponding picture is overlaid on the right. You have the following options for inserting the selected picture: Picture for description The picture is positioned beside the description. An example of this can be found in mask 1-3.
-
Page 45: Maintenance
We recommend that the machine be given a complete overhaul at least once per year. Please feel free to call on Ditting Customer Services for all maintenance work. Please refer to the chapter entitled “Contact Addresses” for the address and contact numbers of Customer Services. -
Page 46: Emptying Collecting Tray
Maintenance IMPORTANT Use only a dry cloth to clean the machine! IMPORTANT Do not use any alkaline cleaning agents. Alkaline cleaning agents can impair the flavour of the coffee. IMPORTANT Do not use compressed air to blow off material from the machine and do not spray with steam or water! This could short-circuit and thus damage the machine. -
Page 47: Cleaning The Bean Hoppers
Maintenance 10.1.3 Cleaning the bean hoppers To open the bean hopper, turn the handle of the closing rod (1) in an anti-clockwise direction. 2. Pull the closing rod up and out of the bean hopper. 3. Remove the lid (2) from the bean hopper. 4. -
Page 48: Cleaning The Hopper Interior
Maintenance Extract the rotary disc flange (4) from the grinder body shell (5). Remove any foreign matter that may be present. Check the grinding discs (6), the rotary disc flange (4) and the grinder body shell (5) for possible faults and replace faulty parts. Reassemble all the parts using the same steps in reverse order. -
Page 49: Cleaning The Hoppers
Maintenance 10.1.6 Cleaning the hoppers 1. Remove the lid (1) from the grinder. First unscrew the rear plate on the flange of the lid by unscrewing the two side screws (2). 2. Remove the plate by pulling it back. 3. Remove the grinder from the hopper and unscrew all 4 screws (3) on the lid. -
Page 50: Replacing Components
Maintenance 10.2 Replacing components 10.2.1 Replacing the grinding discs When the grinding quality is no longer as desired, this means that the grinding discs need to be re- sharpened or replaced. CAUTION The discs must not be removed until the machine is completely at rest! Before beginning this task, switch off the main switch (if fitted), ensure the machine cannot be switched on by accident and pull out the mains plug from the mains socket. -
Page 51: Changing The Brush
Maintenance 10.2.2 Changing the brush 1. Remove the bean hopper from the dosing device. 2. Unscrew the 4 screws (1). 3. Remove the cables (2) and lift the drive motor (3) from the dosing device. 4. Unscrew the screw (4) on the brush. 5. -
Page 52: Changing The Plastic Cylinders
Maintenance Connection plate on the control panel The interfaces are additionally marked on the side of the control panel (see Fig. 10/14, pos. 4) Mains power supply Scales Floppy disk drive External monitor Controller Network Keyboard (without mouse) Fig. 10/15 10.2.5 Changing the plastic cylinders 1. -
Page 53: Maintenance Work On The Mains Power Supply
Maintenance work on the mains power supply IMPORTANT Work on current-bearing assemblies or components must only be carried out by Ditting technicians or by a qualified specialist electrician. Please see chapter "Electrical wiring diagram" for the circuit diagram. CAUTION The grinder must not be opened until the machine is completely at rest. -
Page 54: Protection Devices / Faults
Protection devices / Faults Protection devices / Faults 11.1 Protection devices The grinder is protected by a temperature monitor in the motor coil. Temperature monitor The temperature monitor switches the grinder off as soon as the motor coil is too hot. This can occur for example if the system is in continual use. -
Page 55: Waste Disposal
Waste disposal Waste disposal When purchasing bags, consider such issues as environmental compatibility, health hazards, waste disposal regulations and the local facilities for disposal in compliance with regulations. Waste disposal of the machine is the responsibility of the operator. He is responsible for disposing of the machine carefully and in compliance with the current local regulations. -
Page 56: Electrical Wiring Diagrams
Electrical wiring diagram Electrical wiring diagrams 18.01.06 13-1... - Page 57 Electrical wiring diagram 18.01.06 13-2...
-
Page 58: Contact Addresses
If maintenance work reveals that the grinding discs need re-sharpening or replacing, or that other repairs are necessary, please contact your nearest Ditting Service Point or the factory. New grinding discs and spare and accessory parts (including parts for models modified since purchase) can be ordered from our Customer Services or from the responsible agent. -
Page 59: Index
Index Index Function level 1 9-2 Access space 5-1 Function level 2 9-6 Advanced pers. Blend 9-11 Function level 3 9-9 Amount 9-3 Arrow button 9-6, 9-9 Grinder 9-7 Grinder Button 9-11 Bag 9-4, 9-13 Grinding capacity 3-3 Bag sizes 9-12 Grinding discs 10-6 Bag tare 9-13 Grinding fineness 3-1... - Page 60 Index Price 9-16 Start up 7-1 Price label 9-14 Start with PIN 9-12 Price label info 9-13 Statistics 9-8 Protection devices 2-1, 11-1 Statistics by blend 9-8 Purchase price 9-3 Statistics by hopper 9-8 Submenu 9-16 Switching off the machine 8-1 Recipe info 9-13 Switching on the machine 8-1 Refill hopper 9-6...
Need help?
Do you have a question about the KDS and is the answer not in the manual?
Questions and answers