Table of Contents
Advertisement
Quick Links
Advertisement
Table of Contents

Related Manuals for Boss Audio Systems BCPA12


Summary of Contents for Boss Audio Systems BCPA12
- Page 2 Thank you for choosing BOSS Audio Systems! Sign up for BOSS Audio Systems News and Promos by visiting us on the web at www.bossaudio.com. Be part of our community! Join us by signing up on the web at www.bossinsiders.com IMPORTANT! Complete the information below and keep for your records.
-
Page 3: Table Of Contents
Table of Contents Important Information Apple CarPlay About this Manual............4 Apple CarPlay Introduction ........15 USB Playback ..............20 Operation Warnings ..........4 Connect your iPhone ..........15 Audio/Video/Photo Play Switching ..... 20 Installation Warnings ..........5 Arrange your CarPlay Apps ........16 Audio Playback ............ - Page 4 Table of Contents General Settings Radio Settings Troubleshooting System Tone and Shutdown Delay ...... 23 Radio Region Selecting ..........26 Specifications Set Date and Time Manually ........23 RDS/RBDS Activation ..........26 Set Date and Time Automatically ......23 RDS/RBDS Information Display ......26 Language Setting ............
-
Page 5: Important Information
To understand how to properly use your new The IMPORTANT NOTE illustration denotes WARNING BOSS Audio Systems product, it is recommended important instructions for product features and to read this user manual in its entirety, and keep limitations. Failure to follow them will result in OPERATION OF THIS PRODUCT WHILE it in a safe place for future reference. -
Page 6: Installation Warnings
Failure to do so may result in electric shock, fire, this device or its compliance with safety and damage to product and/or property damage. regulatory standards. BOSS Audio Systems is not affiliated with Apple Inc. Android Auto is a trademark of Google LLC. DO NOT DISASSEMBLE OR ALTER PRODUCT. -
Page 7: Basic Operation
Basic Operation What Comes in the Box 2x Release Keys 1x Mounting Strap Main Unit Display 1x Hex Bolt 2x Plain Washers 1x Hex Nut 1x Tapping Screw 1x Spring Washer 1x Rubber Grommet Wiring Harness SWC Adapter Cable Microphone with 3.5mm Plug and Sticky Base 2x Side Brackets 8x Screws... -
Page 8: Control Panel
Basic Operation Control Panel Home button • Touch to switch between the home menu and the last selected source. • When powered on, touch and hold to turn the screen off. Voice assistant (Push-To-Talk) Touch to activate voice assistant. Enable Apple CarPlay, Android Auto or Bluetooth connection to use voice assistant. Power/Mute button •... -
Page 9: Unit Installation
Basic Operation Unit Installation Before you mount the unit into the dash, complete the wiring connection (P. 28 to 33). WARNING Dash board See the section "Installation Warnings". (P.5) Unit secured with the metal strap Single DIN Opening Installation Metal strap This section explains the installation if your vehicle has a single DIN opening (2"... - Page 10 Basic Operation Unit Installation Double DIN Opening Installation Attach the Display Detach the Display This section explains the installation if your As illustrated below, insert the supplied display As illustrated below, hold down two release vehicle has a double DIN opening (4" x 7"). into the head unit until it clicks.
- Page 11 Basic Operation Unit Installation Adjust positioning of the Display Tilt the Display Left and Right Adjust the Display Height The display can be horizontally tilted by 15 Hold the display then slide it up or down to When attaching the display to the unit, you can degrees.
-
Page 12: Use And Care For The Touchscreen
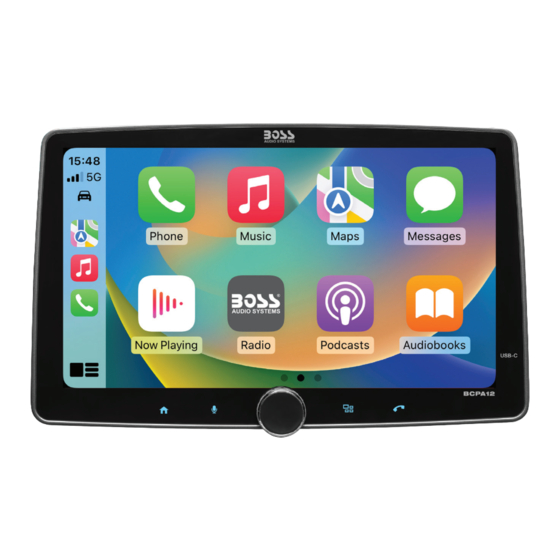
Basic Operation Use and Care for the Touchscreen USB-C This head unit utilizes a Capacitive Touchscreen, the same type that is used on high-end mobile devices. It should be used for and cared for like that type of device. As with all capacitive type technology, if your fingers are wet or sweaty, it will not function properly. Do not allow any sharp objects to come in contact with the screen. -
Page 13: First Time Setup
Basic Operation First Time Setup Set date and time manually Set RDS/RBDS Radio When you turn on the unit for the first time or reset the unit, the initial setup page will appear. Select [MANUAL] to access time, date and time The RDS/RBDS (Radio Broadcast Data System) zone settings. -
Page 14: Home Menu Description
Basic Operation Home Menu Description AM button USB button Switch to audio/video/photo Switch to AM radio playback from a USB flash drive FM button Bluetooth audio button Switch to FM radio Switch to Bluetooth audio streaming from a mobile phone AUX/AV input button Switch to audio/video playback from an external playback device... -
Page 15: Fm/Am Radio
FM/AM Radio Using FM/AM Radio Home Screen Preset a Radio Station 8 Touch to tune to a station in auto seek mode. Touch and hold to switch Touch and hold a preset number in the top bar between auto and manual seek mode. of the display. -
Page 16: Apple Carplay
Apple CarPlay Using CarPlay Connect your iPhone Use Voice Assistant Apple CarPlay Introduction Touch on the unit's front panel to activate USB cable connection will enable CarPlay CarPlay provides a smarter, safer way to use your feature. iPhone pairing is not needed. voice assistant, then speak your command. -
Page 17: Arrange Your Carplay Apps
> CarPlay, select this unit's name from > Contents & Privacy Restrictions > Allowed from CarPlay or added in CarPlay. the device list (shown below). Then select Apps > CarPlay. Customize to access CarPlay apps. BOSS AUDIO BCPA12... -
Page 18: Android Auto
Android Auto Using Android Auto Android Auto Introduction Connect your Android Device Use Voice Assistant Touch on the unit's front panel to activate Android Auto allows the apps on your Android USB cable connection will enable Android Auto phone to be loaded and displayed on the screen feature. -
Page 19: Bluetooth
• To turn on or off shuffle play, touch Bluetooth, and select this unit's name (BOSS After your mobile device is paired with the unit, AUDIO BCPA12) to pair. • To select a preset sound mode, touch the two will automatically reconnect each time they are turned on. -
Page 20: Make A Call
Bluetooth Handsfree Call Voice Assistant (Push-To-Talk) Make a Call View Connection Status • To use a keypad during a call, touch Touch [Device] tab to display the paired devices. From the home menu, touch • To switch to private mode, touch . -
Page 21: Usb
USB Playback Audio Playback Video Settings You can play audio, video and photos stored on a USB flash drive. Make sure your USB flash drive During video playback, touch to access the In the audio playback interface, playback control is connected to the front USB-C port or rear is displayed. -
Page 22: Other External Devices
Other External Devices Audio/Video Input Camera Playback AV Cable Connection Make sure front/rear camera connection is correctly made. (P.32) Using audio/video cables (not included), connect From the home menu, touch the RCA inputs ("L-IN", "R-IN" and "V-IN") on the Manual Camera Trigger unit's back to the RCA outputs (yellow/white/ Audio or video input screen is displayed. -
Page 23: Sound Settings
Sound Settings Set Sound Effects From the home menu, touch [SETTINGS] > [SUB Filter]: Adjust the cutoff frequency for the Touch to adjust right and left volume [Audio] > [EQ] to access sound settings. subwoofer. Only the frequencies below the one balance until you are pleased with the sound you set will be received to reproduce sound. -
Page 24: General Settings
System Settings General Settings From the home menu, touch [SETTINGS] > [Date]: Touch to access date setting screen. [SWC Fixed Settings]: Select this option if your Swipe the date field up and down to set year, vehicle needs a third-party SWC adapter (not [General] to access general settings. -
Page 25: Audio Settings
System Settings Audio Settings Startup Volume Setting From the home menu, touch [SETTINGS] > Initial volume will be the set volume if the set volume is less than the last used volume. [Audio] to access audio settings. [Main Volume]: Set a desired volume for main Initial volume will be the last used volume if audio (radio and media play) when the unit the set volume is greater than the last used... -
Page 26: Display Settings
System Settings Display Settings Bluetooth Setting Automatic Dimming Control From the home menu, touch [SETTINGS] > Make sure CarPlay or Android Auto is not [Display] to access display settings. connected to enable unit's Bluetooth. [Auto Dimming Control]: When enabled and the From the home menu, touch [SETTINGS] >... -
Page 27: Radio Settings
System Settings Radio Settings Camera Settings RDS/RBDS Information Display From the home menu, touch [SETTINGS] > From the home menu, touch [SETTINGS] > [Radio] to access radio settings. [Camera] to access camera settings. [RT DATA DISPLAY]: Enable or disable a service that allows FM stations to display additional information (i.e. -
Page 28: Parking Assist Guidelines Setting
System Settings Camera Settings System Information Parking Assist Guidelines Setting Resetting the Unit From the home menu, touch [SETTINGS] > [About] to access system information. [Parking Assist Guidelines]: Disable the parking [Factory Reset]: Reset the unit to the factory assist guidelines built in the unit if your rear settings. -
Page 29: Connections
Connections Power and Steering Wheel Control (SWC) Wiring Front View WARNING 10 9 8 3 2 1 See the section "Installation Warnings". (P.5) L-IN R-IN SUB1 SUB2 V-IN IMPORTANT NOTE RADIO 15A ATO Fuse Unused input/output wires need to be insulated 20 19 18 17 16 15 14 13 12 11 with tape, heat shrink, or crimp connectors. -
Page 30: Speaker Wiring
Connections Speaker Wiring Front View CAUTION 10 9 8 3 2 1 Do not chassis ground any speaker wire leads. L-IN Only use 4-8 Ω speakers. R-IN DO NOT use 1-3 Ω speakers. Do not bridge any of the channels. They are only to be wired in stereo mode. -
Page 31: Parking Brake Wiring
Connections Parking Brake Wiring Front View IMPORTANT NOTE 10 9 8 3 2 1 Video and photo playback can be enabled only L-IN when the parking brake input wire is connected to your vehicle, and the vehicle's parking brake R-IN is engaged. -
Page 32: Av/Radio
Connections AV/Radio L-IN R-IN FM/AM antenna (not included) SUB1 SUB2 V-IN RADIO CD/DVD, etc. Multi-channel/ Monoblock amplifier Pre-amp audio output AV input Front out (FL & FR) Audio in (L-IN & R-IN) Rear out (RL & RR) Video in (V-IN) Subwoofer out (SUB1 &... -
Page 33: Mic/Camera/Carplay/Android Auto
Connections Mic/Camera/CarPlay/Android Auto Microphone Input Front Camera Input Rear Camera Input L-IN R-IN Apple CarPlay Android Auto SUB1 SUB2 V-IN RADIO Connect the 3.5mm plug of the supplied Connect the lightning cable or USB cable of WARNING hands-free microphone for sound input your iPhone or Android device to enable use when using phone call or voice assistance of CarPlay or Android Auto. -
Page 34: Hands-Free Mic Installation
Connections Hands-Free Mic Installation Placement The unit comes with a hands-free microphone with sticky base and 10ft wire. The location of the microphone can vary from different vehicles due to layout, interior materials, etc. shaded areas are the recommended locations for best microphone performance. Items to look for before placement: •... - Page 35 Troubleshooting Important! If you have checked the points described in the list and the problem persists, turn off the vehicle for ten seconds then turn it back on again. If the problem still persists after restarting the unit, reset the unit by using a small pin to press the reset button on the bottom side of the display. If you still have problems after applying suggestions above, please contact our Customer Service for further assistance.
- Page 36 Specifications General Pre-amp output....2x Front (4V, full range) 2x Rear (4V, full range) Input voltage..........8.5 – 18 VDC Rear USB port.....USB-A (2.0, High Speed) 2x Sub (mono, 4V, LPF) 14.4 VDC (Nominal) CarPlay/Android Auto Sub LPF..........50/80/120/160 Hz Charging (1.5A) Current consumption .........
- Page 37 0623...
Need help?
Do you have a question about the BCPA12 and is the answer not in the manual?
Questions and answers