Table of Contents
Advertisement
Assembly Instructions
& User's Manual
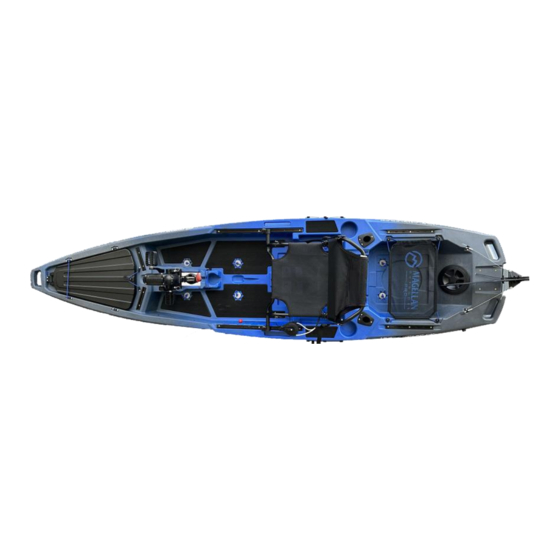
Magellan Outdoors Pro
10'6" Angler Kayak PD
176910
Please keep this instruction manual for future reference
Customer Service: (888) 922-2336
7:00 am to 12:00 am CST (daily)
Live Chat at: www.academy.com
Email:
customerservice@academy.com
Or
Kayak Distribution Customer Service: (450) 812-3613
9:00 am to 4:00 pm CST (Mon-Fri)
Email:
help@kayakdistribution.com
Advertisement
Table of Contents

Summary of Contents for Magellan 176910
- Page 1 Assembly Instructions & User’s Manual Magellan Outdoors Pro 10’6” Angler Kayak PD 176910 Please keep this instruction manual for future reference Customer Service: (888) 922-2336 7:00 am to 12:00 am CST (daily) Live Chat at: www.academy.com Email: customerservice@academy.com Kayak Distribution Customer Service: (450) 812-3613...
-
Page 2: Table Of Contents
Table of Contents Warnings………………………………………………………………… US Coast Guard Regulations…………………………………………. What to Wear.…………………………………………………………... On-Water Essentials…………………………………………………… General Kayak Info…………………………………………………..… Parts List………………………………………………………………… Tools Required..………………………………………………………… Assembly And Use Instructions………………………………………. Care, Maintenance & Repair…………………………………..……… Impulse Drive Replacement Parts Schematic…………..…………… Long Term Storage…………………………………………………….. Transporting…………………………………………………………….. Warranty Information…………………………………………………… Note: Registration is required to activate your warranty. Go to www.paddlekd.com/boat-registration to register your... -
Page 3: Warnings
Warnings ADDLESPORTS CAN BE VERY DANGEROUS AND PHYSICALLY DEMANDING USER OF THIS PRODUCT SHOULD UNDERSTAND THAT PARTICIPATING IN PADDLESPORTS MAY INVOLVE SERIOUS INJURY OR DEATH BSERVE THE FOLLOWING SAFETY STANDARDS WHENEVER USING THIS PRODUCT Get paddle sports instructions specific to this type of craft. Obtain certified first aid training and carry first aid safety/rescue equipment. -
Page 4: Coast Guard Regulations
Welcome to Paddling / Kayaking ✓ What are the Mandatory Kayak Accessories/Equipment in USA? In the United States boating regulations vary from state to state, but on a national level the US Coast Guard requires that: • All recreational boats must carry one wearable, readily-accessible, in good condition, USCG-approved personal floatation device for each person on board. -
Page 5: What To Wear
Welcome to Paddling / Kayaking ✓ What clothing should I wear paddling / kayaking? When selecting what to wear, consider the environment you are in or could be in. As with many outdoor activities you’ll want to use the quick dry layer system, wearing distinct layers of clothing rather than one or two thick layers. -
Page 6: On-Water Essentials
Taking the Essentials Taking the Essentials - The basic survival items you should have in ANY outdoors situation whether the duration of your trip is few hours or few days to ensure a fun, safe, and more comfortable adventure. • Flashlight and spare batteries - A large number of unplanned overnights could be prevented by carrying a flashlight or headlamp. - Page 7 Taking the Essentials • Navigation/communication aids - Carry maps and a compass at minimum. A Global Positioning System (GPS) receiver, cellular phone, satellite phone, handheld radio or other alerting devices—all with fully charged batteries—are also valuable tools. Know how to use these items, but don’t over-rely on them and carry extra batteries. A lot of gadgets have been found on bodies.
- Page 8 Taking the Essentials Summary of Essentials. Take equipment specific to paddling: • Life Jacket or PFD • Buoyant heaving line • Sound signaling device • Bailer or bilge pump • Proper clothing including a dry suit, wet suit, or other cold-water gear •...
-
Page 9: General Kayak Info
Basic Parts of a Pedal Drive Sit-on-Top (SOT) Kayak Scuppers Scuppers are holes that go from the deck of a sit-on-top kayak through the hull. They’re sealed so water can’t enter the inside of the hull and allow any water that splashes onto the deck to drain back out of the kayak. -
Page 10: Parts List
Parts List Pedal Drive System Qty 1 Pedal & Crank Arm Qty 2 Pedal Screw M8 Qty 2 Splash Guard Qty 1 Seat Bottom Qty 1 Seat Back Qty1 Rudder Bracket Qty 1 M6 x 16mm Rudder Bracket Screw Qty 2 Rudder Qty 1 M6 x 112mm Hex Head Cap Screw... -
Page 11: Tools Required
Tools Required Phillips Screwdriver (Not Included) Qty 1 M4 Allen Wrench (Included) Qty 1 M6 Allen Wrench (Included) Qty 1 M8 Allen Wrench (Included) Qty 1 8mm Wrench (Not Included) Qty 1 10mm Wrench (Not Included) Qty 1 Page 11 of 29... -
Page 12: Assembly And Use Instructions
Seat Assembly Instructions Step 1: Remove seat from packaging and identify the seat bottom (E1) and seat back (E2) The seat back (E2) clamps onto seat bottom (E1) via plastic clamps on ends of seat back (see circles below) Seat Back Seat Bottom Step 2: Inspect the sides of the seat bottom frame and... - Page 13 Seat Assembly Instructions (continued) Step 3: Place the seat on the kayak. Loosen the thumbscrews on both sides of seat until there is a visible gap between the track nut and the bottom of the plastic seat track fitting. Align the track nuts with the opening in the center of the tracks on both sides of the kayak.
- Page 14 Installing the Rudder Control Knob Step : 1 Loosen the thumbscrew on the rudder control handle. With the handle pointed to the front of the kayak, insert the rectangular nut into the opening. Press the opposite end of the steering control handle down until it pops into the rail Step 2: Slide the steering control handle forward or...
- Page 15 Installing the Rudder Step 1: Remove the rudder from the packaging. Remove the nut and M6x116mm hex head cap screw, and set aside for later. Step 2: Locate the two threaded inserts on the stern of the kayak (Fig.1) and mount the rudder bracket using two M6x16mm screws.
- Page 16 Installing the Rudder (continued) Step 3: Mount the rudder on the back of the kayak while making sure the rudder lift lines (black rope) are straight and not twisted. Align the holes in the rudder bracket with holes the holes in the rudder block, insert M6x116mm hex head cap screw through the holes and tighten with M6 nut.
- Page 17 Pedal Drive Assembly Instructions Step 1: Install the Splash Shield Locate the splash shield mounting holes on the drive shaft. There are 3 holes and 3 plugs on each side. The splash shield can be positioned in any of these holes, we suggest mounting the splash shield to the center holes.
- Page 18 Pedal Drive Assembly Instructions (Continued) Step 3: Figure 2 Installing The Pedal Onto Drive Locate the bag containing the pedals and remove the two screws. Identify the Left and Right pedal crank screws which are marked with “L” and “R” on the socket of each screw (see Figure 2) Identify the Left and Right pedals which are marked with “L”...
- Page 19 Deploying the Pedal Drive Step 1: Installing The Pedal Onto Drive Insert the drive into the drive slot. Lift the pin and turn the locking block 90 degrees to secure the drive in place. Step 2: The locking block is pre-adjusted for the optimal position.
- Page 20 Stowing the Pedal Drive Step 1: Look through the splash plate to align the propeller so that it is parallel to the drive shaft (fits through the hole on the kayak) Step 2: Pull up the ring to release the locking block, then twist the block 90 degrees.
- Page 21 Stowing the Pedal Drive (continued) Step 3: Push foam insert in the hole while drive is stowed. Step 4: Insert the drive into the recesses molded into the kayak deck (shown below) and secure it to the deck with the bungee cord retaining strap Page 21 of 29...
- Page 22 Rudder Operation Deploying the Rudder: Pull the rope with black pull knob toward the bow (forward). Retracting the Rudder: Pull the rope with red pull knob toward the bow (forward). Tip: Pulling the pull knob upward (away from the water) may be difficult. For easier operation pull directly forward, toward the bow of the boat.
-
Page 23: Care, Maintenance & Repair
Basic Kayak Care and Maintenance We’ve put a lot of time and thought into providing you with a quality craft and we stand behind our product 100%. By reading your kayak’s warranty agreement and following these few simple maintenance steps, you should have years of problem-free fun ahead: •... - Page 24 Pedal Drive Care and Maintenance Maintaining your pedal drive is simple and not much effort is involved in keeping it operating smoothly and reliably for years to come. Although the pedal drive uses marine grade stainless steel that resists corrosion, rust and degradation are still possible if care is not taken.
-
Page 25: Impulse Drive Replacement Parts Schematic
Impulse Drive Replacement Parts Schematic Sub-Assemblies & External Parts Drain Plug # 21105 Handle # 21104 Upper Assembly # K0082-1 Upper Shell # Z0327 Mount Plate # Z0352 Pedal & Crank Lock Pin Assembly with # Z0336 Hardware (set) Handle # 21145 # 21104 Middle... -
Page 26: Long Term Storage
Long Term Storage • For long-term storage and to prevent hull deformation, your kayak should be kept on its side or upside down, on a padded rack with bars placed on or near the bulkheads. • Take care to protect it from long–term exposure to the sun or extreme heat, which can degrade any material and cause permanent damage. -
Page 27: Transporting
Transporting Kayak • When transporting your kayak / SUP, take care to avoid potential damage or distortion to the hull. A good rack system allows you to transport your craft on your vehicle safely and securely. When transporting a composite FG or thermoformed ABS, you will want to add some foam padding to your roof rack or invest in a padded cradle. -
Page 28: Warranty Information
Warranty Information At Kayak Distribution (Riot Kayaks, Boreal Design, Cobra Kayaks, Azul Kayaks, Riot SUP’s and Beluga Outdoor Gear) we stand behind our products with a 5-year limited warranty in North America. If there is a problem with your kayak our goal is to solve the issue quickly and efficiently, so you can get back on the water and enjoy the rest of the season. - Page 29 Warranty Information The warranty agreement obliges the distributor only during the period of coverage (begins on the date of the original warranty activation and expires at the end of the original warranty period specified on the warranty registration form) to repair or replace, at its discretion, the defective parts at either its distribution warehouse or through a designated, authorized dealer’s store.
Need help?
Do you have a question about the 176910 and is the answer not in the manual?
Questions and answers