Table of Contents
Advertisement
Quick Links
Advertisement
Table of Contents

Subscribe to Our Youtube Channel
Related Manuals for Key Digital KD-WP8-3

Summary of Contents for Key Digital KD-WP8-3
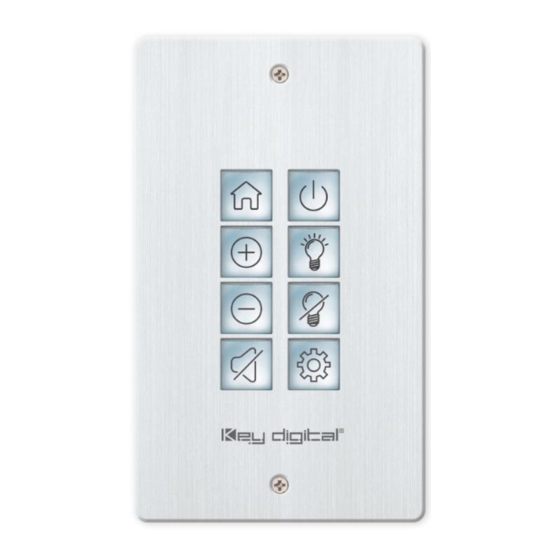
- Page 1 Rev 1.0 – Jan, 2023 Setup & Programming Guide KD-WP8-3 8 Button Programmable IP, IR, RS232 Wall Plate Control Keypad with PoE for KDPlug & Present™, Compass Control® Pro, and Third-Party Systems via Open API Street Mt. Vernon, NY 10553 • www.keydigital.com...
-
Page 2: Table Of Contents
USER VIRTUAL KEYPAD ............................... 39 LED INDICATOR TABLE ................................. 41 TCP/IP CONTROL COMMANDS ............................40 IR & RS232 PORT INFO……………………………………………………………………………………………………………….41 KD-WP8-3 IN COMPASS CONTROL PRO SYSTEMS ……………………………………………….…………………….……..42 OPEN API CONTROL OF IR & RS232 PORTS……………………………………………………………………………………..44 SPECIFICATIONS ................................... 45 WARRANTY INFORMATION ..............................49 PRODUCT WARNINGS &... -
Page 3: About Kd-Wp8-3
GUI to send commands over the network to IP controlled devices or via the built-in RS232 and IR control ports. KD-WP8-3 may also be integrated with Key Digital Master Controllers to control additional IR, RS232 and voltage relay devices. Button events may be configured on the press, release, toggle, or press &... -
Page 4: Application Diagrams
KD-WP8-3 IP Device Control: KD-WP8-3 sends commands directly to the devices via the network. KD-WP8-3 Built-In Control: KD-WP8-3 controls 1 IR and 1 RS232 device via 4pin Phoenix on rear. For IP control, KD-WP8-3 sends commands directly to the devices via the network. - Page 5 Rev 1.0 – Feb, 2023 Back to Top Additional IP, IR, RS, Relay Control: KD-WP8-3 controls 1 IR and 1 RS232 device via 4-pin Phoenix port. For IP control, KD-WP8-3 sends commands directly to the devices via the network. For additional IR, RS232, and Relay control, KD-WP8-3 sends command string and burst info to supported KD Master Controller.
-
Page 6: Quick Setup Guide
3. Place outer button cap (clear) on top of inner button cap. Ensure the icon placement is still centered. a. IMPORTANT: Tab and slot must be oriented on Left and Right sides of button. 4. Place button onto desired space on KD-WP8-3 with light downward pressure until button clicks into place. -
Page 7: Connect
Rev 1.0 – Feb, 2023 Back to Top Connect 1. Connect KD-WP8-3 to PoE providing network switch or PoE injector. 2. Connect USB cable from service port into programming PC. This will be used for initial setup of desired IP address. -
Page 8: Configure
1. Set the desired IP Address and Control Mode via KDMS Pro a. Open KDMS Pro software and perform a USB Scan, ensuring that KD-WP8-3 is connected to PC via USB cable. b. Select YES, when asked if your device is a Master Controller. - Page 9 Rev 1.0 – Feb, 2023 Back to Top IMPORTANT: KD-WP8-3’s IR and RS232 ports cannot simultaneously run in both Standard / Compass mode and Open API mode. In Open API mode, the built-in IR & RS232 commands programmed in web UI and Compass will NOT run. However, IP commands programmed into KD- WP8-3 may run regardless of the selected control mode.
- Page 10 Connect to KD-WP8-3 via LAN with web UI. a. Open web browser and type in the IP address of the KD-WP8-3 as set in step 1 or use default IP address 192.168.1.239 if you did not adjust the IP address.
- Page 11 Key Combo used to lock & unlock keypad. This is helpful for preventing unauthorized use. Soft Reset may be used to wipe all programming and settings except network and password. g. Reboot for power cycling KD-WP8-3 without physically disconnecting LAN/PoE cable. Street Mt. Vernon, NY 10553 • www.keydigital.com...
- Page 12 Note: Configuration Step 1 uses KDMS Pro software for applying desired IP settings for ease of connecting via USB. Once your computer is on the same network with KD-WP8-3 it is typically easiest to do all device settings and programming using web UI.
- Page 13 Rev 1.0 – Feb, 2023 Back to Top 5. (Optional) Import Project is used when loading a completed project file where multiple identical / similar systems are installed. Street Mt. Vernon, NY 10553 • www.keydigital.com 521 East 3...
- Page 14 Rev 1.0 – Feb, 2023 Back to Top 6. Apply Button & Variable Settings. See figure 6a for Button Settings and options for each. a. Button Name: Displayed in the virtual keypad and helps the Programmer keep button events organized. i.
- Page 15 Rev 1.0 – Feb, 2023 Back to Top Figure 6a: Button Settings If Toggle is selected: If Hold for Send is selected: If Hold for Repeat is selected: Street Mt. Vernon, NY 10553 • www.keydigital.com 521 East 3...
- Page 16 Rev 1.0 – Feb, 2023 Back to Top Variable Table. (Optional) You may utilize up to 8 integer variables to set values on button presses and reference those values in commands. See h. Variable Name: Default value is VariableN (1-8). May be max 10 characters. Must be unique. Default Value: Default setting is 0.
- Page 17 Rev 1.0 – Feb, 2023 Back to Top 7. Program Events (aka Commands) for each button. IMPORTANT NOTES: • Many device commands can be found in the IR, RS232 or IP Device Database manager software downloaded HERE. Please refer to the owner’s manual or API document of the controlled device for command info if not.
- Page 18 Variable Control see below. 4) Built-In IR executes IR commands from the built-in IR port on the rear of KD-WP8-3. The IR command can be pasted from any Pronto Hex document or from Key Digital’s IR Manager. An adjustable delay can be added after the command is sent.
- Page 19 Rev 1.0 – Feb, 2023 Back to Top bps. String (ASCII) or HEX data type may be selected, and command info may be entered into the Data cell including \r for carriage return and \n for line feed. An adjustable delay can be added after the command is sent.
- Page 20 Rev 1.0 – Feb, 2023 Back to Top Figure 7c1: LED Addition Event example and options. Figure 7c2a: TCP and UDP IP Command Event example and options. Street Mt. Vernon, NY 10553 • www.keydigital.com 521 East 3...
- Page 21 Telnet IP control should be utilized when trying to control a device which allows you to connect, but then requires a username and password before allowing KD-WP8-3 to control the device. TCP or UDP type control should be selected otherwise.
- Page 22 Rev 1.0 – Feb, 2023 Back to Top Figure 7c3: Delay Addition Event example and options. Figure 7c4: Built-In IR Event example and options. IR Data pasted from a Pronto Hex Sheet. See figure 7c4b. Figure 7c4b: Example Pronto Hex IR sheet collected from mfr.
- Page 23 Rev 1.0 – Feb, 2023 Back to Top Figure 7c5: Built-In RS232 Event example and options. RS232 Data is pasted from a Key Digital RS Device Database. See figure 7c5b. Figure 7c5b: Browsing Key Digital’s RS232 Database Manager for the command data used in the above example.
- Page 24 Rev 1.0 – Feb, 2023 Back to Top Figure 7c6: IR KD-CX/922 Event example and options. IR Data pasted from same Pronto Hex sheet as above figure 7c4b. Street Mt. Vernon, NY 10553 • www.keydigital.com 521 East 3...
- Page 25 Rev 1.0 – Feb, 2023 Back to Top Figure 7c7: IR KD-MC1000 Event example and options. IR Data pasted from Key Digital IR Device Database. See figure 7c7b. Figure 7c7b: Browsing Key Digital’s IR Database Manager for the command data used in above example.
- Page 26 Rev 1.0 – Feb, 2023 Back to Top Figure 7c8: RS232 KD-CX/922 Event example and options. RS232 Data pasted from same Pronto Hex sheet as above figure 7c5b. Street Mt. Vernon, NY 10553 • www.keydigital.com 521 East 3...
- Page 27 Figure 7c9: RS232 KD-MC1000 Event example and options. Figure 7c9b: Example RS232 command info collected from Owner’s Manual of the controlled device. For HEX data type, KD-WP8-3 requires each byte to be separated by a comma, without any spaces between byte.
- Page 28 Rev 1.0 – Feb, 2023 Back to Top Figure 7c10: Relay KD-MC1000 Event example and options. Figure 7c11: Variable Control. After setting the Variable’s name and default values in the Variable table, you may set the variable’s value on your buttons, then reference the variable in your commands using #dN within your command data, where N = the variable number (1-8).
- Page 29 Rev 1.0 – Feb, 2023 Back to Top Figure 7z: ASCII IP or RS232 event which must be converted from ASCII to HEX because of special characters (i.e. %) Street Mt. Vernon, NY 10553 • www.keydigital.com 521 East 3...
-
Page 30: Common Button & Event Examples
Rev 1.0 – Feb, 2023 Back to Top Common Button & Event Examples Example 1: Toggle Button. The Button must first be configured as a Toggle button type in the button configuration step. Unique events may be programmed on the First and Second Button Actions. Street Mt. - Page 31 Rev 1.0 – Feb, 2023 Back to Top Example 2: Hold for Repeat. The Button must first be configured for the Hold for Repeat Event and the hold time must be specified in the button configuration step. With Same as Press applied, there is no need to program the repeated event. If unique repeated events are required, de-select Same as Press checkbox and program the Press and Hold for Repeat button actions individually.
- Page 32 Rev 1.0 – Feb, 2023 Back to Top Example 3: Hold for Send. The Button must first be configured for the Hold for Send Event and the hold time must be specified in the button configuration step. In this example, the user must hold the button for 3.0 seconds before the Hold for Send event is executed.
- Page 33 Press Export Project to export a .kwp project file for backup on your computer so that it may be used for loading into another KD-WP8-3. h. Press Load to Keypad to load the programmed file into the KD-WP8-3. After successful project load and connectivity of your controlled device(s) and (optional) Key Digital Master Controllers, you may now use KD-WP8-3! Street Mt.
- Page 34 9. Virtual Keypad (Pro) The Pro Virtual Keypad allows complete control as if you were physically pressing the KD-WP8-3 buttons. In addition to two-way buttons, the Pro Virtual Keypad also provides a log of executed events. All LED feedback in the Virtual Keypad is identical to the physical keypad.
- Page 35 Back to Top 10. (Optional) Firmware IMPORTANT: Firmware updates will wipe the KD-WP8-3 of its current project load. Please export a project backup file before performing firmware updates and re-load the file after completion. Consult with Key Digital Technical Support before updating. Hard-wired network connection is recommended.
-
Page 36: Control
Rev 1.0 – Feb, 2023 Back to Top Control IP Device Control - For IP Control, KD-WP8-3 sends commands directly to the devices via the network. No Master Controller necessary. • Ensure that the KD-WP8-3 is on the same network as the device you are controlling via IP. - Page 37 Rev 1.0 – Feb, 2023 Back to Top IR, RS, Relay Control: KD-WP8-3 features 1 built-in IR and 1 built-in RS232 port for device control. For additional IR, RS232, or Relay controlled devices, KD- WP8-3 sends command string and burst info to any amount KD Master Controllers.
-
Page 38: Installation In Gang Box
2. Connect network cable from PoE network switch or PoE injector into KD- WP8-3 LAN (POE) port. 3. Insert KD-WP8-3 into the gang box, ensure it is right-side-up by confirming with the wording “TOP” printed on keypad. Then, fasten by using the long mounting screws. -
Page 39: User Virtual Keypad
The Virtual Keypad allows complete control as if you were physically pressing the KD-WP8-3 buttons. The virtual keypad buttons display keypad & button naming, and blinks according to the LED indicator table for two- way feedback identical to the physical keypad. A similar virtual keypad is available using the Key Digital iOS app. - Page 40 Rev 1.0 – Feb, 2023 Back to Top c. A simplified end-user GUI for the virtual keypad is shown after login. (1) Device name and (2) Button names are displayed. d. When the keypad is active (connected), the background color is light blue. e.
-
Page 41: Led Indicator Table
Rev 1.0 – Feb, 2023 Back to Top LED Indicator Table Status Description Image Bootup LEDs circle Blue 5 times. (Normal mode) After finishing bootup, all LEDs flash Blue twice quickly. Note: Bootup takes approx 10 seconds. Bootup LEDs circle 2 times. - Page 42 Event Execute Failure When a button is pressed on a Keypad with project loaded, that button LED will blink Red twice if KD-WP8-3 cannot reach the controlled device. The problem may be caused by an incorrect IP address or IP Port, or that the controlled device has disconnected from the network.
-
Page 43: Tcp/Ip Control Commands
Carriage Return required at end of each string. o Commands are case-sensitive. o After a command is received, a return message is sent from KD-WP8-3 with a carriage return (\r) at the end of the response string. o KWPxPR\r is the most commonly used command, executing the Press & Release events from a single command. - Page 44 RS232 port properties are established using KDMS Pro if set to Open API mode. • IMPORTANT: KD-WP8-3’s IR and RS232 ports cannot simultaneously run in both Standard / Compass mode and Open API mode. In Open API mode, built-in IR & RS232 commands programmed in web UI Street Mt.
-
Page 45: Kd-Wp8-3 In Compass Control Pro Systems
The Compass Control iPad must use app version 2.0.17 or later. 1. Add KD-WP8-3 as a master controller ONLY IF you will control an IR and/or RS232 device from the built-in IR RS232 ports. a. Go to PROGRAM → SETUP CONTROLLERS. Choose KD-WP8-2 from Master Controllers list and press ADD MASTER CONTROLLER button. - Page 46 Rev 1.0 – Feb, 2023 Back to Top 2. Add KD-WP8-2 module ONLY IF you wish to have the KD-WP8-3 Virtual User Keypad in the Compass Control UI. a. Download module from the Compass Modules Page, save in desired location, and extract zip folder.
-
Page 47: Open Api Control Of Ir & Rs232 Ports
Open API Control of IR & RS232 Ports After using KDMS Pro to select KeyCode Open API control mode KD-WP8-3 will listen on a dedicated TCP port for that I/O port. The control system / user application can then make a TCP connection to that port and send data to that I/O port. -
Page 48: Specifications
Controlling IR Devices Send IR commands to KD-WP8-3 over IP on port 4581 (or the updated IP port # if changed in KDMS Pro). Collect the IR command Hex info using Key Digital IR Database Manager v2.0.6 or later. Navigate to the desired make &... -
Page 49: Warranty Information
Exposure to rain or moisture Power Supply Use: You MUST use the Power Supply provided with your unit or you VOID the Key Digital® Warranty and risk damage to your unit and associated equipment. Street Mt. Vernon, NY 10553 • www.keydigital.com... - Page 50 Rev 1.0 – Feb, 2023 Back to Top Street Mt. Vernon, NY 10553 • www.keydigital.com 521 East 3...
Need help?
Do you have a question about the KD-WP8-3 and is the answer not in the manual?
Questions and answers