
Related Manuals for KING BIRD 1305G

Summary of Contents for KING BIRD 1305G
- Page 1 USER MANUAL for KING BIRD Greenhouse 15' x 6.6' x 6.6' (Model: 1305G & 1305W & 1355G & 1355W) Please read, understand, and practice the guidelines in this user manual before use, and keep it for future reference.
-
Page 3: Table Of Contents
Table of Contents Soil Foundation Preparation ........... 3 15’ x 6.6’ x 6.6’ Greenhouse ............. 5 (Model #1305G/#1305W) ..11 15' x 6.6' x 6.6' Greenhouse (With watering kit) (Model #1355G/#1355W) Maintenance ..................19 Warranty .................... 19... - Page 4 Add the following email address to your CONTACT LIST in case of any blocking. Email: maxlead.us@gmail.com Tel: 302-261-5366 1305G Size: 15 x 6.6 X 6.6 ft About Quictent About Quictent ................2 1302W ....................
-
Page 5: Soil Foundation Preparation
So far preparing a foundation for greenhouses is the most practical way to extend the green- house lifespan. Consequently, we at KING BIRD highly recommend you do this right from the beginning. In this chapter, we will introduce the details to prepare a soil foundation. - Page 6 Before you move on with the installation, we have some tips which ONLY apply to the instal- lation with a prepared soil foundation. Tip 1: Please make sure the whole frame stands firmly. A tilted or wobbly structure is NOT allowed. After laying the frame poles into the foundation, please make sure the soil around is Tip 2: firm and compact.
-
Page 7: (Model #1305G/#1305W)
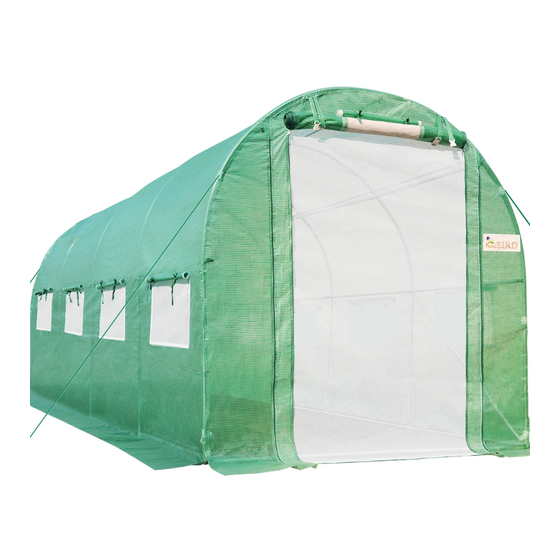
(#4 & #5) and the poles (#6 & #6-1); the longer (M6x60mm) ones apply to all the other joints. You can tell the model #1305G from the model #1305W by the Cover (#9). Model #1305G has a green cover while the cover for Model #1305W is white. - Page 8 Vertical Pole with 1 Male End (40.2”) Vertical Pole with 2 Female Ends (40.2 ”) Cover (A Green Cover for #1305G;A White Cover for #1305W Screw Kit (4 * M6x30mm Screws + 35 * M6x60mm Screws) Tool Kit (Tools included are...
- Page 9 Assembly Steps Before the assembly, please check to make sure that you have all parts listed on the Parts List. The steps below are for a regular assembly, that is, without a prepared foundation. For more details about the foundation preparation, please refer to the previous chapter Soil Foundation Preparation carefully.
- Page 10 Frame Lay the bottom of the frame. As shown, you’ll use the following poles: Step 1 2 x Part #2 6 x Part #3 2 x Part #4 2 x Part #5 Reminder: You are NOT required to tighten all the joints in this step. Attach the poles (#6, #6-1, #7, and #8) to the bottom frame.
- Page 11 Form the tunnel. The poles you’ll use are: Step 3 20 x Part #1 2 x Part #2 6 x Part #3 Reminders 1. To keep a balance, please firstly finish assembling the first two layers of the top tunnel from the opening.
- Page 12 Put on and secure the Cover (#9). Step 5 Reminders a) Equip the joint of frames with the 39 x Screw Caps (#14) and the 14 x Pole Plugs (#15). b) Unzip the cover, raise it over the frame top (either from the left side or the right side), carefully drape it on the assembled frame, and finally fix it to the frame with built-in Velcro tapes.
- Page 13 15 x 6.6 x 6.6 FT Greenhouse w/ Watering Kit (Model #1355G /#1355W) For more details about the assembly,please scan the QR code on the Transparency Program card to watch the installation video. Please Check the after-sales contact information on the card. Parts List You’ll receive one (1) box for this model.
- Page 14 Quantity Part Diagram Description (PCS) Arch Pole (31.3”) Pole with 2 Female Ends (45”) Pole with Male & Female End (45”) Floor Pole with 1 Male End (39.7”) Floor Pole with 1 Female End (39.7”) Long Diagonal Pole (38.8”) #6-1 Short Diagonal Pole (22”)...
- Page 15 Assembly Steps Before the assembly, please check to make sure that you have all parts listed on the Parts List. The steps below are for a regular assembly, that is, without a prepared foundation. For more details about the foundation preparation, please refer to the previous chapter Soil Foundation Preparation carefully.
- Page 16 Frame Lay the bottom of the frame. As shown, you’ll use the following poles: Step 1 2 x Part #2 6 x Part #3 2 x Part #4 2 x Part #5 Reminder: You are NOT required to tighten all the joints in this step. Step 2 Attach the poles (#6, #6-1, #7, and #8) to the bottom frame.
- Page 17 Step 3 Form the tunnel. The poles you’ll use are: 20 x Part #1 2 x Part #2 6 x Part #3 Reminders 1. To keep a balance, please firstly finish assembling the first two layers of the top tunnel from the opening.
- Page 18 Step 5 Install the Watering Kit to the greenhouse. Reminders Compatible faucet size: all common sizes. Please mind that there are 2 gaskets inside the converter, you can remove the innermost one to fit the 20mm faucet. When using for the first time, the water pressure should be small to high to check whether the faucet is tightened.
- Page 19 c)Connect the Sprinklers (#B) and water hose with the Connectors (#C). d)Use the Stainless Steel Clamps (#F) to secure the Watering Kit on the top bars.
- Page 20 Put on and secure the Cover (#9). Step 6 Reminders a) Equip the joint of frames with the 22 x Screw Caps (#14) and the 10 x Pole Plugs (#15). b) Unzip the cover, raise it over the frame top (either from the left side or the right side), carefully drape it on the assembled frame, and finally fix it to the frame with built-in Velcro tapes.
-
Page 21: Maintenance
Required parts (name, quantity, and part number) Pictures (or video clips, if applicable) Warning Restructuring the product without written permission from KING BIRD in advance would VOID the warranty. Damages due to improper use in severe weather conditions, including but not limited to... - Page 22 KB2309083530...
Need help?
Do you have a question about the 1305G and is the answer not in the manual?
Questions and answers
I need help
i need to download instructions for model 1353