Table of Contents
Advertisement
Quick Links
Advertisement
Table of Contents

Summary of Contents for Wellav CMP320
- Page 1 CMP320 Media Platform User Guide V1.1-W...
- Page 2 CMP320 User Guide Revision History Date Version Description Author 2019-09-02 First Draft 2024-03-20 Fix some editing errors and format errors This guide contains some symbols to call your attention. The DANGER symbol calls your attention to a situation that, if ignored, may cause DANGER physical harm to the user.
- Page 3 CMP320 User Guide Safety Instructions ⚫ Read these instructions ⚫ Keep these instructions ⚫ Follow all instructions ⚫ Heed all warnings ⚫ Do not use this unit near water. ⚫ Only use a damp cloth to clean chassis ⚫ Do not install near any heat sources such as radiators, heat registers, stoves, or other apparatus (including amplifiers) that produce heat Do not block any ventilation openings.
-
Page 4: Table Of Contents
CMP320 User Guide Content 1 Chassis Overview .......................... 6 1.1 Front Panel .......................... 6 1.2 Back Panel .......................... 6 2 Installation ............................. 7 2.1 Rack Installation ........................7 2.2 AC Power Connection ......................8 3 Web GUI ............................8 3.1 Web GUI Overview ......................8 3.1.1 Connect the Management Port .................. - Page 5 CMP320 User Guide 3.5.3 Password ......................... 18 3.5.4 Log Manage ......................19 4 Appendices ..........................20 Appendix A - Abbreviations ...................... 20 Appendix B- Warranty ......................22 Appendix C- After-Sales Support ..................... 22...
-
Page 6: Chassis Overview
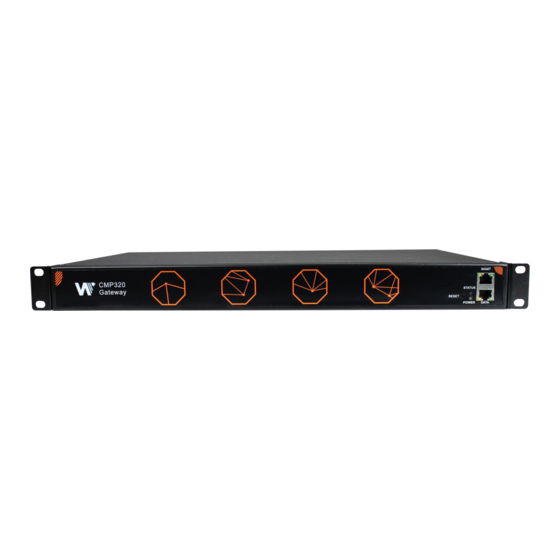
1 Chassis Overview 1.1 Front Panel CMP320 series multi-channel DVB-S/S2 Gateway is designed for both cost-effective commercial TV systems and traditional DTV systems. The device supports 8/16 DVB-S/S2 input, 128 IP outputs. Due to its compact design and powerful function, it’s widely used for such commercial market as... -
Page 7: Installation
2 Installation 2.1 Rack Installation The CMP320 is designed to be mounted in a standard 19” rack. It takes 1RU of rack space. To install it into a rack, please use the following steps: 1. Determine the desired position in the rack for the CMP320. Make sure that the air intake on the top of the unit and the exhausts on the back of the unit will not be blocked. -
Page 8: Ac Power Connection
Please only use the supplied 3-prong power connector or one with equal specifications. NEVER tamper with or remove the grounding pin. This could cause damage to CMP320, personnel, or property. Make sure the power outlet is switched off before plug or unplug the power cable from the panel of CMP320. -
Page 9: Log Into The Web Gui
Check the physical connection by ping command. 3.1.2 Log into the Web GUI Enter the CMP320 baseboard IP address into the URL field of any recommended Web browsers (IE8 or above, Firefox, and Google Chrome) to access the login page. The default user name and... -
Page 10: Status
After a successful login, we will always enter the status overview page, where we can check the device status. Device Status page Explain CMP320’s front panel and back panel. We use only IE, Firefox and Chrome for testing procedures. If use other browsers, like Microsoft Edge, you may encounter incomplete UI layouts, and configure setting in these browsers may lead to errors. -
Page 11: Device Information
Device Information page shows the firmware version, software version, and hardware version of baseboard. 3.2.3 Input There are 4 embedded DVB-S2-FAT modules in CMP320. Each module has 4 channels. Select one module on top to see detailed information, including locked status, total bitrate, effective bitrate, RF level, TS analysis and service list. -
Page 12: Output
CMP320 User Guide ⚫ Service List Click the service name to check the detail info of this service. 3.2.4 Output This page shows the following information: total bitrate, effective bitrate, bitrate status, IP address and port. TS analysis and service list function are also available. -
Page 13: Parameter Settings
CMP320 User Guide 3.3 Parameter Settings 3.3.1 Input Set the DVB-S2 signal receiving parameters in this page, including satellite frequency, symbol rate, LNB frequency. Click the Apply button in the right side to make the change take effect. -
Page 14: Output
CMP320 User Guide 3.3.2 Output To make the configuration of IP output parameters, need to set the TS sending interval, destination IP address and port, protocol (UDP/RTP), TS packets per IP packet, output bitrate. Click Apply to make the setting take effect. -
Page 15: Service Configuration
CMP320 User Guide To batch set the IP input parameters, check the parameter box to make the modification. Click Apply to make the setting take effect. 3.4 Service Configuration 3.4.1 Input Service To set input source streaming out, make the configuration of the destination in this page. -
Page 16: Output Service
CMP320 User Guide ➢ Multiplex services: Click the service line setting icon ( ) to make the certain service output from certain channel combining with other services. After making configuration of output destination, click Apply to make it take effect. The destination channel will be displayed in the channel/service line. - Page 17 CMP320 User Guide ➢ TS setting: Click TS line (the blue area) to make the modification of Original Network ID, TS ID and each Service ID, Service Name, and Service Provider. If the TS stream is bypassed, any information can’t be modified.
-
Page 18: System Settings
CMP320 User Guide 3.5 System Settings 3.5.1 Network In Network page, we can configure the IP address, subnet mask and default gateway of both management port and data port. Click the Apply button in the right side to make the change take effect. -
Page 19: Log Manage
CMP320 User Guide 3.5.4 Log Manage Turn on Enable Real-time Log switch, see the real time log message and level below. ➢ Click to clear all log messages on the screen. ➢ Click to delete all log information. ➢ Click to export log information. -
Page 20: Appendices
CMP320 User Guide 4 Appendices Appendix A - Abbreviations Advanced Audio Coding AC-3 Also known as Dolby Digital Audio Video Bouquet Association Table Bit Error Ratio Bit Rate The rate at which the compressed bit stream is delivered British Naval Connector... - Page 21 CMP320 User Guide Decibel Digital Video Broadcasting Event Information Table Electronic Program Guide Forward Error Correction Group of Pictures High Definition HDCP High-bandwidth Digital Content Protection HDMI High Definition Multimedia Interface The terms HDMI, HDMI High-Definition Multimedia Interface, and the HDMI Logo are trademarks or registered trademarks of HDMI Licensing Administrator, Inc.
-
Page 22: Appendix B- Warranty
Please contact our sales/regional representatives for any help, product information, and troubleshooting. Returning Products for Service The CMP320 is a delicate piece of equipment and needs to be serviced and repaired by the manufacturer. In order to expedite this process please carefully read the following items. •... - Page 23 CMP320 User Guide Serial Number (SN) is printed on a label on the chassis and modules. To create a RMA number, SN must be submitted to support department. Once the RMA number has been issued to the client, the unit/component needs to be packaged and shipped back to the manufacturer. It’s best to use the original box and packaging for the product but if this not available, check with the service department for the proper packaging instructions.
Need help?
Do you have a question about the CMP320 and is the answer not in the manual?
Questions and answers