Advertisement
Quick Links
Advertisement

Summary of Contents for HOMBLI Solar Cam
- Page 1 Solar Cam Manual...
- Page 3 Je kunt de camera eenvoudig aanpassen aan je situatie en het onderhoud is een fluitje van een cent. Met elke dag een beetje zon hoef je hem niet eens op te laden en blijft hij bijna onbeperkt werken.Heb je extra hulp nodig? Ga naar onze supportpagina online: support.hombli.com...
- Page 4 8. Avertissements et consignes de sécurité 9. Déclaration UE de conformité Inhalt Inhoud 1. Verbinden Sie die Hombli Solar Cam mit der Hombli App 1. Verbind de Hombli Solar Cam met de Hombli app 2. Installation 2. Installatie 3. Aufladen und Akkulaufzeit 3.
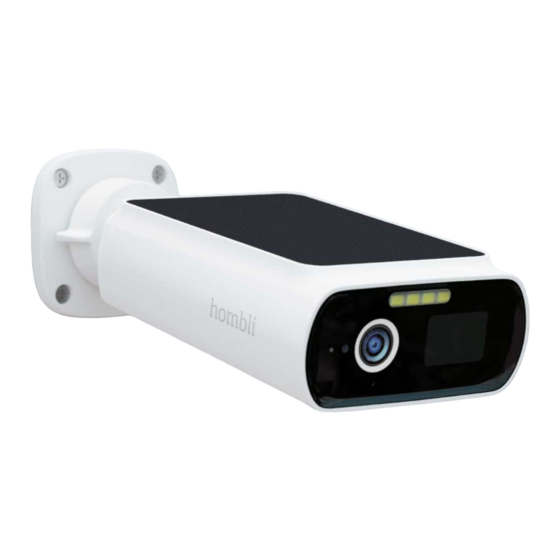
- Page 5 What’s in the box? 1. Hombli Solar Cam 3. USB type C cable 5. 4x Wall plug 2. Wall mount 4. 4x Screw 6. Hex key 1. Hombli Solar Cam 1. Hombli Solarkamera 1. Hombli Solar Cam 1. Hombli Solar Cam 1.
- Page 6 What is what? Everything can be found on the bottom of the camera, beneath the protective flap. Qu’est-ce que c’est? Was ist was? Tout se trouve sur le dessous de l’appareil, sous le rabat de protection. Alles befindet sich auf der Unterseite der Kamera, unter der Schutzklappe. Qué...
- Page 7 1. Point de charge 1.Ladestation 2. Marche/Arrêt 2. Ein/aus 3. MicroSD 3. MicroSD 4. Bouton de réinitialisation 4. Reset-Taste 5. Témoin lumineux de la batterie 5. Batteriekontrollleuchte 1. Punto de carga 1. Punto di ricarica 1. Oplaadpunt 2. Encendido/apagado 2. Accensione e spegnimento 2.
- Page 8 Verbind de Hombli Solar Cam met de Hombli app Als dit de eerste keer is dat je een Hombli product installeert, volg dan alle onderstaande stappen om je Solar Cam in te stellen. Ben je al bekend met Hombli? Ga dan door...
- Page 9 1.1 Download the Hombli App Télécharger l’application Hombli / Laden Sie die Hombli App herunter / Descargue la app Hombli / Scarica l’app Hombli / Download de Hombli app 1.2 Create an account and log in Créer un compte et se connecter / Erstellen Sie ein Konto und melden Sie sich an / Cree una cuenta y inicie la sesión / Crea un account e effettua il log in / Maak...
- Page 10 1.3 Create a family Créer une famille / Erstellen Sie eine Familie / Cree un hogar / Crea una famiglia / Creëer een familie 1.4 Add a new product Ajouter un nouveau produit / Fügen Sie ein neues Produkt hinzu / Añada un nuevo producto / Aggiungi un nuovo prodotto / Voeg een nieuw product toe...
- Page 11 Se non inizia a lampeggiare, premere e tenere premuto il pulsante di reset per 5 secondi. / Om de Solar Cam aan te zetten, druk en houd de aan/uit-knop onderaan gedurende 3 seconden ingedrukt totdat de LED rood knippert. Als het niet begint te...
- Page 12 Ihrem Smartphone erscheint, mit der Kamera der Solar Cam. / Escanee el código QR que aparece en la pantalla de su móvil con la cámara de tu Solar Cam. / Scansiona il codice QR che appare sul tuo telefono con la telecamera del tuo Solar Cam.
- Page 13 Sie verbindet sich nun mit Ihrem WLAN-Netzwerk. / Si ha escaneado correctamente el código QR, el Solar Cam emitirá un sonido y se conectará a la red Wi-Fi. / Se hai scansionato correttamente il codice QR, il Solar Cam emetterà un segnale acustico. Si connetterà...
- Page 14 Erfahren Sie, wie Sie die Kamera in der Hombli App verwenden und entdecken Sie viele spezielle Funktionen wie Nachtsicht, Bewegungserkennung und intelligente Szenarien unter support.hombli.com Aprende a utilizar la cámara en la aplicación Hombli y descubre muchas funciones especiales como la visión nocturna, la detección de movimiento y los escenarios inteligentes en support.hombli.com.
- Page 15 2. Installation Before you start: Carefully read the installation instructions & be aware of the local privacy rules and regulations; place the camera accordingly. Installation Avant de commencer: Lisez attentivement les instructions d’installation et soyez conscient des règles et réglementations locales en matière de protection de la vie privée; placez la caméra en conséquence.
- Page 16 Hombli e controlla se hai un feed e un controllo dal vivo. / Controleer of de locatie binnen het bereik van je wifi-netwerk is. Je kunt dit doen door naar de camera te gaan in de Hombli app en te controleren of je live feed en controle hebt.
- Page 17 2.3 Choose a mounting spot and check if the mount fits flush with the surface. Hold the mount in place and mark the middle of the 4 screw holes. Choisissez un point de montage et vérifiez que le support s’adapte à la surface. Maintenez le support en place et marquez le milieu des 4 trous de vis.
- Page 18 2.5 Screw the mount in place. Vissez le support en place. / Schrauben Sie die Halterung fest. / Atornilla el soporte. / Avvitare il supporto in posizione. / Schroef de steun op zijn plaats. 2.6 Rotate the metal ball-joint in such a way that the hole in the ball is visible and facing downwards.
- Page 19 2.7 Insert the hex key in the hole to keep the ball-joint in place and tightly screw the camera on the mount. Insérez la clé hexagonale dans le trou pour maintenir la rotule en place et vissez fermement la caméra sur le support.
- Page 20 3. Recharging & battery life You can manually recharge the camera in case it doesn’t get enough sun. To do so, take it off the mount and use a USB type C charger and cable. The battery can last roughly 7 months on a full charge when the camera turns on 20 times in 24 hours. If the solar panel receives about 30 minutes of direct sunlight, this can be extended indefinitely, however, many factors like light intensity, outside temperature and location can be a factor.
- Page 21 Verbinden met Google en Alexa (optioneel) De Solar Cam is compatibel met Google Assistant en Amazon Alexa speakers. Check de installatiegidsen en instructievideo’s op onze website om te zien hoe je dit doet. Wil je camerabeelden van de Solar Cam streamen naar de Google Nest Hub of Amazon Echo Show? Activeer dit via hombli.com/activate...
- Page 22 Il est possible d’insérer une carte microSD d’une capacité maximale de 256 Go dans la caméra pour stocker localement vos enregistrements automatisés. Vous pourrez ainsi les lire. Vous pouvez également utiliser la fonction de stockage dans le nuage. Vous la trouverez dans l’application Hombli sur l’écran de la caméra. Suivez simplement les étapes de l’application pour l’activer.
- Page 23 Onderhoud De Hombli Solar Cam heeft niet veel onderhoud nodig, maar we raden wel aan om hem elke 6 maanden schoon te maken. Gebruik gewoon een vochtige zachte doek en een mild schoonmaakmiddel om hem schoon te maken. Vooral het schoonmaken van de voorkant en het zonnepaneel zorgt ervoor dat je altijd een helder beeld en voldoende...
- Page 24 Veel problemen kunnen worden opgelost door de camera te resetten en opnieuw te verbinden met de Hombli app. Reset de camera door de knop onder de klep van de camera 5 seconden in te drukken. De camera zal een geluid maken om de reset te bevestigen. Heb je nog vragen over de Hombli Solar Cam of loop je tegen bepaalde problemen aan? Dan kun je antwoorden op veelgestelde vragen en andere problemen vinden in onze online gidsen op support.hombli.com...
- Page 25 Do not (try to) replace the battery. If the product is defective, do not attempt to repair the device yourself. Contact the store where you bought it for advice, or contact us directly via support@hombli.com Avertissements et consignes de sécurité...
- Page 26 No (intente) sustituir la batería. Si el producto está defectuoso, no intente repararlo usted mismo. Póngase en contacto con la tienda donde lo compró para que le asesoren, o contacte directamente con nosotros a través de support@hombli.com Avvertenze e istruzioni di sicurezza Utilizzare questo prodotto solo nei modi descritti in questo manuale.
- Page 27 Breng geen wijzigingen aan in de camera. De batterij niet (proberen te) vervangen. Probeer het apparaat niet zelf te repareren als het defect is. Neem contact op met de winkel waar je het hebt gekocht voor advies, of neem rechtstreeks contact met ons op via support@hombli.com...
- Page 28 Cet appareil est conforme aux exigences essentielles et aux autres dispositions pertinentes des directives européennes suivantes : -Directive 2011/65/UE -Directive 2014/53/UE Une copie de la déclaration de conformité de l’UE est disponible à l’adresse hombli.com/compliance Bande de fréquence du mode RF sans fil : 2.4 à 2.483 GHz Puissance maximale transmise : 17.5 dBm Le symbole DEEE signifie qu’un appareil doit être éliminé...
- Page 29 Este dispositivo cumple los requisitos esenciales y otras disposiciones pertinentes de las siguientes Directivas de la UE: -Directiva 2011/65/UE -Directiva 2014/53/UE Una copia de la Declaración de Conformidad de la UE está disponible en hombli.com/compliance Banda de frecuencia del modo RF inalámbrico: 2.4 a 2.483 GHz Potencia máxima transmitida: 17.5 dBm El símbolo RAEE significa que un dispositivo debe desecharse por separado de la basura doméstica general.
- Page 30 Dit apparaat voldoet aan de essentiële eisen en andere relevante bepalingen van de volgende EU-richtlijnen: -Richtlijn 2011/65/EU -Richtlijn 2014/53/EU Een kopie van de EU-verklaring van overeenstemming is beschikbaar op hombli.com/compliance. Frequentieband voor draadloze RF-modus: 2.4 tot 2.483 GHz Maximaal uitgezonden vermogen: 17.5 dBm Het WEEE-symbool betekent dat een apparaat apart van het normale huishoudelijke afval moet worden weggegooid.
- Page 32 Hombli is a Dutch brand 1008 1008-CRP @hombli @homblismart @homblismart Hombli © 2024 is Maanweg 174 + 31 702 210 077 a brand of Avanca 2516AB The Hague support@hombli.com International B.V. The Netherlands...
Need help?
Do you have a question about the Solar Cam and is the answer not in the manual?
Questions and answers