Advertisement
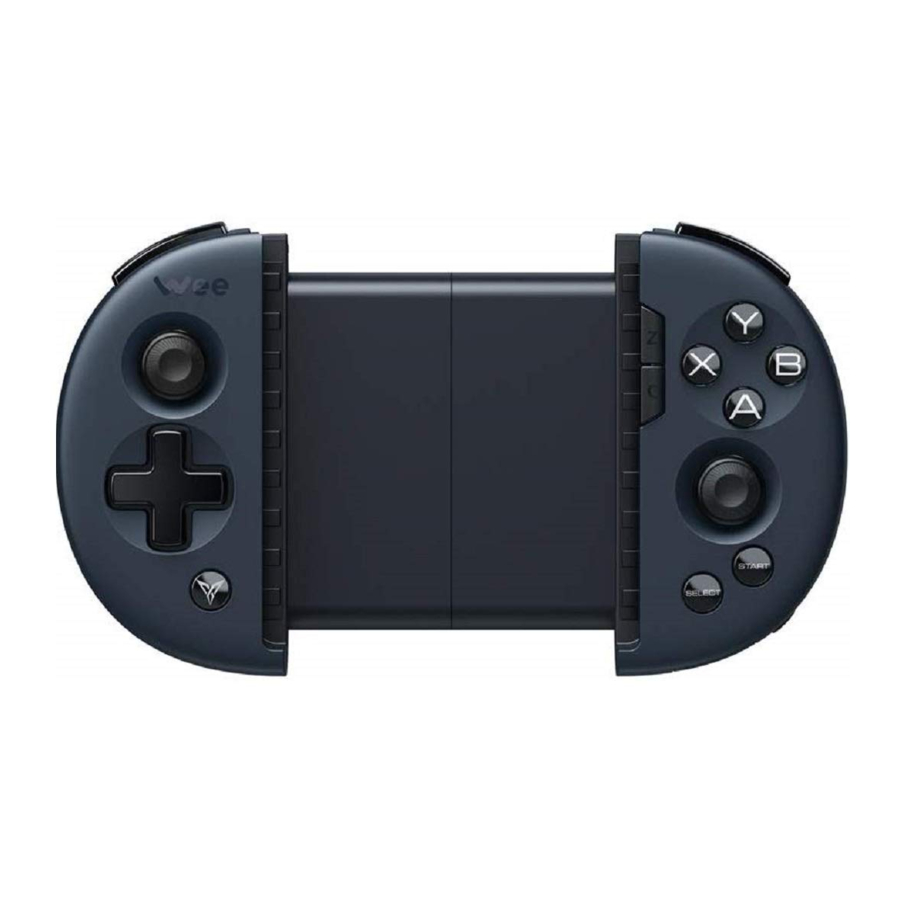
Parts and Features

Flymagic Interface
Patent and innovation of Flydigi with one interface achieving double functions:
Function 1: activate button mapping
Function 2: extend keyboard and mouse connection
Accessories
- Controller
- Flymagic Adapter
![]()
See keyboard-mouse mode connection instructions for usage - Charging Cable
![]()
Can be used as charging cable of controller as well as power connection cable of Flymagic - Bag
- User Manual


Connection instruction for controller
STEP1: Download Flydigi Controller Assistant
(For Android users, please download Flymagic version)

Scan QR Code to download and install Flydigi Controller Assistant
Or: Use browser to visit Flydigi official website: www.flydigi.com to download
STEP2: Activate Flymapping
Open USB debugging mode on the phone according to Flydigi Controller Assistant – Enable button mapping, and complete the following steps
- Connect phone with controller, using data cable provided with the phone, as shown in the figure

- Turn the power switch to the right again, until the phone prompts USB debugging authorization, select "OK". After activation is successful, orange indicator will stay steadily on for 5 seconds before it goes out


STEP3: Use Bluetooth to connect phone
Complete the following steps according to Flydigi Controller Assistant – controller connection instruction
- Turn the power switch to the right, press and hold Logo button for 5 seconds Controller goes into pairing mode
![]()
(Status indicator will quickly flash blue)
- Click phone Setting ->Bluetooth
Turn on Bluetooth on the phone, search and connect FeiZhiWee 2, after connection is successful, status indicator will stay blue.
![]()
Android Bluetooth connection


For paired controllers, only need to click Logo button when re-connecting next time, not necessary to hold the button
STEP4: Start the game
For better gaming experience, please start game under Flydigi Controller Assistant
For Android devices, it is supported to add games, for games not downloaded from Flydigi Gamepad Assistant, they can be added by the "+" sign in "My Game" and configured in a customized way.
Connection instruction for keyboard-mouse mode
Wee 2 supports keyboard-mouse mode, which can extend keyboard and mouse for playing mobile games. When the controller detects a keyboard or mouse is connected, it automatically switches to keyboard-mouse mode
STEP1: Download Flydigi Gamepad Assistant
See STEP1 in "Connection instruction for controller"
STEP2: Activate Flymapping
(only applicable to Android devices)
See STEP2 in "Connection instruction for controller"
STEP3: Connect keyboard and mouse
Connect USB keyboard and mouse to controller as shown in the below figure. After connection is successful, status indicator of controller will stay steadily orange

- 5V power, must be connected (can be phone charger, portable power bank or other 5V power with USB interface)
- Charging cable (standard supply)
- Flymagic interface of controller
- Flymagic adapter (standard supply)
- USB keyboard (unsupplied)
- USB mouse (unsupplied)
STEP4: Use Bluetooth to connect phone and start the game
See STEP3 in "Connection instruction for controller "and complete Bluetooth connection between controller and phone in Flydigi Controller Assistant. Once Flydigi Controller Assistant is started, it automatically recognizes keyboard and mouse so you may play phone game with them. For gaming operations, please refer to Operation Wizard of Flydigi Controller Assistant.
 Note: Keyboard-mouse mode supports keyboard and mouse devices with USB interfaces, including USB wired keyboard and mouse, wireless keyboard/mouse suite, wireless mouse.
Instructions of basic operations and indicators
| Power on/off | Slide the power switch to the right, then controller will be turned on Slide the power switch to the left, then controller will be turned off. | Power indicator will slowly flash green twice before it goes out indicatingcontroller is successfully turned on |
| Bluetooth pairing | Press and hold Logo button for over 5 seconds after controller is turned on | Status indicator will quickly flash blue indicating controller is entering pairing mode |
| Normal working | Controller is working normally after Bluetooth connection is successful | Under controller mode: LED indicator stay blue Under keyboard-mouse mode: LED indicator stay orange |
| Reconnecting with Bluetooth | Use the paired controller again, click Logo button to automatically reconnect with Bluetooth | Status Indicator will be the same as normal working condition after successfully connected |
| Charging | Charging | Power indicator will stay red |
| Charging completed | Power indicator goes out | |
| Low Power | 20% power remains | Power indicator slowly flashes green |
| 10% power remains | Power indicator quickly flashes green | |
| Activating button mapping | Use data cable provided with phone to connect controller's Flymagic interface and Android phone, and slide the power switch to the right again, controller will enter button mapping activation mode | Under activation mode, Power indicator will stay green, LED indicator quickly flashes orange; After activation is successfully, LED indicator will stay orange for 5 seconds before it goes out |
| Calibrating stick | Press and hold SELECT + START buttons for 2 seconds at the same time | LED indicator will slowly flashes blue twice indicating stick calibration is successful |
Performance specifications
| Supported platforms | Android | Android phones and tablets with Bluetooth 4.0, while Android system is 4.4 and above | |||
| Supported phone size | Android | 6.3" and under, thickness no greater than 8.5mm | |||
| Connection method | Bluetooth 4.0 | Distance of use | Less than 10m | ||
| Battery life | About 80 hours | Battery capacity | 300mAh lithium battery | ||
| Power consumption | Operational current ≤2.5mA; standby current ≤4uA | Charging input | 5V-100mA | ||
| Charging time | About 3-4 hours | Controller weight | 120g | ||
FAQ
- What if the controller indicator is not on?
Please check whether controller has sufficient power. - What if button mapping cannot be activated?
- Please confirm whether operation is correct, please refer to button mapping activation wizard in Flydigi Controller Assistant for details;
- Please use original data cable of the phone for activation operation (charging cables without data transmission function cannot complete activation);
- Please check whether controller has sufficient power; if power indicator keeps flashing quickly or slowly after power switch is turned on, it indicates that controller does not have sufficient power, therefore it cannot activate button mapping, please charge controller first before trying button mapping activation again.
- What can keyboard-mouse mode do?
Keyboard-mouse mode is an innovative design of Flydigi controllers that allows you to use controller as keyboard/mouse converter. You can connect keyboard and mouse with USB interface to Wee 2 controller and connect it with terminals such as phones and tablets by Bluetooth, and then control phone games by your keyboard and mouse.
How can I use keyboard-mouse mode?
See "Connection instruction for keyboard-mouse mode" for details.
Can I use keyboard-mouse mode with controller mode at the same time?
No.
Web: www.flydigi.com
Facebook: Flydigi
Documents / Resources
References
Download manual
Here you can download full pdf version of manual, it may contain additional safety instructions, warranty information, FCC rules, etc.
Download Flydigi WEE2 - Stretchable Controller & Keyboard/Mouse Converter Manual
Advertisement


Need help?
Do you have a question about the WEE2 and is the answer not in the manual?
Questions and answers