Table of Contents
Advertisement
Quick Links
Advertisement
Table of Contents

Summary of Contents for RainWater Harvesting Carat XXL Tank
- Page 1 Rainwater Harvesting Installation manual Carat XXL Tank...
-
Page 2: General Notes
GENERAL NOTES The points described in these instructions must be followed correctly. If not correctly observed, any right to claim on the warranty may be refused. Any missing instructions must be requested directly from us. A complete check of all the items/components for possible damage must be carried out before the assembly or installation begins. -
Page 3: Technical Data
TECHNICAL DATA 2.1 Technical Data Carat XXL *Telescopic dome shaft at maximum height *Telescopic dome shaft at minimum height Mini telescopic Maxi telescopic dome shaft dome shaft 2.2 Overview tanks Carat XXL Tank (litres) 16,000 22,000 26,000 32,000 36,000 42,000 46,000 52,000 56,000... -
Page 4: Tank Structure
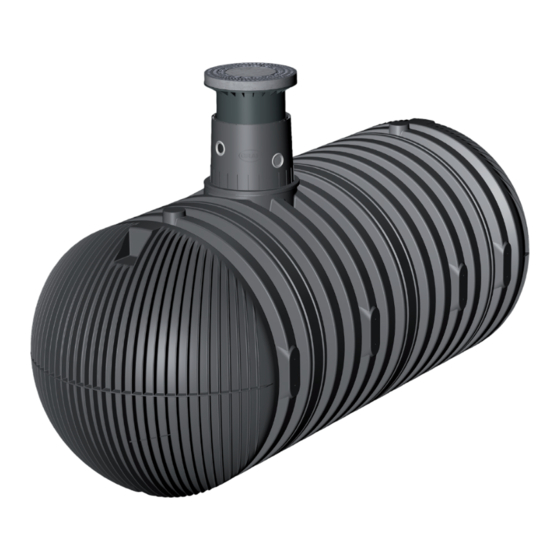
TANK STRUCTURE Cover Telescopic dome shaft (can be inclined by 5º) Profile seal - Telescopic dome shaft Tank dome (can be rotated by 360º) Tank seal - Tank dome Tank dome sealing plug Carat XXL underground tank Graf UK Ltd... -
Page 5: Installation And Assembly
INSTALLATION AND ASSEMBLY 4. Installation conditions Subsoil Telescopic dome shaft Compact foundation Surrounding (round-grained gravel, maximum grain size 10/20) Covering layer Carat XXL Underground Tank Concrete layer for surfaces used by passenger cars ß ––> DIN 4124 from 1250mm depth of the trench 4.1 Construction site Under all circumstances, the following points must be clarified prior to installation: •... - Page 6 INSTALLATION AND ASSEMBLY 4.2 Trench To ensure that sufficient space is available for working, the base area of the trench must exceed the dimensions of the tank by > 500mm on each side; the distance from solid structures must be at least 1000mm.
- Page 7 INSTALLATION AND ASSEMBLY 4.6 Groundwater and cohesive (water- impermeable) soils (e.g. clay soil) >800 <1500mm With only occasional ground water and cohesive, water impermeable soils (e.g. loam), adequate drainage of the ground water or leakage water must be ensured so that the tanks never stand deeper in the ground water than indicated in the table.
-
Page 8: Insertion And Filling
INSTALLATION AND ASSEMBLY 4.9 Installation adjacent to surfaces used by vehicles If the underground tanks are installed adjacent to surfaces which are used by heavy vehicles weighing over 12 t, the minimum distance away from these surfaces is at least the depth of the trench. 4.10 Connection of several tanks Two or more tanks are connected via the assembly surfaces by means of GRAF special seals DN 100... -
Page 9: Routing Connections
INSTALLATION AND ASSEMBLY 4.12 Routing connections All feed and overflow pipes must be routed with a decline of at least 1% in the direction of flow (possible, subsequent settling must be taken into consideration in this case). If the tank overflow is connected to a public sewer, this must be protected against reflux by means of a lifting station (mixed sewer) or reflux seal (pure rainwater sewer) according to DIN 1986. -
Page 10: Assembling The Telescopic Dome Shaft
ASSEMBLING THE TELESCOPIC DOME SHAFT 5.1 Assembling the tank dome Prior to assembly, the enclosed seal is locked onto the tank neck’s profile “B“. The tank dome is then aligned with the piping connections and is locked to the tank neck. It is essential to make sure that the upper seal “A”... - Page 11 ASSEMBLING THE TELESCOPIC DOME SHAFT 5.4 Telescopic dome shaft over which passenger cars may drive If the tank is installed under areas used by passenger cars, the collar area of the telescopic dome shaft (colour anthracite) must be supported with concrete (load class B25 = 250 kg/m²).
-
Page 12: Inspection And Servicing
INSPECTION AND SERVICING The entire system must be checked for leaks, cleanliness and stability at least every three months. The entire system should be serviced at intervals of approx. 5 years. In this case, all parts of the system must be cleaned and their function checked. - Page 13 NOTES Graf UK Ltd...
- Page 14 NOTES Graf UK Ltd...
- Page 15 NOTES Graf UK Ltd...
- Page 16 R A I N W A T E R H A R V E S T I N G W A S T E W A T E R M A N A G E M E N T S T O R M W A T E R M A N A G E M E N T W A T E R B U T T S &...
Need help?
Do you have a question about the Carat XXL Tank and is the answer not in the manual?
Questions and answers