Advertisement
Available languages
Available languages
Quick Links
by
Gebrauchsanweisung
Assembly Instructions
Instructions de montage
Istruzioni per il montaggio
Instrucciones de montaje
Montage-instructies
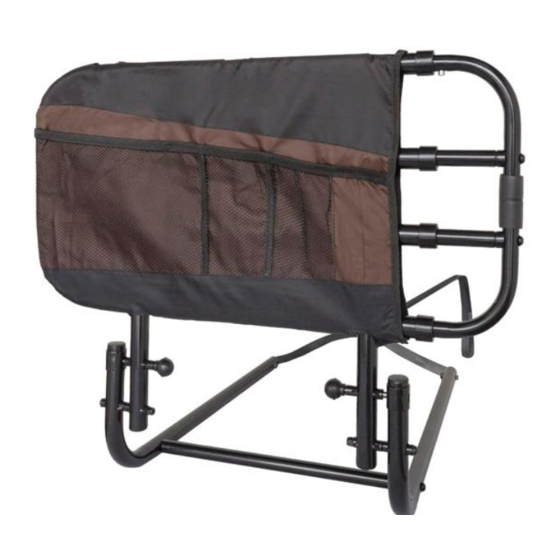
Bettseitengitter
„Pivot-Rail"
Art.-Nr.: PRAIL8001
Vertrieb durch rehastage GmbH - Artlandstrasse 80 - D-49610 Quakenbrück -
www.rehastage.de
05.01.2023 / Rev. 04
Advertisement

Summary of Contents for rehastage Stander Pivot-Rail
- Page 1 Gebrauchsanweisung Assembly Instructions Instructions de montage Istruzioni per il montaggio Instrucciones de montaje Montage-instructies Bettseitengitter „Pivot-Rail“ Art.-Nr.: PRAIL8001 Vertrieb durch rehastage GmbH - Artlandstrasse 80 - D-49610 Quakenbrück - www.rehastage.de 05.01.2023 / Rev. 04...
- Page 2 1.0 Vorwort: Sehr geehrte Kundin, sehr geehrter Kunde, wir freuen uns, dass Sie ein Qualitätsprodukt der rehastage GmbH gewählt haben. Eine gute Beziehung zu unseren Kunden ist für rehastage von hoher Bedeutung. Kundennähe bedeutet: schneller Service, so wenig Bürokratie wie möglich und enge Zusammenarbeit mit unseren Kunden. Suchen Sie Rat bei Ihrem behandelnden Arzt oder Therapeuten, um sicherzustellen, dass dieses Produkt für Sie geeignet ist und Ihren...
- Page 3 Montageanleitung Bettseitengitter „Pivot Rail“ Artikelnummer: PRAIL8001 3.0 Lieferumfang: Nehmen Sie alle Teile aus der Verpackung und prüfen Sie diese auf Vollständigkeit (siehe Abbildung 1). Teil A Bettseitengitter 1 Stück Teil B Basisrohre mit Sicherungsgurt 2 Stück Teil C Verbindungsrohre 2 Stück Teil D Schrauben M6x40 4 Stück...
- Page 4 Montageanleitung Bettseitengitter „Pivot Rail“ Artikelnummer: PRAIL8001 4.2 Legen Sie fest, auf welcher Seite des Bettes das Produkt, wie in ABBILDUNG 3 dargestellt, installiert werden soll. Die längenverstellbare Seite des Bettseitengitters sollte immer zum Fußende des Bettes ausgerichtet sein. Befestigen Sie A und B mit den mitgelieferten Werkzeugen (H und J) mit den Befestigungselementen (E, F und G) wie in ABBILDUNG 3 dargestellt.
- Page 5 Montageanleitung Bettseitengitter „Pivot Rail“ Artikelnummer: PRAIL8001 4.5 Bedienung: Um das Bettseitengitter zu verlängern, drücken Sie den Federknopf und ziehen die Verlängerungsseite des Bettseitengitter nach außen, wie in Abbildung 5 a gezeigt. Um das Bettseitengitter abzusenken, ziehen Sie die Knöpfe und drehen Sie sie um 90 Grad, wie in Abbildung 5 b und 5 c gezeigt.
- Page 6 Verletzungen, die aus der unsachgemäßen Benutzung oder Montage des Produktes entstehen können oder entstanden sind. • Im Falle von Montageproblemen wenden sie sich bitte an die verkaufende Stelle (Fachhandel) bzw. direkt an: Rehastage GmbH Artlandstraße 80 49610 Quakenbrück / Deutschland qm@rehastage.de •...
- Page 7 Garantie erfasst sind Mängel, die auf Verschleiß, unsachgemäße Behandlung oder durch kommerziellen Gebrauch des Gerätes entstanden sind. Die Garantie erlischt, wenn der Artikel durch andere als rehastage selbst oder einem von rehastage autorisierten Händler repariert oder konstruktiv verändert wird. Die Gewährleistungspflicht erlischt, wenn Reparaturen bzw. Veränderungen oder Ersatz einzelner Teile, die nicht Original-rehastage-Ersatzteile sind, von anderer Seite als der Verkäuferin oder liefernden Firma...
- Page 8 1.0 Preface: Dear customer, we are pleased that you have chosen a quality product from rehastage GmbH. A good relationship with our customers is of great importance to rehastage. Customer proximity means: fast service, as little bureaucracy as possible and close cooperation with our customers. Seek advice from your treating doctor or therapist to ensure that this product is suitable for you and meets your needs.
- Page 9 Assembly instructions Bed side rails "Pivot-Rail Item number: PRAIL8001 Part J Allen key 1 piece Part K Textile cover (bag, pre-assembled) 1 piece Figure 1 4.0 Assembly and installation instructions, operation: 4.1 Using the tool provided (J), attach C to D and F to B as shown in Figure 2. Figure 2 4.2 Determine on which side of the bed the product should be installed as shown in FIGURE 3.
- Page 10 Assembly instructions Bed side rails "Pivot-Rail Item number: PRAIL8001 LEFT SIDE OF BED ASSEMBLY RIGHT SIDE OF THE BED ASSEMBLY Figure 3 4.3 Using the provided tools (H and J), attach A and B with the fasteners (E, F and G) as shown in FIGURE 4. Figure 4 4.4 Open the lock of the SAFETY Harness and guide it around the bed frame / slatted frame.
- Page 11 Assembly instructions Bed side rails "Pivot-Rail Item number: PRAIL8001 4.5 Operation: To extend the bed side rail, press the spring button and pull the extension side of the bed side rail outwards, as shown in figure 5 a. To lower the bed side rail, pull the knobs and turn them 90 degrees, as shown in figure 5 b and 5 c.
- Page 12 • In the event of assembly problems, please contact the place of sale (specialist trade) or directly to: Rehastage GmbH Artlandstraße 80 49610 Quakenbrück / Germany qm@rehastage.de...
- Page 13 The warranty is void if repairs or modifications or replacement of individual parts that are not original rehastage spare parts are made by anyone other than the seller or supplying company. During the warranty period, rehastage shall decide whether to repair the device free of charge or replace it free of charge.
- Page 14 1.0 Avant-propos : Cher client, nous sommes heureux que vous ayez choisi un produit de qualité de rehastage GmbH. Une bonne relation avec nos clients est d'une grande importance pour rehastage. La proximité du client signifie : un service rapide, le moins de bureaucratie possible et une coopération étroite avec nos clients. Demandez conseil à...
- Page 15 Instructions de montage Barre latérale de lit "Pivot Rail Numéro d'article : PRAIL8001 3.0 Étendue de la livraison : Sortez toutes les pièces de l'emballage et vérifiez qu'elles sont complètes (voir figure 1). Pièce A Barrières latérales de lit 1 pièce Partie B Base tubes avec ceinture de sécurité...
- Page 16 Instructions de montage Barre latérale de lit "Pivot Rail Numéro d'article : PRAIL8001 4.2 Déterminez de quel côté du lit le produit doit être installé comme indiqué sur la FIGURE 3. Le côté réglable en longueur de la barrière latérale du lit doit toujours faire face à l'extrémité du pied du lit. À...
- Page 17 Instructions de montage Barre latérale de lit "Pivot Rail Numéro d'article : PRAIL8001 4.5 Opération : Pour étendre la barrière latérale de lit, appuyez sur le bouton à ressort et tirez le côté extension de la barrière latérale de lit vers l'extérieur, comme indiqué sur la figure 5 a. Pour abaisser la barrière latérale du lit, tirez sur les boutons et tournez-les de 90 degrés, comme indiqué...
- Page 18 • En cas de problèmes de montage, veuillez contacter le bureau de vente (commerce spécialisé) ou directement : Rehastage GmbH Artlandstraße 80 49610 Quakenbrück / Allemagne qm@rehastage.de •...
- Page 19 10.0 Garantie : En plus de la garantie légale, rehastage offre une garantie sur ce produit contre les défauts de fabrication ou de matériel pendant 2 ans à compter de la date d'achat. La garantie s'applique uniquement au premier utilisateur de l'article.
- Page 20 Instructions de montage Barre latérale de lit "Pivot Rail Numéro d'article : PRAIL8001 11.0 Explication des symboles utilisés, des marquages et des informations à fournir : Fabricant, nom et Représentant Dispositif médical Attention ! Des Suivez les adresse du autorisé du fabricant informations telles instructions fabricant...
- Page 21 1.0 Prefazione: Gentile cliente, siamo lieti che lei abbia scelto un prodotto di qualità della rehastage GmbH. Un buon rapporto con i nostri clienti è di grande importanza per rehastage. Vicinanza al cliente significa: servizio veloce, meno burocrazia possibile e stretta collaborazione con i nostri clienti. Chiedete consiglio al vostro medico curante o terapista per assicurarvi che questo prodotto sia adatto a voi e soddisfi le vostre esigenze.
- Page 22 Istruzioni per il montaggio Sponda del letto "Pivot Rail Numero articolo: PRAIL8001 Parte D Viti M6x40 4 pezzi Parte E Viti M6x80 2 pezzo Parte F Rondella Ø6,5 6 pezzo Parte G Madre M6 2 pezzo Parte H Chiave a bocca 1 pezzo Parte J Chiave a brugola...
- Page 23 Istruzioni per il montaggio Sponda del letto "Pivot Rail Numero articolo: PRAIL8001 LATO SINISTRO DEL GRUPPO LETTO LATO DESTRO DEL GRUPPO LETTO Figura 3 4.3 Utilizzando gli strumenti forniti (H e J), fissate A e B con gli elementi di fissaggio (E, F e G) come mostrato nella FIGURA 4.
- Page 24 Istruzioni per il montaggio Sponda del letto "Pivot Rail Numero articolo: PRAIL8001 4.5 Operazione: Per estendere la sponda del letto, premere il pulsante a molla e tirare il lato di estensione della sponda verso l'esterno, come mostrato nella figura 5 a. Per abbassare la sponda del letto, tirare le manopole e ruotarle di 90 gradi, come mostrato nella figura 5 b e 5 c.
- Page 25 DISCLAIMER: Né Stander Inc. né il produttore/distributore sono responsabili per qualsiasi danno o lesione che possa risultare o essere risultato dall'uso o dall'installazione impropria del prodotto. • In caso di problemi di montaggio, si prega di contattare l'ufficio vendite (commercio specializzato) o direttamente: Rehastage GmbH Artlandstraße 80 49610 Quakenbrück / Germania qm@rehastage.de •...
- Page 26 L'obbligo di garanzia scade se le riparazioni o le modifiche o la sostituzione di singole parti che non sono pezzi di ricambio originali di rehastage vengono eseguite da chiunque non sia il venditore o la società...
- Page 27 1.0 Prefacio: Estimado cliente, Nos complace que haya elegido un producto de calidad de rehastage GmbH. Una buena relación con nuestros clientes es de gran importancia para rehastage. Proximidad al cliente significa: servicio rápido, la menor burocracia posible y una estrecha colaboración con nuestros clientes. Pida consejo a su médico o terapeuta para asegurarse de que este producto es adecuado para usted y satisface sus necesidades.
- Page 28 Instrucciones de montaje Barra lateral de la cama "Pivot-Rail Número de artículo: PRAIL8001 Pieza B Base tubos con cinturón de seguridad 2 pieza Parte C Tubos de conexión 2 pieza Pieza D Tornillos M6x40 4 pieza Parte E Tornillos M6x80 2 pieza Parte F Arandela Ø6,5...
- Page 29 Instrucciones de montaje Barra lateral de la cama "Pivot-Rail Número de artículo: PRAIL8001 Utilizando las herramientas suministradas (H y J), fije A y B con los sujetadores (E, F y G) como se muestra en la FIGURA 3. LADO IZQUIERDO DEL CONJUNTO DE LA CAMA LADO DERECHO DEL MONTAJE DE LA CAMA Figura 3 4.3 Utilizando las herramientas suministradas (H y J), fije A y B con los sujetadores (E, F y G) como se muestra en...
- Page 30 Instrucciones de montaje Barra lateral de la cama "Pivot-Rail Número de artículo: PRAIL8001 4.5 Operación: Para extender la barandilla lateral de la cama, presione el botón del muelle y tire del lado de extensión de la barandilla lateral de la cama hacia fuera, como se muestra en la figura 5 a. Para bajar la barandilla lateral de la cama, tire de los pomos y gírelos 90 grados como se muestra en la figura.
- Page 31 • En caso de problemas de montaje, póngase en contacto con la oficina de ventas (comercio especializado) o directamente: Rehastage GmbH Artlandstraße 80 49610 Quakenbrück / Alemania qm@rehastage.de •...
- Page 32 La garantía queda anulada si el artículo es reparado o modificado constructivamente por alguien que no sea rehastage o un distribuidor autorizado por rehastage. La obligación de la garantía se extingue si las reparaciones o modificaciones o la sustitución de piezas individuales que no sean recambios originales de rearme son...
- Page 33 1.0 Voorwoord: Beste klant, Wij zijn blij dat u een kwaliteitsproduct van rehastage GmbH heeft gekozen. Een goede relatie met onze klanten is van groot belang voor rehastage. Klantnabijheid betekent: snelle service, zo weinig mogelijk bureaucratie en nauwe samenwerking met onze klanten. Vraag advies aan uw behandelend arts of therapeut om er zeker van te zijn dat dit product voor u geschikt is en aan uw behoeften voldoet.
- Page 34 Montage-instructies Bed zijhek "Pivot-Rail Artikelnummer: PRAIL8001 Deel D Schroeven M6x40 4 stuks Deel E Schroeven M6x80 2 stuk Deel F Sluitring Ø6,5 6 stuk Deel G Moer M6 2 stuk Deel H Steeksleutel 1 stuk Deel J Inbussleutel 1 stuk Deel K Textielhoes (zak, voor gemonteerd) 1 stuk...
- Page 35 Montage-instructies Bed zijhek "Pivot-Rail Artikelnummer: PRAIL8001 LINKERZIJDE VAN DE BEDCONSTRUCTIE RECHTERZIJDE VAN DE BEDCONSTRUCTIE Figuur 3 4.3 Bevestig A en B met behulp van de bijgeleverde gereedschappen (H en J) met de bevestigingsmiddelen (E, F en G) zoals afgebeeld in FIGUUR 4. Figuur 4 4.4 Open het slot van het veiligheidsgordel en leid het rond het bed frame/ de lattenbodem.
- Page 36 Montage-instructies Bed zijhek "Pivot-Rail Artikelnummer: PRAIL8001 4.5 Operatie: Om het bedhek te verlengen, drukt u op de veerknop en trekt u de verlengzijde van het bedhek naar buiten, zoals getoond in figuur 5 a. Om het bedhek te laten zakken, trekt u aan de knoppen en draait u ze 90 graden, zoals getoond in afb. 5 b en 5 c.
- Page 37 ONTKENNING: Noch Stander Inc. noch de fabrikant/distributeur zijn aansprakelijk voor enige schade of letsel die het gevolg is of kan zijn van onjuist gebruik of onjuiste installatie van het product. • Neem in geval van montageproblemen contact op met het verkoopkantoor (vakhandel) of rechtstreeks: Rehastage GmbH Artlandstraße 80 49610 Quakenbrück/ Duitsland qm@rehastage.de •...
- Page 38 Verwijdering dient te geschieden via een afvalverwerkingsbedrijf of een openbaar afvalverwerkingspunt. 10.0 Garantie Naast de wettelijke garantie biedt rehastage een garantie op dit product tegen fabricage- of materiaalfouten gedurende 2 jaar vanaf de datum van aankoop. De garantie geldt alleen voor de eerste gebruiker van het artikel.
- Page 39 Seite 39 von 40...
- Page 40 Stander Inc. EMERGO EUROPE Artlandstrasse 80. 2410 Heritage Dr. Westervoortsedijk 60 49610 Quakenbrück / Germany Logan UT, 84321 / USA 6827 AT Arnhem E-Mail: info@rehastage.de E-Mail: sales@stander.com The Netherlands Vertrieb durch rehastage GmbH - Artlandstrasse 80 - D-49610 Quakenbrück - www.rehastage.de...
Need help?
Do you have a question about the Stander Pivot-Rail and is the answer not in the manual?
Questions and answers