Table of Contents
Advertisement
Quick Links
Advertisement
Table of Contents

Summary of Contents for MAC Panel SCOUT DAK
- Page 1 MAC Panel Company SCOUT Instructions DAK Insertion and Removal...
-
Page 2: Table Of Contents
Contents Mounting and Extracting DAKs from a SCOUT system - Overview ............... 2 Step 1 Inserting and extracting a single wide DAK................3 Step 2 Identify the 2 styles of Screw....................5 Step 3 Inserting the DAK ........................6 Step 4 Removing the DAK ........................ -
Page 3: Mounting And Extracting Daks From A Scout System - Overview
Mounting and Extracting DAKs from a SCOUT system - Overview The diagrams and instructions apply to all MAC Panel DAKs and SCOUT receivers. Warning It is important to follow these instructions for both insertion and extraction as damage to the receiver and/or DAK can occur if installed or extracted incorrectly. -
Page 4: Step 1 Inserting And Extracting A Single Wide Dak
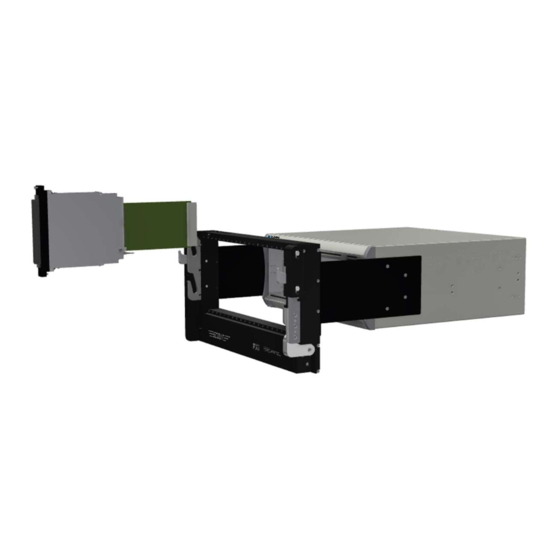
Step 1 Inserting and extracting a single wide DAK. To perform this operation, you will require the following tools from the DAK tool kit: 3/16” slotted screwdriver DAK removal tool, part number 5212346 Figure 2 DAK in position to be inserted into receiver. Align the assembled DAK and PXI instrument with the required chassis slot position. -
Page 5: Figure 4 Push The Assembly Into The Chassis
Slowly push the assembly into the chassis until you feel slight resistance, at this point the rear connector on the PXI card will be ready to be inserted into the chassis backplane connector. Figure 4 Push the assembly into the chassis. P a g e D A K I n s e r t i o n a n d R e m o v a l R e v A... -
Page 6: Step 2 Identify The 2 Styles Of Screw
Step 2 Identify the 2 styles of Screw. There are 2 styles of screw in a DAK. Figure 5 Jacking Screw The jacking screw is located at the bottom of a DAK and is used to insert and extract the DAK. When INSERTING: Activate FIRST When EXTRACTING:... -
Page 7: Step 3 Inserting The Dak
Step 3 Inserting the DAK It is critical that the screws are actuated in the correct order. In a single wide DAK, the top screw is used for securing the DAK. The bottom screw is a jackscrew and is used to screw the assembly onto the chassis backplane. -
Page 8: Figure 9 Lock The Dak In Place
Tighten the DAK into place using the locking screw. Figure 9 Lock the DAK in place. P a g e D A K I n s e r t i o n a n d R e m o v a l R e v A... -
Page 9: Step 4 Removing The Dak
Step 4 Removing the DAK Again, it is critical that the screws are actuated in the correct order. DAK removal is the opposite of insertion. Screw the DAK into the assembly using the jack screw. Figure 10 Undo the locking screw first. Extract the DAK and PXI instrument from the backplane by unscrewing the jack screw. -
Page 10: Figure 12 Fully Extract The Dak
Remove the DAK completely with the aid of the removal tool, part number 55123465. Figure 12 Fully extract the DAK. P a g e D A K I n s e r t i o n a n d R e m o v a l R e v A... -
Page 11: Appendix Adaks With 2 Slots Or More
Appendix A DAKs with 2 slots or more Some DAKS are wider than a single slot. In all instances it is critical that the jack screw is activated first when inserting the DAK and last when extracting the DAK. This is shown in more detail in the video. Figure 13 Example of a double wide DAK In the example above, there are 4 screws, 1 jack screw and 3 locking screws, located as shown: Top Left... -
Page 12: Appendix B Possible Damage To Receiver
Appendix B Possible Damage to Receiver Warning It is critical that the following rule is always applied: When INSERTING: Activate FIRST When EXTRACTING: Activate LAST Figure 14 Jack Screw If this rule is not followed it is highly likely that the receiver will be damaged. Each threaded hole in the receiver has a helicoil fitted to improve the strength of the thread. -
Page 13: Appendix Cdak Tool Kit Contents
Appendix C DAK Tool Kit Contents The DAK Tool Kit, part number 561211, includes all necessary tools to assist with satisfactory DAK assembly, insertion and extraction Figure 16 DAK Tool Kit Description Part # Location Alignment Tool 412640 Assorted Screwdrivers #1 Philips #2 Philips 3/16”...
Need help?
Do you have a question about the SCOUT DAK and is the answer not in the manual?
Questions and answers