Table of Contents
Advertisement
Advertisement
Table of Contents

Summary of Contents for HOLOSUN DRS-NV
- Page 1 HOLOSUN DRS-NV Digital Rifle Sight – Night Vision User Manual v1.1...
-
Page 2: Table Of Contents
CONTENTS Important Notices ................................. 2 Product Overview ................................. 3 Features ....................................4 Battery ....................................4 1. Battery Installation(As shown in Figure 2) ........................4 2. Battery Recharging ................................5 Product Installation ................................5 Red Dot Sight Functions ................................ 6 1. Multi-Reticle System ................................. 6 2. -
Page 3: Important Notices
(IR) illumination source is needed. Holosun recommends our RAID light with IR head or one of our laser devices with IR Illumination such as the Holosun IRIS, LE321, or LS321. - Page 4 Ensure proper eye relief is maintained when shooting larger calibers. The user assumes all responsibility and liability for having DRS-NV/TH properly mounted to a firearm and using the DRS-NV/TH properly. Always check the condition of your mounting system prior to using your firearm.
-
Page 5: Product Overview
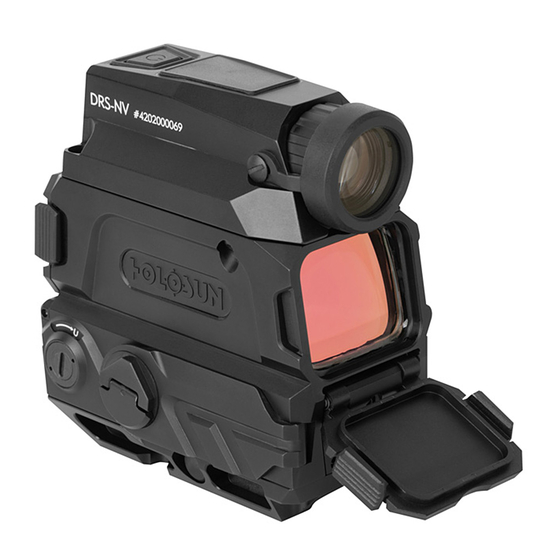
1. Product Description Thank you for purchasing the HOLOSUN DRS-NV digital fusion sight. The DRS-NV is a sight that integrates a red dot sight with a digital night vision camera, combining Holosun's red dot aiming technology with digital night vision capabilities. -
Page 6: Features
5)Close the battery cap after installing the batteries. Press the battery cap firmly with your thumb and rotate the paddle clockwise until the battery cap is secured. Note: The DRS-NV includes two 18350 batteries. You need to use the included dedicated USB magnetic cable or a... -
Page 7: Battery Recharging
2)Connect the USB end of the dedicated USB magnetic cable to an external USB power source, and then connect the other end of the cable to the magnetic charging port of the DRS-NV as shown in Figure 3. 3)Indicator light a. -
Page 8: Product Installation
1. Use the included 11mm tool to loosen the nut by rotating counterclockwise. (Figure 4) 2. Move the clamping block to a position sufficient to connect the mount to a Picatinny rail. 3. Apply forward pressure to the DRS-NV and then tighten the 11mm mounting nut to 50-65 INCH/lbs. Figure 4 Red Dot Sight Functions 1. - Page 9 3)Operation mode: Two modes are available in the following order: Manual Mode -> Lockout Mode. a. Manual mode: Brightness adjustment: There are 12 reticle brightness setting levels in manual mode. Settings 1 to 4 are NV compatible and setting 12 is the brightest. Press”+” or ”-” to increase or decrease the brightness b.
-
Page 10: Camera Functions
ON. When the red indicator light flashes three times Shake Awake is OFF. Press and hold for 5 seconds to exit the Shake Awake activation mode. When Shake Awake is activated, the DRS-NV will enter sleep mode. Any slight vibration or movement will turn the DRS-NV back on. - Page 11 1) Taking Photos or Recording Video Momentarily press the button to take photos. The remaining memory space, represented as remaining percentage, will be displayed in the lower right corner of the screen. For example, means there is 10% of storage space remaining. Long press the button to start video recording.
-
Page 12: Menu Operation
system will exit after 2 seconds. 6) Observation Mode Observation mode disables photo and video functions extending battery life. Press and hold the button and then simultaneously press the power button to enter Observation Mode. In this mode photography and video recording cannot be used. An eye symbol will be displayed in the upper right corner of the screen. - Page 13 a. Brightness: Press the button to enter the main menu interface (IMG (Image) function is selected by default). Click the button to enter the image setting interface (Bri (Brightness) function is selected by default), and then click the button to set the image brightness. Select between 1 to 6 of image brightness using the buttons to adjust the image brightness.
- Page 14 button to set your Sharp setting. Sharp has three settings: H/M/L (High/Med/Low Sharpness). Press the buttons to adjust Sharp. After selecting your Sharp setting, press and hold the button to return to the previous menu. 2)Cal (Zero Calibration Function) The Cal (Calibration) setting is used to set your zero and to adjust the projected image alignment with your sight picture.
- Page 15 From the Set menu, press the button to enter Reset. Press the buttons to select N or Y. Selecting Y (Yes) will restore factory settings of the DRS-NV. To exit, press and hold the button to return to the previous menu.
-
Page 16: Data Processing
DRS-NV. Your computer will automatically recognize the device’s memory and then you can export video files and photos. The format of the video file is MP4, and the format of the photo is jpg. When finished, turn off the DRS-NV and then remove the USB interface cable. - Page 17 Example of the reticle for .308 caliber at different magnifications: The numbers on the reticle represent 200yard, 300yard, 400 yard, and 500yard, respectively.
- Page 18 The holdover T-reticle is designed around .223 caliber at different magnifications: The numbers on the reticle represent 200yard, 300yard, 400yard, and 500yard, respectively.
-
Page 19: Zero Setting
Confirm that the digital night vision image aligns with the real-life image at 30-50 meters using the 1X setting. Using a 3X magnifier (HOLOSUN HM3X) can be used to achieve the best results. -
Page 20: Lens Covers
Lens Covers 1. The DRS-NV includes lens covers for the red dot sight objective lens (solid), ocular lens (transparent), and digital night vision camera lens (transparent). When the solid lens cover of the objective lens is closed, the digital camera function of the DRS-NV will not be affected and may enhance contrast in certain lighting conditions. -
Page 21: Removing Or Replacing The Camera
Removing or Replacing the Camera Note: It is recommended to remove the camera only when necessary. If disassembly is required please follow the instructions and perform the removal and replacement in a clean indoor desktop environment. 1. To remove the camera, use the included T10 tool to remove the four screws by rotating counterclockwise and then remove the four screws 1 # ->2 # ->3 # ->4 # in sequence. -
Page 22: Maintenance & Care
Holosun DRS models include a limited lifetime warranty on parts and workmanship to the original purchaser. The lifetime warranty is limited to the housing and optical systems. Holosun provides a 3-year warranty from the date of original retail purchase for electronic components. At our sole discretion, we will repair or replace products found to be defective under normal use without charge, excluding any delivery costs which will be assumed by the purchaser.
Need help?
Do you have a question about the DRS-NV and is the answer not in the manual?
Questions and answers