Table of Contents
Advertisement
Advertisement
Table of Contents

Summary of Contents for Axon TASER 10 VR
- Page 1 TASER 10 VR Controller User Guide Rev: 07 Dec 2023...
- Page 2 1. Save these instructions. The most up-to-date warnings and instructions are available at www.axon.com. , and TASER 10 are trademarks of Axon Enterprise, Inc., some of which are registered in the US and other countries. For more information, visit www.axon.com/legal.
-
Page 3: Table Of Contents
TASER 10 VR Controller User Guide Contents Introduction Health and safety warnings Controller features Overview Selector switch Sidelight LEDs Magazine Timeout/sleep mode Trigger Holster tracking USB port App button Pairing Headset menu Sleep mode Battery packs Storage Removal Installation Charging... -
Page 4: Introduction
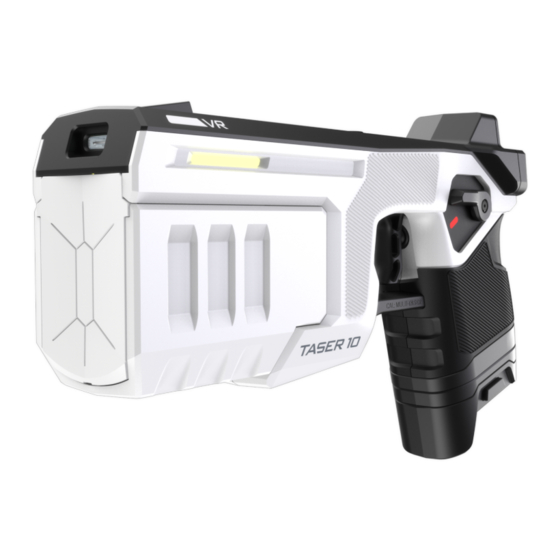
TASER VRC when powered on. Health and safety warnings White TASER 10 VR Controllers are only for use in virtual reality (VR) training environments. They will neither accept nor fire probes like a duty TASER 10. -
Page 5: Controller Features
Don’t block the Selector switch on one side of the TASER VRC while attempting to move it on the opposite side. This can break the switch and disable the controller. Keep the TASER VRC in an Axon-approved, TASER VRC-specific holster when not in use. -
Page 6: Sidelight Leds
NEVER attempt to attach a live TASER 10 magazine (whether loaded or unloaded) to a TASER 10 VR Controller. ONLY USE WHITE magazines with a VR controller. The TASER 10 VR Controller (VRC) has a removable magazine that can be left installed. Orient it properly before attempting to insert it. -
Page 7: Timeout/Sleep Mode
VR only when the Selector switch is On (Armed). Holster tracking The TASER 10 VR Controller can track when it is holstered and unholstered in specific types of holsters. This feature works with Blackhawk, Safariland, and Blade-Tech holsters made specifically for VR controllers. An S.O. Tech holster works for both a duty TASER 10 and the TASER 10 VR controller. -
Page 8: Usb Port
VR headset. Do not use this function without specific instructions/directions from Axon Technical Support. A TASER 10 VR Controller can NOT be recharged with this port. App button Use the round App button on top of the TASER VRC for pairing and accessing the headset menu. - Page 9 TASER 10 VR Controller User Guide Press the VIVE headset power button (at the back near the battery) to put both the headset and TASER VRC in Sleep mode. Move the TASER VRC out of range of the headset for more than 30 seconds.
-
Page 10: Battery Packs
TASER 10 VR Controller User Guide Battery packs Storage Store battery packs in their original packaging, including the desiccant bag, until ready to be used. Do not store a battery pack anywhere the gold contacts on the top of the battery may touch metal objects;... -
Page 11: Installation
TASER 10 VR Controller User Guide Installation 1. Slide the battery in firmly. 2. When the battery pack seats properly, the release buttons will pop out from a recessed position with two audible clicks. 3. Pull on the bottom of the battery pack to confirm it is seated The LED remains white if the battery is not fully seated;... -
Page 12: Known Issues
TASER 10 VR Controller User Guide Known issues Once you use a battery in a TASER VRC and then dock the battery for charging, the LED on the dock will no longer turn green like it normally does when the battery is fully charged. -
Page 13: Pair Controller With Htc Vive Headset
TASER 10 VR Controller User Guide Pair controller with HTC VIVE headset This article applies only to a white dedicated Virtual Reality controller that functions only in a VR environment. The Pairing LED behind the front sight indicates the current pairing mode:... - Page 14 TASER 10 VR Controller User Guide 5. Wait three seconds for internal systems to fully power on. The TASER VRC asks to begin pairing. The Pairing LED will be blue (if green , it’s already paired). 6. Press the App button firmly (so it clicks) until the Pairing LED starts flashing blue , or about three seconds.
-
Page 15: Pairing Using Headset Settings
TASER 10 VR Controller User Guide 7. When the controller and headset are paired, a confirmation appears onscreen, the Pairing LED turns green , and Simulator Training launches. The TASER VRC will remain paired to the headset even if turned off or the battery is removed. - Page 16 TASER 10 VR Controller User Guide 3. Select Inputs, then Controllers. 4. If any controllers are already paired to this headset, select Continue to unpair them. 5. Move or cycle the selector switch to On to wake up the TASER VRC. The Pairing...
- Page 17 TASER 10 VR Controller User Guide 6. Press the App button firmly (so it clicks) until the Pairing LED starts flashing blue , or about three seconds. 7. Wait briefly for the TASER VRC to pair to the headset. When completed, the Pairing LED will turn green ...the headset will confirm with "Connected"...
- Page 18 TASER 10 VR Controller User Guide ... and then it returns to the Input screen showing the connected controller. 8. Select Library to exit the pairing screen. Axon Enterprise, Inc.
-
Page 19: Pairing To A Different Headset
TASER 10 VR Controller User Guide Pairing to a different headset Pairing a TASER VRC to different headset is very similar to initial pairing, with just a little difference in the screens you'll see. 1. Turn the headset on by pressing the power button for about five seconds. - Page 20 TASER 10 VR Controller User Guide 5. Move or cycle the selector switch to On to wake up the TASER VRC. The Pairing LED will be blue , (if green , it’s already paired). Wait three seconds for internal systems to fully power on.
- Page 21 TASER 10 VR Controller User Guide ...and the headset returns to the Input screen showing the connected TASER VRC. 8. Select Library to exit the pairing screen. Axon Enterprise, Inc.
-
Page 22: Faqs
TASER 10 VR Controller User Guide FAQs How do I update the headset to the latest firmware? Your VIVE VR headset will periodically check for the latest features or enhancements. If you'd like to check manually: 1. Ensure the headset has at least 30% battery charge (two LEDs). - Page 23 TASER 10 VR Controller User Guide Why is my controller aim point drifting around while I'm in VR? Ensure the side, top, and back are not covered by your hand, stickers, or any other obstruction. If battery level is low (red on the Pairing LED), switch to a fully charged battery.
- Page 24 Why I can't use hand-tracking and pinch to select things in Axon apps? Making selections in Axon apps is actually easier. Simply look at the item you'd like to select and a round countdown timer appears. When it gets to zero after about a second, it makes the selection without you having to lift a finger.
-
Page 25: Maintenance
TASER 10 VR Controller and water CAUTION Do not immerse the TASER 10 VR Controller in any liquids. Avoid exposing the TASER 10 VR Controller to excessive moisture. The TASER 10 VR Controller is not a weatherproof device. Do not immerse the TASER VRC in water or any other liquid. -
Page 26: Technical Specifications
TASER 10 VR Controller User Guide Technical specifications The TASER 10 VR Controller is a virtual reality controller and can only be used with virtual reality applications. No components can be used as a weapon or converted into a weapon. Buttons are used for communicating trigger action and for Bluetooth Low Energy (BLE) pairing to a compatible virtual reality headset. -
Page 27: Customer Service
Visit www.axon.com/support for other international telephone numbers. Product returns To return a TASER 10 VR Controller for service, please follow the procedures at www.axon.com. Compliance A TASER 10 VR Controller system transmission is in the frequency ranges of 2402– 2480 MHz. -
Page 28: Ised Canada Compliance Statement
TASER 10 VR Controller User Guide harmful interference in a residential installation. This equipment generates, uses and can radiate radio frequency energy and, if not installed and used in accordance with the instructions, may cause harmful interference to radio communications. However, there is no guarantee that interference will not occur in a particular installation.
Need help?
Do you have a question about the TASER 10 VR and is the answer not in the manual?
Questions and answers