
Summary of Contents for Sure-Response SR-3
- Page 1 Sure-Response Sure-Response, Inc. Portable FM Transceiver SR-3 Sure-Response User's Manual...
- Page 2 ‰ INSTRUCTIONS BEFORE USE ‰ MAIN FEATURES y Use of transceiver without antenna properly installed poses risk of electric shock. • 26 programmable radio channels • CTCSS/CDCSS tones y Do not use transceiver in the proximity of explosive substances or compounds •...
-
Page 3: Table Of Contents
CONTENT PREPARATION ........01 MENU SHORTCUT SETTING ... 09 FUNCTION OPERATION AND ACCESSORIES ........01 INSTRUCTION ........10 CHARGING INSTRUCTION ....01 CHARGE STEPS ........02 BEEP PROMPT (BEEP) ......10 INSTALL/REMOVE BATTERY PACK ..02 SQUELCH LEVEL SETTING (SQL) ..10 INSTALL ANTENNA ........ -
Page 4: Preparation
pack is ~13 hours. This is based on a The battery is fully charged when the PREPARATION standard 5/5/90 duty cycle (5% transmit, indicator LED flashes green. 5% receive, 90% idle) ▶ ACCESSORIES fully charged from the manufacturer. ⚠ CAUTION Carefully remove radio and accessories from Charge the battery fully before using the ŠDo not leave fully charged battery on charger... -
Page 5: Install Antenna
▶ ▶ ▶ INSTALL ANTENNA INSTALL BELT CLIP INSTALLING THE OPTIONAL first. Seat the bottom edge of the battery then HEADSET close locking clamp with a firm click. To install antenna, insert antenna connector Insert belt clip into receptical on back of battery and push upwards until firmly To remove battery, turn off radio power, open into top of radio and twist clockwise until... -
Page 6: Getting Started
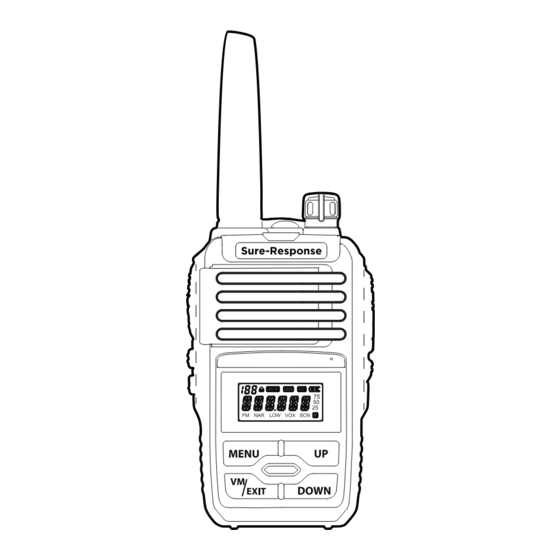
▶ LCD DISPLAY GETTING STARTED The LCD display shows a variety of radio modes and settings. They are described below ▶ DESCRIPTION OF TRANSCEIVER CTCSS Tone Mode CDCSS Tone Mode VOX Function Enabled LED Flashlight Narrow Band Function Enabled Antenna Power/Volume Knob Battery Capacity Display... -
Page 7: Basic Operation
y While radio is powered on, turn knob BASIC OPERATION clockwise to increase speaker volume, and counter-clockwise to decrease volume. ▶ SHORTCUT OPERATION ‰ LED Indicator ‰ PTT ‰ Function Keypad y Red light flashing when transmitting y [MENU]: Short press [MENU] to access y Push [PTT] and speak to microphone to y Light light flashing when receiving transmit. -
Page 8: Function Operation And Instruction
MENU NAVIGATION FUNCTION OPERATION AND INSTRUCTION ▶ ▶ BEEP PROMPT (BEEP) SQUELCH LEVEL SETTING (SQL) 1. Press [MENU]: opens the main radio settings menu 2. Press [MENU]: selects individual menu section This setting controls whether or not the radio This setting controls the squelch level of the 3. -
Page 9: Vox Function Setting (Vox.swi)
▶ ⚠ NOTE AT 5/10/20/30: This mode sets a lockout level. "OFF" is disabled VOX, 10 is lowest MANUALLY LOCK/UNLOCK Incorrect squelch setting can degrade radio timer that only takes place once. KEYPAD sensitivity, 1 is highest sensitivity. reception. Too low of a setting can subject radio 4. - Page 10 This equipment has been tested and found to comply with the limits for a Class B digital device, pursuant to part 15 of the ▶ FCC Rules. These limits are designed to provide reasonable protection against harmful interference in a residential WIRED RADIO CLONING installation.
Need help?
Do you have a question about the SR-3 and is the answer not in the manual?
Questions and answers