
Summary of Contents for Bticino XW8003
- Page 1 Smarther AC XW8003 / XM8003 / XG8003 / XW8003W User and installation manual Home + Control RA00186AB-10/23-PC www.bticino.com...
- Page 2 Smarther AC User and installation manual Home + Control...
-
Page 3: Table Of Contents
Set the temperature Set the fan speed Installation Dimensional data Flush-mounted installation (XW8003/XM8003/XG8003) Wall-mounted installation XW8003W Front view Symbols on the display of a Smarther AC associated with an IR air conditioning unit 12 Simboli sul display di uno Smarther AC associato con Attuatore Fancoil... - Page 4 Smarther AC User and installation manual Settings Manage my home Home parameters Room and device settings "Fan" parameter (only with Smarther AC associated with a fancoil actuator) Configure the Smarther AC associated with an IR air conditioning unit Configure the Smarther AC associated with a fancoil actuator Advanced settings Manage the fancoil actuator associated with the Smarther AC Rename the fancoil actuator associated with Smarther AC...
-
Page 5: Your Smarther Ac, Use It Now
Smarther AC User and installation manual Your Smarther AC, use it now! CAUTION: In order to work, the device must first be configured using the Home+Control App. Heat your home immediately (Boost) You can switch your system on quickly with the BOOST function ACTIVATION USING THE DEVICE USING THE APP Home... -
Page 6: Set The Temperature
Smarther AC User and installation manual Set the temperature ACTIVATION USING THE DEVICE USING THE APP Home Cooling Smarther AC Thermostat Fan speed Auto Working week Comfort until 22:00 1. From the Smarther AC scroll to display the temperature setting page Home Cooling Smarther AC... -
Page 7: Set The Fan Speed
Smarther AC User and installation manual Set the fan speed ACTIVATION USING THE DEVICE USING THE APP Home Cooling Smarther AC Thermostat Fan speed Auto Working week Comfort until 22:00 1. From the Smarther AC scroll to display the fan speed setting page Home Cooling Smarther AC... -
Page 8: Installation
2 W max. 5(2) A Flush-mounted installation (XW8003/XM8003/XG8003) NOTE: Install the Smarther so that it is within the field of view of the air conditioning unit, making sure that there are no obstacles in between (plants, furniture, light fittings, etc.) that may impair communication between the infrared transmitter and receiver. - Page 9 Smarther AC User and installation manual CAUTION: Avoid tightening the screws too much, in order to prevent any base distortion that may compromise the correct installation of the device. The front must be tightly fixed to the base and the fastening clip should lock into place. Once the installation has been done, wait for 2 hours before checking the read temperature.
-
Page 10: Wall-Mounted Installation Xw8003W
Smarther AC User and installation manual Wall-mounted installation XW8003W NOTE: Install the Smarther so that it is within the field of view of the air conditioning unit, making sure that there are no obstacles in between (plants, furniture, light fittings, etc.) that may impair communication between the infrared transmitter and receiver. -
Page 11: Front View
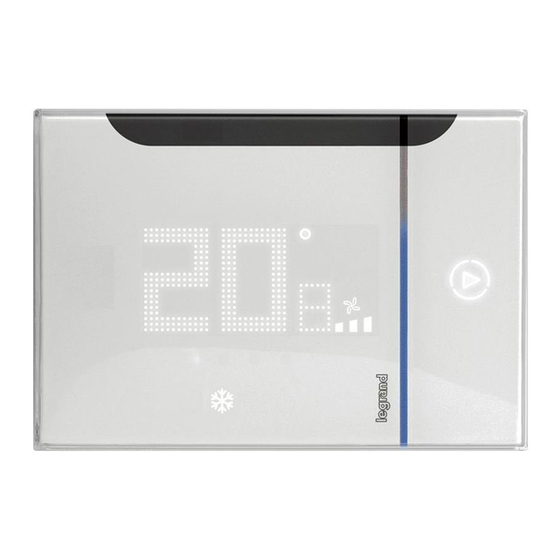
Smarther AC User and installation manual Front view 1. Touch screen display 2. Temperature*/humidity display 3. IR emitter 4. Indicator of the time remaining for “Boost” mode operation 5. Wi-Fi connection key and Radio frequency settings 6. Keys for temperature setting 7. -
Page 12: Symbols On The Display Of A Smarther Ac Associated With An Ir Air Conditioning Unit
Smarther AC User and installation manual Symbols on the display of a Smarther AC associated with an IR air conditioning unit Icon Meaning The system is OFF Cooling mode operation The system is in cooling mode. Heating mode operation The system is in heating mode. The manual mode temporarily excludes the hour programs;... -
Page 13: Simboli Sul Display Di Uno Smarther Ac Associato Con Attuatore Fancoil
Smarther AC User and installation manual Simboli sul display di uno Smarther AC associato con Attuatore Fancoil Icon Meaning The system is OFF Cooling mode operation The system is in cooling mode and is ON. Heating mode operation The system is in heating mode and is ON. The manual mode temporarily excludes the hour programs;... -
Page 14: Rear View
Smarther AC User and installation manual Rear view XW8003/XM8003/XG8003 BTICINO V.le Borri, 231 21100 (VA) ITALY 110 - 240 V 50/60 Hz 2 W max. 5(2) A 1. Power supply connection clamps 2. Connection clamps (future use) XW8003W 110 - 240 V 50/60 Hz 2 W max. -
Page 15: Technical Data
Smarther AC User and installation manual Technical data Power supply 110 – 240 Vac , 50/60Hz Absorption 2 W max Maximum cable section 1 x 1,5mm Contact output 5(2) A Operating temperature 5 – 40 °C Type of operation Pollution index Rated pulse voltage 4 kV Compatible with IR emitter (3460IR) -
Page 16: Operation
Smarther AC User and installation manual Operation After associating an IR air conditioning unit or a fancoil actuator, the Smarther AC allows to: – adjust the temperature manually – switch the system on for a limited time (Boost mode) – adjust the fans –... - Page 17 NOTE: a domestic Wi-Fi with internet access is needed for the connection between the Smarther AC and the smartphone. To use the service, the Customer must acquire the technical equipment which allows access to the Internet, on the basis of an agreement made by the Customer himself with an ISP (Internet Service Provider). BTicino plays no part in this.
-
Page 18: Adjust The Temperature Through Smarther Ac
Smarther AC User and installation manual Adjust the temperature through Smarther AC In any installation situation, whether you have one or more IR air conditioning units or one or more Fancoils, you can control the temperature in your home using Smarther AC and/or the Home+Control app. -
Page 19: B - Control One Or More Ir Air Conditioning Units In The Same Room But Outside The Ir Range Of Smarther Ac (Too Far Away Or Obscured By Obstacles)
Smarther AC User and installation manual B - Control one or more IR air conditioning units in the same room but outside the IR range of Smarther AC (too far away or obscured by obstacles) If one or more IR air conditioning units are too far away from Smarther AC or obscured by an obstacle, it is possible to use an IR emitter. -
Page 20: D - Control One Or More Actuators Connected To Fan-Coil In The Same Room
Smarther AC User and installation manual D - Control one or more Actuators connected to Fan-coil in the same room If fancoils are installed in the same room as Smarther AC, it is possible to use fancoil actuators* By closing the on-board contacts, the actuator can drive the valve opening and the 3 fan speeds. 24 Vac/dc ou 24 Vac/dc ou 110/240 Vac... -
Page 21: Associate Your Smarther Ac
Smarther AC User and installation manual Associate your Smarther AC NOTE: Before pairing, check that all devices are correctly installed and positioned. After powering, the device must be associated with the free Home+Control App in order to control it: CAUTION: Without association with the App, it will also not be possible to use the local controls. To do this, you will need to: Download the App from the Stores Register and create an user account... -
Page 22: Account Registration On The User Cloud
You must first register to be able to use the Home+Control App and thus use the Smarther AC advanced functions. After opening the App follow the registration instructions: Create an account Create an account Email Password J.Smith@bticino.com Good! Enjoy your home simply connected Create an account Already have an account? Login... - Page 23 I accept the Terms and Conditions and the Privacy Policy I want to receive advice, news and exclusive promotions from Legrand Group brands: Legrand - Netatmo - Bticino I want help Legrand Group improve its products by sharing my usage data from the apps Continue 6.
-
Page 24: Association Of The Home+Control Account With The Smarther Ac
Smarther AC User and installation manual Association of the Home+Control account with the Smarther AC This association procedure varies according to: – the type of system – the devices to be associated with the Smarther AC – the operating system of the Smarther AC on which the Home+Control App has been installed Association of the Smarther AC with an IR air conditioning unit using a smartphone with Android operating system android... - Page 25 Smarther AC User and installation manual Association of the Smarther AC with the fancoil actuator (Radio Frequency) using a smartphone with Android operating system android Association of the Smarther AC with the fancoil actuator (Radio Frequency) using a smartphone with iOS operating system...
-
Page 26: Association Of The Smarther Ac With An Ir Air Conditioning Unit Using A Smartphone With Android Operating System
Smarther AC User and installation manual Association of the Smarther AC with an IR air conditioning unit using a smartphone with Android operating system NOTE: Before starting the pairing with the Smarther, connect the smartphone to the home Wi-Fi network and check that the Wi-Fi is connected to the Internet Configuration Configuration Get access to an already installed... - Page 27 Smarther AC User and installation manual Configuration Keep the button on the top right side of your thermostat pressed until the Wi-Fi sign is blinking and the text "AP" appears on screen. Not working? I see it A Opens the FAQ to help in the resolution of the problem 4.
- Page 28 A Indicates that you are trying to complete the association using an incorrect App Configuration Configuration Configuration Wi-Fi connection Enter the password for "Rete BTicino" This accessory will be configured to access this network: Password "Rete BTicino" 5 GHzz Wi-Fi networks are not supported...
- Page 29 Smarther AC User and installation manual Configuration Configuration Configuration Are you sure this product is being installed for the first time? Any existing data from the product will be erased. Yes I am sure Cancel Is this product being installed for the Is this product being installed for the first time? first time?
- Page 30 Smarther AC User and installation manual Configuration Configuration Please give a name to the product Please enter a name Smarther AC Thermostat Configuration In the following steps you are going to configure Smarther AC Thermostat to control an AC unit. Skip infrared configuration Continue Start...
- Page 31 Smarther AC User and installation manual Listed brand Configuration Selection Please enter a brand name Other brand Aucma Bluestar Carrier Changhong Changling Chigo Chunlan Validate 24. Select the air conditioning unit brand 25. Touch to confirm Configuration Configure your remote Press various buttons on your remote while pointing it at the Smarther AC until it is...
- Page 32 Smarther AC User and installation manual Now the system will prompt to perform some actions to test the correct connection between Smarther AC and IR air conditioning unit. Configuration Make sure your air conditioner is turned off If not, use your remote to turn it off My air conditioner is off 27.
- Page 33 Smarther AC User and installation manual Configuration The Smarther AC is turning your air conditioner OFF... Nothing happened? My air conditioner is off A In the event that the remote control is not recognised, the system suggests to run the remote control self-learning procedure 29.
- Page 34 Smarther AC User and installation manual Brand not listed Configuration Selection Please enter a brand name Other brand Aucma Bluestar Carrier Changhong Changling Chigo Chunlan Validate 24. Select "Other brand" 25. Touch to confirm Configuration Configure your remote Press various buttons on your remote while pointing it at the Smarther AC until it is automatically recognised.
- Page 35 Smarther AC User and installation manual Now the system will prompt to perform some actions to test the correct connection between Smarther AC and IR air conditioning unit. Configuration Make sure your air conditioner is turned off If not, use your remote to turn it off My air conditioner is off 27.
- Page 36 Smarther AC User and installation manual Check that Smarther AC is in front of the IR air conditioning unit and that there are no obstacles impairing the communication. Configuration Try again Before retrying, check that the controller is in front of the air conditioner and that there are no obstacles between them.
- Page 37 Smarther AC User and installation manual Configuration The Smarther AC is turning your air conditioner ON... Nothing happened? My air conditioner is on 31. If the IR air conditioning unit has not switched on, touch “Nothing happened”. The system will now try to find a remote control similar to yours in the database. If the search is successful, the confirmation screen (32A) appears.
- Page 38 Smarther AC User and installation manual Self-learning procedure of the remote control This procedure is necessary if the keys on your remote control are not recognised. NOTE: The following self-learning example is for a complete IR air conditioning unit with all the functions available.
- Page 39 Smarther AC User and installation manual Configuration Turn on your AC Don't forget to point your remote at the Smarther AC Thermostat Press the Power button as if you were turning on your AC. It is on 4. If the display of your remote control is on, touch to confirm. Configuration Make sure the cooling mode is activated Don't forget to point your remote at the Smarther...
- Page 40 Smarther AC User and installation manual Switching off the air conditioning unit Configuration Now, turn off your AC Don't forget to point your remote at the Smarther AC Thermostat Press the Power button as if you were turning off your AC. Waiting for the remote...
- Page 41 Smarther AC User and installation manual Switching on the air conditioning unit Configuration Turn on your AC one more time Don't forget to point your remote at the Smarther AC Thermostat Press the Power button as if you were turning on your AC.
- Page 42 Smarther AC User and installation manual The screen indicating the transition to the second self learning step (Temperature) is displayed Congratulations! Let's go to the next step On/Off Temperature Fan speed Modes Swing Continue 10. Touch to start the second self learning step (Temperature)
- Page 43 Smarther AC User and installation manual Configuration Before we start In the next steps, point the remote control at the Smarther AC Thermostat and not your AC. Each button press will be validated by a beep. Please wait for it before continuing. Continue 11.
- Page 44 Smarther AC User and installation manual Configuration What is the temperature shown on your remote? Minimum temperature Confirm 14. Touch to set the correct temperature shown on your remote control. 15. Touch to confirm the temperature and proceed to the maximum temperature setup stage Maximum temperature Configuration Now, reach the maximum temperature...
- Page 45 Smarther AC User and installation manual Configuration What is the temperature shown on your remote? Maximum temperature Confirm 18 Touch to set the correct temperature shown on your remote control. 19. Touch to confirm the temperature and go back to the minimum temperature setup page Minimum temperature Configuration Reach the minimum temperature one...
- Page 46 Smarther AC User and installation manual The screen indicating the transition to the third self-learning step (fan speed) is displayed Congratulations! Let's go to the next step On/Off Temperature Fan speed Modes Swing Continue 22. Touch to start the third self-learning step (fan speed) Configuration Let's move on to fan speed Find the buttons for changing the fan speed on...
- Page 47 Smarther AC User and installation manual Configuration Configuration Select other fan options available on your remote Use the fan buttons to determine how many fan speeds your AC has. Auto Don't count other options like Auto or Quiet as speeds. Quiet The icons may differ from one remote to another.
- Page 48 Smarther AC User and installation manual Maximum fan speed Configuration Now, reach the maximum fan speed Press the fan button multiple times until you reach the maximum fan speed. Wait for the beep between each button press. Maximum fan speed reached 31.
- Page 49 Smarther AC User and installation manual Automatic fan speed Configuration Auto fan option Press the fan button multiple times until you reach the "Auto fan" option. Auto fan option reached 35. Press the fan button several times until the automatic speed is reached, or press the automatic speed mode button if available.
- Page 50 Smarther AC User and installation manual The screen indicating the transition to the fourth self-learning step (Mode) is displayed Congratulations! Let's go to the next step On/Off Temperature Fan speed Modes Swing Continue 39. Touch to start the fourth self-learning step (Mode) Configuration Let's move on to modes Find the buttons for changing the modes on your...
- Page 51 Smarther AC User and installation manual Configuration Select the modes available on your remote Use the mode button to find all the available modes. Cooling Heating Auto The icons may differ from one remote to another. Try to find something that looks similar on yours. Confirm 41.
- Page 52 Smarther AC User and installation manual Dry Mode Configuration Reach the Dry mode Press the mode button multiple times until you reach the "Dry" mode. Dry mode reached 45. Press the mode button several times until Dry mode is reached, or press the Dry button if available.
- Page 53 Smarther AC User and installation manual Auto mode Configuration Reach the Auto mode Press the mode button multiple times until you reach the "Auto" mode. Auto mode reached 49. Press the mode button several times until Automatic mode is reached, or press the Automatic mode button if available.
- Page 54 Smarther AC User and installation manual The screen indicating the transition to the fifth self-learning step (Swing) is displayed Configuration Congratulations! Let's go to the next step On/Off Temperature Fan speed Modes Swing Continue 53. Touch to start the fifth self-learning step (Swing) Configuration Let's move on to Swing Find the buttons for changing the vertical swing...
- Page 55 Smarther AC User and installation manual Configuration Select the swing options available on your remote Use the swing buttons to find all the swing options available. Vertical swing Air flows from top to bottom Horizontal swing Air flows from right to left Confirm (Vertical swing/Horizontal swing).
- Page 56 Smarther AC User and installation manual Configuration Activate the continuous movement of the vertical swing one more time Press the vertical swing button multiple times until the swing is in motion. This will help the Smarther AC Thermostat verify its new setup.
- Page 57 Smarther AC User and installation manual Configuration Reach the lowest position of the vertical swing Press the vertical swing button multiple times until you reach the lowest position. Wait for the beep between each button press.. Lowest position reached 64. Press the vertical swing button several times until the lowest swing position of the fins is reached.
- Page 58 Smarther AC User and installation manual Configuration Switch to the lowest position of the vertical swing one more time Press the vertical swing button multiple times until you reach the lowest position. This will help the Smarther AC Thermostat verify its new setup..
- Page 59 Smarther AC User and installation manual Configuration Now, stop the horizontal swing's continuous movement Press the horizontal swing button multiple times until the swing stops and stays fixed, regardless of the position it's in. Motion stopped 72. Press the horizontal swing button several times until the movement of the fins stops in a fixed position.
- Page 60 Smarther AC User and installation manual Predefined horizontal swings Configuration Configuration Use the swing buttons to find the number of horizontal swing predefined positions Don't count other options like Auto as positions. Number of vertical swing positions Do you have predefined positions for the horizontal swing on your remote? Use the swing buttons to find out if you have predefined positions on your remote.
- Page 61 Smarther AC User and installation manual Configuration Reach the leftmost position of the horizontal swing Press the horizontal swing button multiple times until you reach the leftmost position. Wait for the beep between each button press.. Leftmost position reached 81. Press the horizontal swing button several times until the leftmost position of the fins is reached.
- Page 62 Smarther AC User and installation manual To end the procedure, you are asked to save again the switch off function. Configuration Finally, turn OFF your AC Don't forget to point your remote at the Smarther AC Thermostat Press the Power button as if you were turning off your AC..
- Page 63 Smarther AC User and installation manual Configuration Configuration The setup is complete On/Off Temperature Fan speed Modes Swing Thank you!\nYour Smarther AC Thermostat will be ready shortly The remote configuration is in progress, which will let you fully control your air conditioner. You will be notified when your controller is ready to use.
-
Page 64: Association Of The Smarther Ac With The Ir Air Conditioning Unit Using A Smartphone With Ios Operating System
Download HOME + CONTROL www.bticino.it/red Download HOME + CONTROL App Hereby, BTicino S.p.A., declares that the radio equipment type Smarther with Netatmo item XW8002/XM8002/XG8002 is in compliance with Directive 2014/53/EU. The full text of the EU declaration of conform HOMEKIT® CODE... - Page 65 Smarther AC User and installation manual – on the back of the Smarther AC HOMEKIT® CODE Add product Add product Configuration Which product do you want to install? Get access to an already installed product What is the brand of the product you want to install? Smarther AC Thermostat...
- Page 66 The Wi-Fi network to be used is automatically recognised Configuration Wi-Fi configuration This accessory will be configured to access this network: Rete BTicino 5 GHz Wi-Fi networks are not supported Connect to another Wi-Fi network Confirm 4. Touch to confirm...
- Page 67 Smarther AC User and installation manual Configuration Which color has the Wi-Fi indicator? White Blue 7. The Smarther AC shows the blue Wi-Fi symbol. Touch it to continue the configuration A Indicates that you are trying to complete the association using an incorrect App Configuration Configuration Name...
- Page 68 Smarther AC User and installation manual Download HOME + CONTROL App Configuration Download HOME + CONTROL App Accessory Scan code or hold iPhone near the accessory. More options… Scan a Setup Code Look for a QR code on the accessory, packaging or instructions, and position it in the camera frame above.
- Page 69 Thermostat Name Use the name provided or enter a Use the name provided or enter a custom name for each item. custom name. Humidity sensor Bticino AirConditioner bgc10... Continue Finish Continue Identify View in Home 20. If necessary touch to rename the thermostat name 21.
- Page 70 Smarther AC User and installation manual Configuration Configuration Please choose a type for each room Bedroom Bathroom Bedroom Garage Congratulations! Your product is now configured Confirm Finish 24. Touch to select the type of room where to install the Smarther AC 25.
-
Page 71: Association Of The Smarther Ac With The Fancoil Actuator (Radio Frequency) Using A Smartphone With Android Operating System
Smarther AC User and installation manual Association of the Smarther AC with the fancoil actuator (Radio Frequency) using a smartphone with Android operating system NOTE: Before starting the pairing with the Smarther, connect the smartphone to the home Wi-Fi network and check that the Wi-Fi is connected to the Internet Configuration Configuration Get access to an already installed... - Page 72 Smarther AC User and installation manual Configuration Keep the button on the top right side of your thermostat pressed until the Wi-Fi sign is blinking and the text "AP" appears on screen. Not working? I see it A Opens the FAQ to help in the resolution of the problem 4.
- Page 73 A Indicates that you are trying to complete the association using an incorrect App Configuration Configuration Configuration Wi-Fi connection Enter the password for "Rete BTicino" This accessory will be configured to access this network: Password "Rete BTicino" 5 GHzz Wi-Fi networks are not supported...
- Page 74 Smarther AC User and installation manual Configuration Configuration Configuration Are you sure this product is being installed for the first time? Any existing data from the product will be erased. Yes I am sure Cancel Is this product being installed for the Is this product being installed for the first time? first time?
- Page 75 Smarther AC User and installation manual Configuration Configuration Please give a name to the product Please enter a name Smarther AC Thermostat Configuration In the following steps you are going to configure Smarther AC Thermostat to control an AC unit. Skip infrared configuration Continue Start...
- Page 76 Smarther AC User and installation manual Add product Add product Configuration What is the brand of the product you want to install? Gateway Power Outlet with Home/Away Master Switch Gateway Module Plug-in Gateway Smarther There are no product to configure Brands available in the area: Europa Check that Smarther AC and the HVAC actuator are...
- Page 77 Smarther AC User and installation manual 30. Briefly press the "Program" button on the actuator or wait for the green LED to come on. Repeat the same procedure for all the actuators (maximum 5 fancoil actuators, 1 Smarther AC in each room) NOTE: Check that there are no fancoil actuators switched on other than those that you require Configuration Press briefly the PROG button on the HVAC actuator and...
- Page 78 Smarther AC User and installation manual 34. The LED on the actuator turns off Home Home Home Home Start Complete your installation, you have 1 step left Cooling Cooling Cooling Smarther AC Smarther AC Manage my home Smarther AC Thermostat Thermostat Thermostat Resume configuration...
- Page 79 Smarther AC User and installation manual Add product Add product Configuration There are other products ready to be What is the brand of the product you want configured to install? Gateway Power Outlet with Home/Away Master Switch HVAC actuator Gateway Module Plug-in Gateway Smarther Brands available in the area...
- Page 80 Smarther AC User and installation manual Configuration Configuration Select system type Select valve type Two pipes fan coil ON/OFF valve normally open Four pipes fan coil ON/OFF valve normally closed Proportional valve 0-10V Three points valve Continue Continue 43. Select the type of system 44.
- Page 81 Smarther AC User and installation manual Configuration Select algorithm type Hysteresis Proportional-integral Continue 51. Select the type of algorithm among: Hysteresis algorithm: this algorithm is based on the hysteresis, la the capacity of a structure to change its temperature more or less slowly depending on the type of system and then according to the speed that the installed devices use to heat/cool If you select this algorithm, you must define its thresholds (see next screen).
- Page 82 Smarther AC User and installation manual Configuration Control algorithm Heating hysteresis threshold More information Cooling hysteresis threshold More information Full speed threshold More information Valve Valve cycle time Continue NOTE: This configuration is only necessary when "Hysteresis" is selected as algorithm in the previous step 53.
-
Page 83: Association Of The Smarther Ac With The Fancoil Actuator (Radio Frequency) Using A Smartphone With Ios Operating System
Download HOME + CONTROL www.bticino.it/red Download HOME + CONTROL App Hereby, BTicino S.p.A., declares that the radio equipment type Smarther with Netatmo item XW8002/XM8002/XG8002 is in compliance with Directive 2014/53/EU. The full text of the EU declaration of conform HOMEKIT® CODE... - Page 84 Smarther AC User and installation manual – on the back of the Smarther AC HOMEKIT® CODE Add product Add product Configuration Which product do you want to install? Get access to an already installed product What is the brand of the product you want to install? Smarther AC Thermostat...
- Page 85 The Wi-Fi network to be used is automatically recognised Configuration Wi-Fi configuration This accessory will be configured to access this network: Rete BTicino 5 GHz Wi-Fi networks are not supported Connect to another Wi-Fi network Confirm 4. Touch to confirm...
- Page 86 Smarther AC User and installation manual Configuration Which color has the Wi-Fi indicator? White Blue 7. The Smarther AC shows the blue Wi-Fi symbol. Touch it to continue the configuration A Indicates that you are trying to complete the association using an incorrect App Configuration Configuration Name...
- Page 87 Smarther AC User and installation manual Download HOME + CONTROL App Configuration Download HOME + CONTROL App Accessory Scan code or hold iPhone near the accessory. More options… Scan a Setup Code Look for a QR code on the accessory, packaging or instructions, and position it in the camera frame above.
- Page 88 Thermostat Name Use the name provided or enter a Use the name provided or enter a custom name for each item. custom name. Humidity sensor Bticino AirConditioner bgc10... Continue Finish Continue Identify View in Home 20. If necessary touch to rename the thermostat name 21.
- Page 89 Smarther AC User and installation manual Configuration Configuration Please choose a type for each room Bedroom Bathroom Bedroom Garage Congratulations! Your product is now configured Confirm Finish 24. Touch to select the type of room where to install the Smarther AC 25.
- Page 90 Parameters Home Manage my home Cooling Cooling Continue the configuration Schedules Some products were not configured correctly. Termostato Sm... Bticino AirConditioner bgc10... Please resume the installation. Thermal comfort Continue This control mode is not supported Fan speed Guests Later Auto...
- Page 91 Smarther AC User and installation manual Configuration Add product Add product Which product do you want to install? What is the brand of the product you want to install? Smarther with Netatmo There are no product to configure Smarther AC Check that Smarther AF and the HVAC Thermostat actuator are both powered or create and...
- Page 92 Smarther AC User and installation manual 37. Briefly press the "Program" button on the actuator and wait for the green LED to come on. Repeat the same procedure for all the actuators (maximum 5 fancoil actuators, 1 Smarther AC in each room) Configuration Press briefly the PROG button on the HVAC actuator and wait until the led...
- Page 93 Parameters Home Manage my home Cooling Cooling Continue the configuration Schedules Some products were not configured correctly. Termostato Sm... Bticino AirConditioner bgc10... Please resume the installation. Thermal comfort Continue This control mode is not supported Fan speed Guests Later Auto...
- Page 94 Smarther AC User and installation manual Configuration Configuration Configuration Select system type Select valve type Select fan type Two pipes fan coil ON/OFF valve normally open Speed 0-10V Four pipes fan coil ON/OFF valve normally closed Three stages speed Proportional valve 0-10V Three points valve Continue Continue...
- Page 95 Smarther AC User and installation manual Configuration Select algorithm type Hysteresis Proportional-integral Continue 54. Select the type of algorithm among: Hysteresis algorithm: this algorithm is based on the hysteresis, la the capacity of a structure to change its temperature more or less slowly depending on the type of system and then according to the speed that the installed devices use to heat/cool If you select this algorithm, you must define its thresholds (see next screen).
- Page 96 Smarther AC User and installation manual Configuration Control algorithm Heating hysteresis threshold More information Cooling hysteresis threshold More information Full speed threshold More information Valve Duration time between valve cycles Duration time between valve cycles Continue NOTE: Questa configurazione è necessaria solo se al punto precedente hai selezionato come "Isteresi" come algoritmo 56.
- Page 97 Smarther AC User and installation manual Configuration Configuration Configuration Please give a name to the product Name Thermostat Continue Congratulations! Congratulations! Your HVAC actuator is now configured. All devices have been set up. Next Finish 61. Insert a name for the actuator 62.
-
Page 98: Create A Program Using The Guided Procedure
Smarther AC User and installation manual Create a program using the guided procedure At this point, through questions you have to answer, the procedure proposes to create a program to adjust the temperature. It is possible to learn more about the program operation in the Schedules chapter. - Page 99 Smarther AC User and installation manual Create a schedule Create a schedule Lunch Week-end Do you come back home for lunch? What time do you get up during the week-end? What time do you go to bed during the week-end? Continue Continue 9.
- Page 100 Smarther AC User and installation manual Create a schedule Create a schedule Cooling temperature What would be your ideal comfort temperature at home during the day? Congratulations! A new temperature schedule has been created for your home. It will apply on every room. You can modify it at any time by clicking on "__LEG_ SCHEDULES"...
-
Page 101: Access Your Home Through Invitation
Smarther AC User and installation manual Access your home through invitation It is possible to access the home created by your installer, or one of your family members, following the steps shown below. NOTE: All the users have the same control, invitation and modification authorities. Download the App from the Stores –... -
Page 102: Forgotten Password
Smarther AC User and installation manual Forgotten password When you have forgotten the password: Login Email Password Enjoy your home simply connected Create an account Forgot your password? Already have an account? Login Login 1. Touch to open the login page 2. -
Page 103: Authentication
Smarther AC User and installation manual A message will confirm that the password has been changed successfully; open the App to enter the authentication data Enjoy your home simply connected Create an account Already have an account? Login Authentication After registering with the portal, you can authenticate by entering email and password. Login Email Password... -
Page 104: Functions Using The Device
Smarther AC User and installation manual Functions using the device Boost functions The Boost forces the switching on of the system for a limited time (15, 30 or 45 minutes) independent of the measured and programmed temperature. Once the time set has elapsed, Smarther AC will resume operation according to the previous program. - Page 105 Smarther AC User and installation manual The display shows the measured temperature; the LED gradually switches off while the set time passes by. 3. To end the setting early touch the ; symbol; Smarther AC will continue operation according to the previous programming.
-
Page 106: Set The Temperature
Smarther AC User and installation manual Set the temperature The temperature level that can be locally set refers only to the manual mode operation. 1. Touch the display 2. Scroll on the display to go to the next page 3. The current setting is displayed, modify the setting with the keys... - Page 107 Smarther AC User and installation manual Once the setting is complete wait for a few seconds. The display will show the measured temperature.
- Page 108 Smarther AC User and installation manual NOTE: It is possible to switch off the system by adjusting the temperature: – < 16°C (with heating programme active) – > 30°C (with cooling programme active) – < 16°C or > 30°C (with automatic programme active); by sending an OFF command from the App.
-
Page 109: Set The Fan Speed
Smarther AC User and installation manual Set the fan speed Depending on the device on your system, in this page you can adjust the speed of the fan of an IR air conditioning unit or fancoil. 1. Touch the display 2. - Page 110 Smarther AC User and installation manual Once the setting is complete wait for a few seconds. The display will show the measured temperature.
-
Page 111: Room Humidity Display
Smarther AC User and installation manual Room humidity display Smarther AC contains a sensor that detects the humidity percentage in the room; follow the procedure described below to display the measured value. 1. Touch the display 2. Scroll 3 times on the display to go to the dedicated page The measured humidity percentage is visible for a few seconds, then the measured temperature display will appear again. -
Page 112: Functions Using The App
Smarther AC User and installation manual Functions using the App Home Page After logging in, from this page you can manage the temperature inside your home, using the Smarther AC. The functions available depend on the devices associated with the system (IR air conditioning unit or fancoil actuator). - Page 113 Smarther AC User and installation manual Home page with several Smarther AC Home Garage Kitchen Cooling Garage Smarther AC Thermostat Auto Auto Working week Comfort until 22:00 A Settings pull-down menu Home name C Open the "Graphic" section, where it is possible to view the system temperature and humidity charts.
- Page 114 Smarther AC User and installation manual It opens a section where it is possible to change some settings regarding the individual rooms and devices, or the settings of Manage my home the whole home. It is also possible to set some Smarther AC parameters It opens the section, where it is possible to create and manage Schedules the programs...
-
Page 115: Control A Single Device
Smarther AC User and installation manual Control a single device In this mode it is possible to: – set a temperature up to a certain time – activate the boost function – adjust the fan speed – set the OFF status The settings will only affect the device inside the room Set the temperature This function allows to set a temperature. - Page 116 Smarther AC User and installation manual The temperature is now set Home Cooling Smarther AC Thermostat Auto Auto Manual Setpoint until 17:05 A Set temperature Set mode indication C Setting end time 4. Touch to quit the current mode and return to the programmed mode Adjust the fan speed Depending on the device on the system, this function allows to adjust the speed of the fan of an IR air conditioning unit or fancoil.
- Page 117 Smarther AC User and installation manual Adjust the fan speed Depending on the device on the system, this function allows to adjust the speed of the fan of an IR air conditioning unit or fancoil. NOTE: If Smarther AC is in a programmed mode, changing the fan speed will automatically switch to manual program mode Home Home...
- Page 118 Smarther AC User and installation manual Adjusts the vertical/horizontal swing of the fins Depending on the device on the system, this function allows to adjust the vertical/horizontal swing of the fins of an IR air conditioning unit or fancoil. Home Cooling Smarther AC Thermostat...
- Page 119 Smarther AC User and installation manual Case 2: only management of predefined positions It is not possible to enable/disable the vertical/horizontal swing of the fins; only predefined positions are available Home Cooling Smarther AC Thermostat Auto Auto Working week Comfort until 22:00 Smarther AC Thermostat Fan speed Auto...
-
Page 120: Set The Off Function
Smarther AC User and installation manual Set the OFF function This function allows to switch off the Smarther AC by activating the OFF function. Home Home Cooling Cooling Smarther AC Smarther AC Thermostat Thermostat Hall of Auto Auto Working week Comfort until 22:00 1. -
Page 121: Set The Boost Function
Smarther AC User and installation manual Set the Boost function This function forces the switching on of the system (both heating and cooling) for a limited time (15,30 or 45 minutes) independent of the measured or programmed temperature. Once the time set has elapsed, the Smarther AC will resume operation according to the previous program. -
Page 122: Control All The Home Devices
Smarther AC User and installation manual Control all the home devices Using the home page central button, it is possible to adjust the temperature of the home, sending commands that will affect all the devices. Therefore it is possible to: –... -
Page 123: Absent Function
Smarther AC User and installation manual Absent Function This setting allows to enable the “Absent” function on the Smarther AC (Default: Heating: 12°C / Cooling: OFF). The Absent function is very useful when going out for a medium-long period of time and it is necessary to keep an acceptable temperature, avoiding pointless energy waste. -
Page 124: Off Function
Smarther AC User and installation manual OFF function This setting allows to switch off the Smarther AC by activating the OFF function until a certain date and time. Home Home Kitchen Kitchen Garage Garage Working week Holiday week Away Comfort until 22:00 1. -
Page 125: Settings
Smarther AC User and installation manual Settings Manage my home In this section, it is possible to change some settings of the rooms or the whole home. Inside the rooms, you will find Smarther AC devices and other associated devices. You will also be able to change some parameters. - Page 126 Smarther AC User and installation manual Location Home Geographical location Enter an address here Geographical location Viale Luigi Borri 231, 21100 Varese Varese, Italy Location Timezone Europe, Rome Confirm 1. Touch to set your home position 2. Enter the address and select it among the suggested ones 3.
-
Page 127: Room And Device Settings
Smarther AC User and installation manual Room and device settings In this section, it is possible to rename and delete a room or configure the Smarther AC and other associated devices. The available functions are different depending on the device associated with the Smarther AC (IR air conditioning unit or fancoil actuator) Manage my home Manage my home... -
Page 128: Fan" Parameter (Only With Smarther Ac Associated With A Fancoil Actuator)
Smarther AC User and installation manual "Fan" parameter (only with Smarther AC associated with a fancoil actuator) In this section, it is possible to modify some parameters of the fans. Manage my home Living room Edit Termostato Smarth Post heating ventilation time Delete HVAC actuator Sets the time the fan have to continue spinning after the... -
Page 129: Configure The Smarther Ac Associated With An Ir Air Conditioning Unit
Smarther AC User and installation manual Configure the Smarther AC associated with an IR air conditioning unit In this section, you can view some information regarding Smarther AC and IR air conditioning unit. It is also possible to perform various configurations on the Smarther AC, such as configuring the network and more, or repeat the association with the IR air conditioning unit. -
Page 130: Configure The Smarther Ac Associated With A Fancoil Actuator
Smarther AC User and installation manual Configure the Smarther AC associated with a fancoil actuator In this section, it is possible to view some information about the Smarther AC and the fancoil actuator. It is also possible to perform various configurations on the Smarther AC, such as configuring the network and more, or change the hydraulic parameters of the fancoil actuator. - Page 131 Smarther AC User and installation manual Manage the Smarther AC Manage my home Manage my home Smarther AC Thermostat Smarther AC Thermostat Rename Move Configuration Configuration Delete Advanced Advanced Advanced remote configuration Advanced remote configuration Launch the advanced configuration of your remote if Launch the advanced configuration of your remote if some feature don't control properly your air conditioner some feature don't control properly your air conditioner...
- Page 132 Smarther AC User and installation manual Delete Manage my home Manage my home Smarther AC Thermostat Smarther AC Thermostat Rename Move Configuration Configuration Delete Advanced Advanced Advanced remote configuration Advanced remote configuration Launch the advanced configuration of your remote if Launch the advanced configuration of your remote if Remove some feature don't control properly your air conditioner...
-
Page 133: Advanced Settings
Smarther AC User and installation manual Advanced settings Manage my home Manage my home Smarther AC Thermostat Thermostat parameters Touch interface Configuration Advanced Touch sound Advanced remote configuration Vibration Launch the advanced configuration of your remote if some feature don't control properly your air conditioner Screen brightness Information Wi-Fi signal... - Page 134 Smarther AC User and installation manual Display brightness Manage my home Screen brightness Thermostat parameters Automatic without off Touch interface Automatic with off Touch sound Customized Vibration Screen brightness 1. Touch to select the display lighting operating logic After 10 seconds, the display switches off, goes to stand-by mode and performs the selected operating logic.
- Page 135 Smarther AC User and installation manual Configure the network In this section, it is possible to set to which Wi-Fi network the Smarther AC is connected. This function is useful for example when replacing the router, or when you want to connect the Smarther AC to a network other than the one selected during the first installation.
- Page 136 Smarther AC User and installation manual Configuration Keep the button on the top right side of your thermostat pressed until the Wi-Fi sign is blinking and the text "AP" appears on screen. Not working? I see it 4. Press to continue Configuration Which color has the Wi-Fi indicator? White...
- Page 137 Smarther AC User and installation manual Configuration Configuration Configuration Wi-Fi connection Enter the password for "Rete BTicino" This accessory will be configured to access this network: Password "Rete BTicino" 5 GHzz Wi-Fi networks are not supported Select the product you wish...
- Page 138 Smarther AC User and installation manual Configure the IR air conditioning unit This procedure allows to associate the Smarther AC with an IR air conditioning unit, so that through the infrared system you will be able to control the IR air conditioning unit directly from the Smarther AC.
- Page 139 Smarther AC User and installation manual Configure the fancoil actuator This procedure allows to change the hydraulic parameters of the fancoil actuator associated with the Smarther AC. Configuration Manage my home Manage my home Smarther AC Thermostat Smarther AC Thermostat Configuration Configuration Advanced...
-
Page 140: Manage The Fancoil Actuator Associated With The Smarther Ac
Smarther AC User and installation manual Manage the fancoil actuator associated with the Smarther AC In this section, it is possible to view some information about the Smarther AC and the fancoil actuator. It is also possible to perform various configurations on the Smarther AC, such as configuring the network and more, or change the hydraulic parameters of the fancoil actuator. -
Page 141: Rename The Fancoil Actuator Associated With Smarther Ac
Smarther AC User and installation manual Rename the fancoil actuator associated with Smarther AC Manage my home Manage my home HVAC actuator HVAC actuator Rename the product Configuration Configuration Identify Identify Information Information Model Model HVAC actuator HVAC actuator Serial number ec:5e:1f:00:00:37:69:9c Serial number ec:5e:1f:00:00:37:69:9c... -
Page 142: Schedules
Smarther AC User and installation manual Schedules During the association of your Smarther AC with your Smartphone, through the answers to some questions regarding your living habits the tutorial has allowed you to create a program that manages the temperature inside the home based on your needs. The created program sets different temperatures based on time and week day;... - Page 143 Smarther AC User and installation manual Working week Working week Working week Active Active Active Heating Cooling Auto Monday Monday Working week Active Tuesday Tuesday Create a cooling schedule Wednesday Wednesday Thursday Thursday Friday Friday Saturday Saturday Sunday Sunday 3. Touch to open the Programs menu A Select the type of system for the new program, either: Heating: If the measured temperature is below the programmed setpoint for the period, the heating system is activated.
-
Page 144: Duplicate A Program
Smarther AC User and installation manual Duplicate a program Via this function you can copy and if necessary modify an existing program Home Home Manage my home Cooling Schedules Smarther AC Thermostat Thermal comfort Guests Auto Auto Working week Add product Comfort until 22:00 Install a new home Shortcut Center... - Page 145 Smarther AC User and installation manual Working week Working week Rename Active Active Monday Monday Duplicate schedule Copy-paste days Tuesday Tuesday Wednesday Wednesday Thursday Thursday Friday Friday Saturday Saturday Sunday Sunday 5. Touch to duplicate the program 6. Select to duplicate the program Working week Working week Duplicate schedule...
-
Page 146: Rename A Program
Smarther AC User and installation manual Rename a program This function allows to rename a program. Working week Working week Home Rename Active Active Monday Monday Duplicate schedule Copy-paste days Tuesday Tuesday Cooling Smarther AC Thermostat Wednesday Wednesday Auto Auto Thursday Thursday Working week... -
Page 147: Modify A Program
Smarther AC User and installation manual Modify a program You can customise a programme better by changing certain parameters: Change a time interval; – Copy-paste the days; – Set-point. – Change a time interval Working week Working week Home Active Active Monday Night... - Page 148 Smarther AC User and installation manual Working week Modify a time slot Modify a time slot Active Time slots Time slots Night Starts Starts Monday 07:00 Monday 07:00 Living room Finish Finish Comfort Monday 08:00 Monday 14:30 Living room Sets of temperatures Sets of temperatures Living room Comfort...
- Page 149 Smarther AC User and installation manual Copy-paste the days This function gives the possibility of copying the profile created for a certain day to one or more days of the week. Working week Working week Home Rename Active Active Monday Monday Duplicate schedule Copy-paste days...
- Page 150 Smarther AC User and installation manual Set point You can delete custom set-points to better manage the programs of your thermostat. You can also change the temperature of the default set-points. Add a set point This function gives the possibility of adding set points, customising the temperature and name based on personal needs.
- Page 151 Smarther AC User and installation manual Change temperatures Modify a time slot Name Time slots Starts Monday 07:00 Modifications are applied to all time slots where these temperatures are being used. Finish Monday 14:30 Living room Sets of temperatures Smarther AC Thermostat Comfort Edit Fan speed...
- Page 152 Smarther AC User and installation manual Change temperatures Change temperatures Change temperatures Change temperatures Name Name Comfort Comfort Modifications are applied to all time slots where these Modifications are applied to all time slots where these temperatures are being used. temperatures are being used.
- Page 153 Smarther AC User and installation manual Delete a set point This function allows to delete the created set point. NOTE: Set points cannot be deleted by default (Comfort/Eco/Night). NOTE: Only set points not appearing in a program can be deleted. Set points appearing in a program can only be deleted after being deleted from the programs for the individual days.
-
Page 154: Activate A Program
Smarther AC User and installation manual Activate a program After creating the programs you must activate the one you want Home Home Cooling Cooling Smarther AC Smarther AC Thermostat Thermostat Auto Auto Auto Auto Working week Working week Comfort until 22:00 Comfort until 22:00 Working week Holiday week... -
Page 155: Delete A Program
Smarther AC User and installation manual Delete a program This function gives the possibility of definitively removing an existing program. Working week Working week Working week Home Active Active Active Monday Monday Heating Cooling Auto Working week Active Tuesday Tuesday Cooling Holiday week Deactivated... -
Page 156: Example Of Creation Of A New Program From An Existing One
Smarther AC User and installation manual Example of creation of a new program from an existing one It is possible to change a program defining the various parameters which make up the program (temperature levels, time intervals and days of application) specifically and in a totally free way. Let’s now see how we can change an existing program so that it includes the following settings: –... - Page 157 Smarther AC User and installation manual In order to create a new program meeting the previously described conditions, duplicate existing program and then customise it: Working week Working week Working week Home Active Active Active Heating Cooling Auto Monday Monday Working week Active Tuesday...
- Page 158 Smarther AC User and installation manual Add a time slot Add a time slot Add a time slot Time slots Time slots Time slots Starts Starts Starts Sunday 12:00 Sunday 12:00 Sunday 00:00 Finish Finish Finish Sunday 13:00 Sunday 13:00 Sunday 13:00 Sets of temperatures Sets of temperatures...
- Page 159 Smarther AC User and installation manual Add a time slot Time slots Starts Sunday 00:00 Finish Wednesday 14:00 Sets of temperatures Comfort Edit Edit Night Edit Add a new set of temperatures Validate 14. Touch to confirm B From 14:00 on Wednesday to 18:00 on Wednesday set the temperature to the “Comfort” setpoint (24°C) Holiday week Holiday week...
- Page 160 Smarther AC User and installation manual Add a time slot Add a time slot Add a time slot Time slots Time slots Time slots Starts Starts Starts Wednesday 12:00 Wednesday 14:00 Wednesday 14:00 Finish Finish Finish Wednesday 13:00 Wednesday 15:00 Wednesday 15:00 Sets of temperatures Sets of temperatures...
- Page 161 Smarther AC User and installation manual C From 18:00 on Wednesday to 23:45 on Friday set the temperature to the “Eco” setpoint (OFF) Holiday week Add a time slot Add a time slot Time slots Time slots Starts Starts Wednesday 14:00 Wednesday 14:00 Hall Comfort...
- Page 162 Smarther AC User and installation manual Add a time slot Add a time slot Holiday week Time slots Time slots Starts Starts Wednesday 18:00 Wednesday 18:00 Hall Finish Finish Comfort Friday 23:45 Friday 23:45 Hall Sets of temperatures Sets of temperatures Night Hall Comfort...
-
Page 163: Thermal Comfort
Smarther AC User and installation manual Thermal comfort This section can be used to set some display parameters to improve the temperature comfort of the home Home Thermal comfort Home Global settings Manage my home Default time of manual setpoints Cooling Schedules Smarther AC... -
Page 164: Default Time For Manual Temperature
Smarther AC User and installation manual Default time for manual Temperature. temperature manually, the user is asked how long to keep the settings. When setting the Here it is possible to set the default value. Thermal comfort Global settings Default time of manual setpoints 1. -
Page 165: Charts
Smarther AC User and installation manual Charts This section can be used to display the charts relating to data collected by the Smarther AC regarding temperature values, system on/off and humidity. Home Cooling Smarther AC Thermostat Auto Auto Working week Comfort until 22:00 1. -
Page 166: Humidity Chart
Smarther AC User and installation manual Humidity chart Fri 5 Living room - Hum... A Reading date/time Reading the humidity C Curve of the measured humidity D Selection of temperature/humidity charts Time bar (date/time) Humidity value bar 1. Scroll to display the values detected near the reading bar In the example shown, the following data were collected at 6:15 a.m. -
Page 167: Manage My Guests
Guests Home Manage my home Cooling Schedules Smarther AC Thermostat Thermal comfort Users Guests Auto Auto J.Smith@bticino.com Working week Add product Comfort until 22:00 J.Brown@bticino.com Install a new home F.Alycia@bticino.com Shortcut Center Help App settings My account Invite a user Log out 1. -
Page 168: Invite A User
Smarther AC User and installation manual Invite a user Guests Guests Users Users J.Smith@bticino.com J.Smith@bticino.com J.Brown@bticino.com J.Brown@bticino.com F.Alycia@bticino.com F.Alycia@bticino.com Condividi con Gmail Condivisione Messaggi Amazon Alexa nelle Bluetooth Copia negli Drive I tuoi gruppi appunti Invite a user Invite a user... -
Page 169: Add A Product To This Home
Smarther AC User and installation manual Add a product to this home Add a Smarther AC In this section, it is possible to add connected devices. This procedure is necessary for both adding a new device and replacing and existing one NOTE: The procedure below is only valid for adding or replacing a Smarther AC. -
Page 170: Add A Fancoil Actuator
Smarther AC User and installation manual Add a fancoil actuator In this section it is possible to add a fancoil actuator installed in the home in combination with the Smarther AC thermostat. Home Add product Home What is the brand of the product you want to install? Manage my home Cooling... -
Page 171: Add A Ir Emitter Using A Smartphone With Android Operating System
Smarther AC User and installation manual Add a IR emitter using a smartphone with Android operating system In this section, it is possible to add an IR emitter installed in your home in combination with the infrared remote control of an IR air conditioning unit. Add product Home Home... - Page 172 Smarther AC User and installation manual Configuration Keep the button on the top right side of your thermostat pressed until the symbol "[ ]" appears and the network led starts blinking white. Continue 6. Keep the upper Smarther AC pushbutton pressed until the symbol “ ”...
- Page 173 Smarther AC User and installation manual Configuration Press the button on the top right side of your thermostat to close the network. The "[ ]" symbol will disappear and the thermostat will show its main screen. The green leds on the other devices will turn off.
- Page 174 Smarther AC User and installation manual Add product Configuration Configuration There are other products ready to be Choose the product you would like configured to install Gateway Plug-In To configure IR emitter Smarther IR emitter Identify MyHOMEServer1 Classe 300EOS with Netatmo Tesrmostato Smarther AC Are all the products you wish to install displayed? IR emitter...
- Page 175 Smarther AC User and installation manual Configuration Congratulations! Your product is now configured. Finish 22. Touch to confirm the end of the configuration.
-
Page 176: Add A Ir Emitter Using A Smartphone With Ios Operating System
Smarther AC User and installation manual Add a IR emitter using a smartphone with iOS operating system In this section, it is possible to add an IR emitter installed in your home in combination with the infrared remote control of an IR air conditioning unit. Home Parameters Add product... - Page 177 Smarther AC User and installation manual Configuration Keep the button on the top right side of your thermostat pressed until the symbol "[ ]" appears and the network led starts blinking white. Continue 6. Keep the upper Smarther AC pushbutton pressed until the symbol “ ”...
- Page 178 Smarther AC User and installation manual Configuration Press the button on the top right side of your thermostat to close the network. The "[ ]" symbol will disappear and the thermostat will show its main screen. The green leds on the other devices will turn off.
- Page 179 Smarther AC User and installation manual Configuration Add product There are other products ready to be configured Which product do you want to install? IR emitter 1 Classe 300EOS with Netatmo Video door entry unit with Alexa built-in, answer to calls and open the gate...
- Page 180 Smarther AC User and installation manual Configuration Configuration Congratulations! Congratulations! IR emitter is now configured! All devices have been set up. Finish Finish 21. Touch to confirm the end of the configuration.
-
Page 181: Install A New Home
Smarther AC User and installation manual Install a new home This function allows to install a new home associated with your account (e.g. Seaside home) Configuration Home Home Get access to an already installed Manage my home product Cooling Schedules What is the brand of the product you want to install? Smarther AC... -
Page 182: Quick Selections
Smarther AC User and installation manual Quick selections NOTE: This function is only available for devices with Android® operating system Android® In this section, it is possible to add some shortcuts to the Home page of your smartphone, to allow quick access to certain tools (scenarios, schedules, etc.). - Page 183 Smarther AC User and installation manual Away The scene has been successfully executed 5. Touch to activate the quick selection A A notification confirms that the quick selection has been activated...
-
Page 184: Help
Smarther AC User and installation manual Help In this section, it is possible to display FAQ (and their answers) regarding the use of the Home + Control App. Home Help Home Select the product for which you need help. Manage my home Cooling Schedules Smarther AC Thermostat... -
Page 185: App Settings
Smarther AC User and installation manual App settings In this section, it is possible to set the theme for the Home+Control app, manage security-related issues of your smartphone and view certain information Theme This section can be used to choose the theme of the App graphic interface. Home App settings Home... -
Page 186: My Account
Smarther AC User and installation manual My account In this section, it is possible to view and display some functions regarding your account. Account management Home Home Manage my home J.Smith@bticino.com Cooling Schedules Smarther AC Profile Thermostat Thermal comfort Security... -
Page 187: Email/Account (Change Of The Device Management Email/Account)
Smarther AC User and installation manual Email/account (change of the device management email/account) To change the access email address Change my email Profile Email J.Brown@bticino.com J.Smith@bticino.com Remove account My new email J.Brown@bticino.com Confirm new email J.Brown@bticino.com Password Confirm 1. Enter the login details (email and password) of the new registered Legrand account to be used to manage the device 2. - Page 188 NOTE: When deleting the account, all the data associated with the Applications will also be lost Profile Email J.Smith@bticino.com Remove account 1. Touch to delete your account definitively You will be redirected to a web page where you can complete the deletion of your account I want to delete my account.
-
Page 189: Safety
A Completes the password edit procedure Disconnects from all devices Edit password Security Security Security Change my password J.Smith@bticino.com J.Smith@bticino.com Account security Current password New Password In case of loss or theft of your devices, you can disconnect your account from all devices... -
Page 190: Disconnect From All Devices
Disconnect me from all devices Disconnect me from all devices Disconnection Your account J.Smith@bticino.com will be Enjoy your home simply logged out from all your devices, including this connected one, and all third party applications. -
Page 191: Communication Preferences
Smarther AC User and installation manual Communication preferences This section can be used to enable/disable the reception of communications from Legrand News, promotions and tips We will provide you with content tailored to your interests so you can make the most of the smart home. Define them now Interests Products, features and uses... -
Page 192: Partner Apps
Smarther AC User and installation manual Partner apps In this section, you can display all the third parties to whom you granted rights to operate on your connected devices. (E.g.: HOMEKIT, Google home etc.) Third-party application You have authorized these applications to access data in your account. -
Page 193: Reset
Smarther AC User and installation manual Reset Resetting the Wi-Fi configuration and the HOMEKIT settings This action deletes the Wi-Fi configuration and the HOMEKIT settings 1. Keep pressed the reset pushbutton on the side of the Smarther AC A countdown will start (about 5 seconds) at the end of which you will hear a confirmation beep. - Page 194 Smarther AC User and installation manual 2. Release the reset pushbutton. The display of the Smarther AC switches off After a few seconds the Smarther AC comes back on. It is now possible to complete the association with Home + Control App using the procedure described in the Associate your Smarther AC section...
-
Page 195: Reset To The Factory Settings
Smarther AC User and installation manual Reset to the factory settings CAUTION: It is possible to reset the factory settings (10" sec) only within 1 minute from switch on. To carry out this procedure after the time limit (1 minute from switch-on), switch off and then on again. This action returns the Smarther AC to the factory settings: all programs and associations with the App, and therefore with the devices (IR air conditioning unit and fancoil actuators), will be lost 1. - Page 196 Smarther AC User and installation manual 0.0 flashes on the Smarther AC display until a confirmation beep is heard. 3. Release the reset pushbutton. The display of the Smarther AC switches off NOTE: in some cases the device reset can last up to one minute.
- Page 197 Smarther AC User and installation manual After a few seconds the Smarther AC comes back on. It is now possible to complete the association with Home + Control App using the procedure described in the Associate your Smarther AC section CAUTION: This type of reset also deletes the association with the Smarther AC, and therefore any existing associations with IR air conditioning units and fancoil actuators.
- Page 198 BTicino SpA Viale Borri, 231 21100 Varese www.bticino.com BTicino SpA reserves at any time the right to modify the contents of this booklet and to communicate, in any form and modality, the changes brought to the same.
Need help?
Do you have a question about the XW8003 and is the answer not in the manual?
Questions and answers