
Subscribe to Our Youtube Channel
Summary of Contents for Whisper Power OctoControl Pro
- Page 1 User/Installation Manual WhisperCare 2.0 OctoControl Pro OctoControl Pro | OctoControl Pro 4G | We connect, we manage, we control whisperpower.com...
-
Page 2: Table Of Contents
2 OctoControl Pro | OctoControl Pro 4G Table of Contents Introduction 1.1. Use of this manual / applicability of this manual 1.2. General features 1.3. Clarification of notation 1.4. Glossary of terms 1.5. Applicability of this manual 1.6. Safety, liability, and warranty specifications 1.6.1. - Page 3 OctoControl Pro | OctoControl Pro 4G 3 3.6. OctoView Touch Monitor 3.7. Multi-functional display 3.7.1. Raymarine 3.7.2. Garmin 3.7.3. Simrad 3.7.4. B&G 3.8. WhisperCare 2.0 Cloud connection 3.8.1. Utilizing the WhisperCare 2.0 4G router 3.8.2. Using an existing internet connection Troubleshooting 4.1.
-
Page 4: Introduction
OctoControl Pro and OctoControl Pro 4G manufactured and marketed by WhisperPower. It is therefore essential that every person who works on or with the OctoControl Pro or OctoControl Pro 4G should be familiar with the contents of this manual, and that he/she should carefully follow the instructions contained herein. -
Page 5: Applicability Of This Manual
WhisperPower does not accept liability for damage due to use of the OctoControl Pro or OctoControl Pro 4G, possible errors in the manuals and the results thereof. -
Page 6: Identification
6 OctoControl Pro | OctoControl Pro 4G 1.6.4. Identification The identification label is located at the back of the OctoControl Pro or OctoControl Pro 4G. Important technical information required for service, maintenance and secondary delivery of parts can be derived from the identification label. -
Page 7: General Operation
General operation The content on the screens is automatically generated based on the equipment connected and configured on the OctoControl Pro. The images shown in this manual may differ from the actual content on your screen. 2.1. System overview modes Two modes can be used to display all the information of the system and devices. -
Page 8: Screen Content
8 OctoControl Pro | OctoControl Pro 4G 2.2. Screen content 2.2.1. Lock screen System status icons are always shown in top left corner. Shows if shore/grid input is present Shows if generator is standby/running Shows if solar input is present... -
Page 9: Energy System Overview Screen
OctoControl Pro | OctoControl Pro 4G 9 2.2.2. Energy system overview screen Pressing the WhisperPower logo returns to this screen Switch between light and dark Change mode of operation System widgets • AC Input – Shows summary of all shore/grid information. -
Page 10: Device Widget Overview Screen
10 OctoControl Pro | OctoControl Pro 4G 2.2.3. Device widget overview screen Choose between device widget overview or energy system overview. Two different overviews with just one setting. Change the settings See the list of devices Each device is shown in a widget. The widget displays the status of the... -
Page 11: Device Information Screen
OctoControl Pro | OctoControl Pro 4G 11 2.2.4. Device information screen Basic controls of the device, for example starting and stopping the generator. Overview, Monitor and Control tab to provide detailed information and control. Detailed monitoring data... -
Page 12: Navigation Between Screens
12 OctoControl Pro | OctoControl Pro 4G 2.3. Navigation between screens Lock screen Press lock icon to lock Touch anywhere on the screen. screen to unlock. System overview screen Press WhisperPower Press any sub system logo to go back. widget. -
Page 13: Installation
Install the OctoControl Pro in a well-ventilated room protected against rain, snow, spray, vapour, bilge, moisture, and dust. Never use the OctoControl Pro or OctoControl Pro 4G in a location where there is a danger of gas or dust explosions. Ensure that there are no obstructions to the airflow through the ventilation openings. -
Page 14: Connection Descriptions
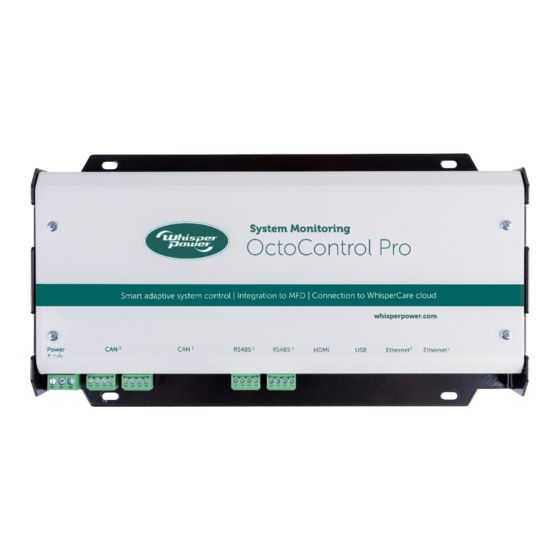
14 OctoControl Pro | OctoControl Pro 4G 3.2. Connection descriptions Power – 3 pin pluggable screw terminal 1. V+ 2. V- 3. PE CAN² – 2x 4 pin pluggable screw terminal 1. CAN 2. CAN high 3. CAN 4. CAN CAN¹... - Page 15 OctoControl Pro | OctoControl Pro 4G 15 RS485 – 4 pin pluggable screw terminal 1. NC 2. RS485 3. RS485 4. RS485 RS485 – 4 pin pluggable screw terminal 1. NC 2. RS485 3. RS485 4. RS485 HDMI Used for OctoView Touch Monitor USB –...
-
Page 16: Power Supply
It is recommended to use a navigation battery bank as the power source for the OctoControl Pro. Using a correct size and length of battery cable (not provided), connect the power supply. Install the wire fuses in the positive cables. -
Page 17: Wpc Bus
OctoControl Pro | OctoControl Pro 4G 17 CAUTION! Never connect a non-WhisperConnect device to the WhisperConnect network directly! This will void warranty of all WhisperConnect devices connected. Wrong installation is not covered by warranty. Every WhisperConnect device is equipped with two data ports. All devices are daisy chained together using UTP patch cables. -
Page 18: Lithium Power Plus
It collects and process all data from each individual battery and presents this information on the CAN bus to be read by the OctoControl Pro. A Lithium Power Plus to WhisperConnect splitter must be used to connect to a WhisperConnect network. - Page 19 Connect the DDC bus from the generator to either RS485 or RS485 . Only one generator can be connected per RS485 communication port of the OctoControl Pro. It is recommended to always install the DDC remote panel in the system.
-
Page 20: Octoview Touch Monitor
Connect the USB cable and HDMI cable between the OctoView Touch Monitor and OctoControl Pro. Provide power to the OctoView Touch Monitor. The USB and HDMI port on the OctoControl Pro are not designed to provide power to a connected monitor. Both cables are necessary for correct functioning OctoView Touch Monitor. -
Page 21: Multi-Functional Display
OctoControl Pro. Follow the instructions of the Garmin multi- functional display. The integration process is automated. The Garmin multi-functional display will automatically recognize the OctoControl Pro and the WhisperCare icon will popup automatically. Press the WhisperCare icon to open the WhisperCare environment. -
Page 22: Simrad
Follow the instructions of the Simrad multi- functional display. The integration process is automated. The Simrad multi-functional display will automatically recognize the OctoControl Pro and the WhisperCare icon will popup automatically. Press the WhisperCare icon to open the WhisperCare environment. 3.7.4. B&G Connect an ethernet patch cable with a B&G ethernet adapter between the B&G multi-functional... -
Page 23: Whispercare 2.0 Cloud Connection
3.8.2. Using an existing internet connection Connecting the OctoControl Pro to the internet allows the use of the WhisperCare 2.0 cloud portal. An energy system can be monitored and controlled using this portal. Furthermore, automatic notifications can be sent in case the energy system needs attention. -
Page 24: Troubleshooting
24 OctoControl Pro | OctoControl Pro 4G Troubleshooting 4.1. Fault finding table Fault Possible cause Recommended action Unit does not turn on No DC input Check wiring, check power source Defective fuse Check wiring, check polarity The OctoView Touch Monitor HDMI cable installed incorrectly Check HDMI cable. -
Page 25: Technical Specifications
OctoControl Pro | OctoControl Pro 4G 25 Technical specifications 5.1. Electrical specifications OctoControl Pro OctoControl Pro 4G Article number 60208025 60208030 Electrical Specifications Input voltage 8-32 V DC 8-32 V DC Power consumption < 500 mA @ 12 V DC <... -
Page 26: Connections
26 OctoControl Pro | OctoControl Pro 4G 5.3. Connections OctoControl Pro OctoControl Pro 4G Article number 60208025 60208030 Connections Power 3 pin pluggable screw 3 pin pluggable screw connector connector CAN #1 2x RJ45 (pinout following 2x RJ45 (pinout following... -
Page 27: Regulations And Directives
5.6. EU declaration of conformity Manufacturer: WhisperPower BV Address: Kelvinlaan 82, 9207 JB Drachten, The Netherlands Hereby WhisperPower declares under our responsibility that product: OctoControl Pro is in conformity with the following provisions of the EC: • 2004/108/EC (EMC Directive), the following harmonized standards having been applied: •... - Page 28 WhisperPower BV Kelvinlaan 82, 9207 JB Drachten The Netherlands www.whisperpower.com sales@whisperpower.com...
Need help?
Do you have a question about the OctoControl Pro and is the answer not in the manual?
Questions and answers