Table of Contents
Advertisement
Quick Links
Advertisement
Table of Contents

Summary of Contents for Huato HE230C Series
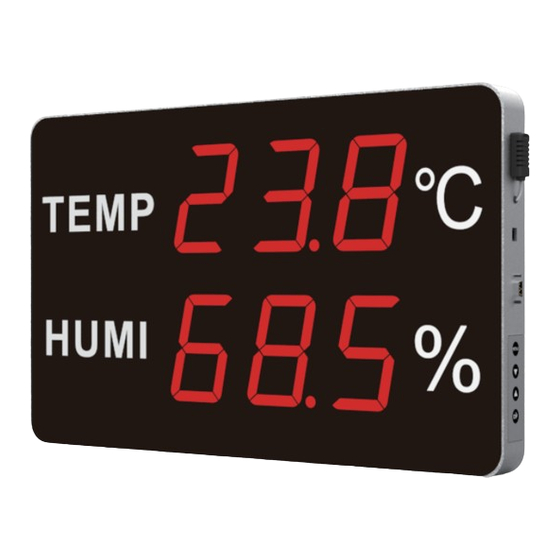
- Page 1 User’s Guide HE230C HE230C Series LED Temperature Humidity Display Board...
-
Page 2: Table Of Contents
Table of Contents Table of Contents Section ..........................Page Section 1 Introduction ..................1.1 Introduction ..................1.2 Features ....................1.3 Applications ..................1.4 Data Logger Model ................1.5 Temperature and Humidity Data Logger Appearance ......1.6 Temperature and Humidity Data Logger Screen ........ 1.7 Button function instructions .............. -
Page 3: Introduction
1.2 - Features Section • HE230C series :temperature/humidity shows at the same time. • Communication interface: USB • Temperature humidity calibration function; values can be adjusted through buttons on the instruments. -
Page 4: Temperature And Humidity Data Logger Appearance
Introduction 1.5 - Temperature and Humidity Data Logger Appearance Section HE230C-TH MENU Power port MENU button Lower key Temperature dispaly Upper key OK button Humidity display Hanger Built-in sensor HE230C-EX MENU Power port MENU button Lower key Temperature dispaly Upper key OK button Humidity display Hanger... -
Page 5: Temperature And Humidity Data Logger Screen
Introduction 1.6 - Temperature and Humidity Data Logger Screen Section HE230C-TH/EX Temperature display area Humidity display area 1.7 - Button function instructions Section :MENU function button MENU Normal mode: (1)press enter date setup mode, press enter setting state, MENU press button respectively to adjust the value. -
Page 6: Section 2 Installation And Instruction
Installation and Instruction Section 2 - Software Installation 2.2 Computer configuration requirements: (1) Support Windows2000/XP/Vista/Win7/Win8/Win10 ( 32/64-bit) System, Not support Linux/Unix and other systems. (2)The CPU should be 1.6GHz or higher,Memory not less than 256MB,The hard disk has more than 4GB of free space. -
Page 7: Usb Driver Install
Installation and Instruction 2.4 USB Driver Installation (1)Click”INSTAll” (2)Driver Install Success (3) Check whether the port number is displayed after the installation is completed, checking port NO. step as below:Right Click【My Computer】—Click【 Manage】—【Device... - Page 8 Installation and Instruction Manage】 As shown in following picture: device Manage (4)Double-Click【Port(COM 和 LPT)】,Checking CH340 or CH341 port No.,As shown in following picture: double-click Ports port number Attention: If no port is displayed for the above operation, you can restart the computer to display the port number...
-
Page 9: Tlogpro Software Using
Installation and Instruction 2.5 LogPro Software Using 2.5.1 Software function description: ⑧ ⑦-1 ⑦-2 ④ ⑥ ⑤ ① ② ③ ⑨ ⑩ ⑪ ⑫ ⑬ ⑭ ○ ○ ⑰ ⑱ ⑳ ⑲... - Page 10 Installation and Instruction ⑳-1 ⑳-2 ⑳-3 ⑳-4 ⑲-1 ⑳-5 ⑳-6 ⑲-2 ⑳-7 ⑲-3 ⑳-8 ⑲-4 ⑳-9 Item Instruction Remark Menu List Read Instrument properties Synchronization attribute The recorder setup window pops up.Read Instrument properties Download Log data(Automatic/manual) Delete Log data(Automatic/manual) View real time data of device Stop real time data of device File list:View other device data that download and store...
-
Page 11: Basic Function Operations
Installation and Instruction 20-2 S653 Calibration 20-3 GPRS Set 20-4 GSM Set 20-5 C/F Conversion 20-6 Data Import 20-7 Series Debug 20-8 Switch to Classic UI 20-9 Switch to Chinese Vesion 2.5.2 Basic Function Operations (1)After Installed, Create a desktop shortcut (2)Software connected: Running software into the page ,The instrument is connected to the computer when it is turned on, Click menu bar... - Page 12 Installation and Instruction Synchronization attribute Read Instrument properties Name Instrument name, customizable Factory SN. Suggest not to revise it Uploading Interval(s) Device Uploading Intervals,1-240S can be set Logging Interval(s) Device Logging Intervals,2-86400S can be set Temperature unit setting, Celsius and Fahrenheit can be Temperature Type arbitrarily set...
- Page 13 Installation and Instruction The precision of each channel can be fine-tuned. When entering positive value, the indicator value decreases, and when entering Offset negative value, the indicator value increases. It is recommended not to change offset Channel Name Default, not changed (4)Download data:click button-【confirmed】, You can download all the data in the recorder to computer,...
- Page 14 Installation and Instruction ( 6 ) You can export the recorded data to EXCEL file , click select save. You can also export file or image format, for further processing. (7) click button, all data in the logger can be deleted . (8)...
Need help?
Do you have a question about the HE230C Series and is the answer not in the manual?
Questions and answers