Advertisement
Thank you for purchasing this ICON Vehicle Dynamics product. Please read through this entire document before proceeding with
installation. If you are not confi dent in your mechanical skills, please seek the help of a professional to perform the installation. Check your
packages immediately upon arrival to ensure that everything listed is included, and to check for damage during shipping. If anything is
missing or damaged, or if you need technical assistance with any aspect of this installation, call (951) 689-ICON as soon as possible.
APPLICATION
These installation instructions apply to the following
products:
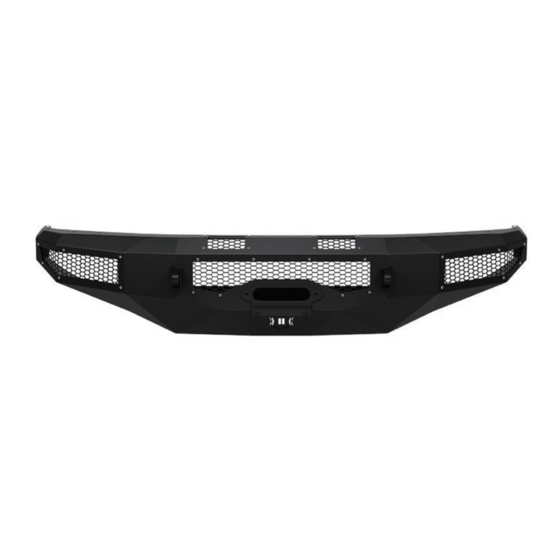
66200 17-UP FSD PRO WINCH BUMPER
COMPONENTS INCLUDED
(1)
17-UP FSD FRONT BUMPER
(1)
17-UP FSD FRONT BUMPER WINCH TRAY
(1)
17-UP FSD DRVR SIDE FACIA MOUNT 1
(1)
17-UP FSD DRVR SIDE FACIA MOUNT 2
(1)
17-UP FSD PASS SIDE FACIA MOUNT 1
(1)
17-UP FSD PASS SIDE FACIA MOUNT 2
(1)
17-UP FSD MESH CENTER
(1)
17-UP FSD MESH DRIVER SIDE
(1)
17-UP FSD MESH PASSENGER SIDE
(2)
17-UP FSD MESH TOP
(1)
WINCH BUMPER LICENSE PLATE BRACKET
HARDWARE INCLUDED
(8)
1/2-13 NYLOCK NUT GR8 YZINC
(24) 1/2" SAE FLAT WASHER GR8 YZINC
(2)
1/2-13 X 1.00 HHCS GR8 YZINC
(8)
1/2-13 X 1.50 HHCS GR8 YZINC
(8)
1/2-13 X 2.00 HHCS GR8 YZINC
(2)
3/8-16 X 1.00 BHCS 18-8 RAW
(2)
3/8-16 NYLOCK NUT GR8 CZINC
(28) M6-1.00 X 20MM BHCS SS
(8)
M6-1.00 X 20MM SQUARE NECK CARRIAGE
BOLT SS
(8)
M6-1.00 FLANGE NUT SS
(2)
BUMPER LICENSE PLATE RETAINER
ICON TECH LINE:
951.689.ICON
INSTALLATION INSTRUCTIONS
2017-UP FSD PRO WINCH
DOCUMENT: INST_66200_REVA • UPDATED: FEB 2022
TOOLS REQUIRED
• Ratchet/extensions
• Body panel clip removal tool
• 4mm hex key
• 10mm & 15mm socket/wrench
• 7/32" hex key
• 3/4" socket/wrench
• E6 external Torx socket
TECH NOTES
NOTE: These installation instructions are based on
a clean installation on to a stock vehicle. Previously
modifi ed vehicles may require additional steps.
NOTE: Installation on Superdutys equipped with
Adaptive Cruise Control requires relocation of
the ACC module with the following product (sold
separately):
66202 17-UP FSD ACC RELOCATION KIT
IMPORTANT NOTICES - PLEASE READ FIRST
READ ALL INSTRUCTIONS THOROUGHLY
FROM START TO FINISH BEFORE BEGINNING
INSTALLATION! IF THESE INSTRUCTIONS ARE
NOT PROPERLY FOLLOWED SEVERE FRAME,
SUSPENSION OR TIRE DAMAGE MAY RESULT TO
THE VEHICLE!
ICON VEHICLE DYNAMICS RECOMMENDS
ALL INSTALLATION TO BE PERFORMED BY A
PROFESSIONAL SHOP/SERVICE TECHNICIAN.
PRODUCT FAILURE CAUSED BY IMPROPER
INSTALLATION WILL NOT BE COVERED UNDER
ICON'S WARRANTY POLICY.
INSTALLATION INSTRUCTIONS
1.
Ensure the vehicle is placed on a fl at, level surface
with the transmission in PARK (or fi rst gear for
vehicles equipped with a manual transmission), the
tires chocked, and the emergency brake ON. Wear
safety glasses from this point forward. Open hood
and disconnect the negative battery terminal.
2. Starting from the driver underside of the front
bumper, unplug the fog light harness connector
FRONT BUMPER
www.iconvehicledynamics.com
Advertisement
Table of Contents

Summary of Contents for ICON Vehicle Dynamics IMPACT 66200
- Page 1 DOCUMENT: INST_66200_REVA • UPDATED: FEB 2022 Thank you for purchasing this ICON Vehicle Dynamics product. Please read through this entire document before proceeding with installation. If you are not confi dent in your mechanical skills, please seek the help of a professional to perform the installation. Check your packages immediately upon arrival to ensure that everything listed is included, and to check for damage during shipping.
- Page 2 P. 2 21-UP BRONCO PRO SERIES FRONT WINCH BUMPER that is located along the inside frame rail. Note: Relocation bracket needed to relocate the ACC module (not included), please use ICON PN 66202 17-UP FSD ACC RELOCATION BKT. FIG. 1 3.
- Page 3 P. 3 21-UP BRONCO PRO SERIES FRONT WINCH BUMPER position the tray into place. Note: ensure that the winch tray clears any coolant lines. 11. From the topside, using a 3/4” socket and wrench secure the winch tray using four (4) supplied 1/2- 13 X 2.00 Hex Head Cap Screws, eight (8) supplied Flat Washers and four (4) supplied 1/2-13 Nylock Nuts.
- Page 4 P. 4 21-UP BRONCO PRO SERIES FRONT WINCH BUMPER in which case the holes in the bumper will need Note: If you wish to keep the OEM headlight lamp to be drilled to the larger size. If you do this, rubber spacer, jump to the next steps.
- Page 5 P. 5 21-UP BRONCO PRO SERIES FRONT WINCH BUMPER FIG. 24 FIG. 25 FIG. 22 22. Remove the temporary screws through the top opening once the fasteners have been secured. If 20. If available, install LED lights (not included or sold desired, cover the top opening by using a 4mm by ICON) into the light mount brackets on either Hex Key to secure the top opening mesh onto the...
- Page 6 21-UP BRONCO PRO SERIES FRONT WINCH BUMPER LIMITED LIFETIME WARRANTY ICON Vehicle Dynamics warrants to the original retail purchaser who owns the vehicle on which the product was originally installed. ICON Vehicle Dynamics does not warrant the product for finish, alterations, modifications and/or installation contrary to ICON Vehicle Dynamics instructions.

Need help?
Do you have a question about the IMPACT 66200 and is the answer not in the manual?
Questions and answers