Advertisement
Unit 626 Kilshane Avenue, North West Business Park, Ballycoolin, Dublin 15, Ireland
Telephone: +353 1 8612 632 Fax: +353 1 8612 647 email:info@driveriteair.com
Web:
www.driveriteair.com
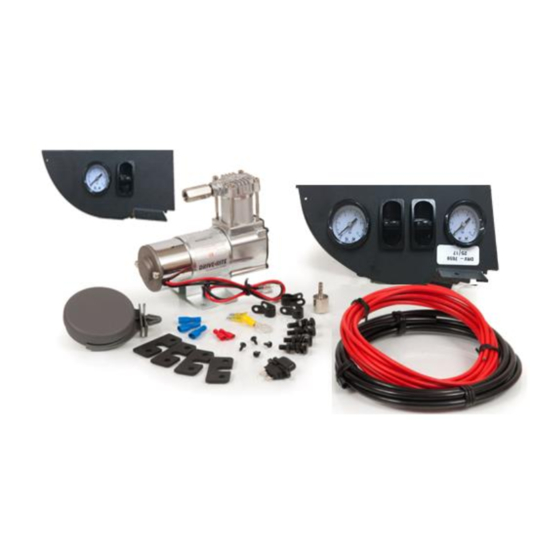
COMPRESSOR AND GAUGE KIT (METRIC)
KIT COMPRESSEUR + MANOMETRE DOUBLE (METRIC)
SET MIT
KOMPRESSOR UND MANOMETER
(METRISCH)
DR.49.011001
INSTALLATION INSTRUCTIONS /
NOTICE DE MONTAGE
/MONTAGEANLEITUNG
*Illustration shown are for example only. Actual contents may differ for your vehicle.
*Photos non contractuelles
*Manometer im Bild sind nur als Beispiel gegeben. Die Form Ihres Bedienteils kann anders aussehen.
Advertisement
Table of Contents

Summary of Contents for DRIVERITE DR.49.011001
- Page 1 COMPRESSOR AND GAUGE KIT (METRIC) KIT COMPRESSEUR + MANOMETRE DOUBLE (METRIC) SET MIT KOMPRESSOR UND MANOMETER (METRISCH) DR.49.011001 INSTALLATION INSTRUCTIONS / NOTICE DE MONTAGE /MONTAGEANLEITUNG *Illustration shown are for example only. Actual contents may differ for your vehicle. *Photos non contractuelles...
-
Page 2: Table Of Contents
11/18 Revision 6 DR.49.011001 Contents Electrical Diagram / Schema Electrique Elektrischer Anschlussplan ....3 Pneumatic Diagram / Schema Pneumatique Pneumatischer Anschlussplan ... 4 Installing the Compressor / Installation du compresseur Montage des Kompressors ..................6 Installing the Gauge / Installation du panneau de commande... - Page 3 11/18 Revision 6 DR.49.011001 Electrical Diagram / Schema Electrique Elektrischer Anschlussplan Relay Fuse/ Fusible/ Sicherung +12V Note: Max length between fuse and 12V feed no greater than 75mm. Note: La longueur maxi entre le fusible et le +12V ne doit pas être supérieure à...
-
Page 4: Pneumatic Diagram
11/18 Revision 6 DR.49.011001 Pneumatic Diagram / Schema Pneumatique Pneumatischer Anschlussplan Single gauge / Manomètre simple / Einzelmanometer... - Page 5 11/18 Revision 6 DR.49.011001 Double gauge / Manomètre Double / Doppelmanometer...
-
Page 6: Installing The Compressor
11/18 Revision 6 DR.49.011001 Installing the Compressor / Installation du compresseur Montage des Kompressors Disconnect ground cable from vehicle battery before starting. Débrancher le câble de la prise terre de la batterie du véhicule avant de commencer Vor Arbeitsbeginn ist das Massekabel der Fahrzeugbatterie abzuklemmen. -
Page 7: Installing The Gauge
11/18 Revision 6 DR.49.011001 Installing the Gauge / Installation du panneau de commande / Montage des Bedienpanels The gauges supplied with the kit are designed to fit within the dash of the vehicle. Below is an example of how a gauge should be fitted to the dash of Fiat Ducato X250. -
Page 8: Wiring / Cablage./.Kabelbaum
11/18 Revision 6 DR.49.011001 Wiring / Cablage./.Kabelbaum Attach the wire harness to the compressor unit. Relier le faisceau électrique au compresseur Verbinden Sie den Kabelbaum mit dem Kompressor. Route wiring harness from the compressor. In some cases, a hole may have to be drilled to allow access for the harness. It will be necessary to seal any grommets or holes that have been cut, drilled or removed so as not to allow elements to enter the cab area of the vehicle. -
Page 9: L'installation/Systemkontrolle
11/18 Revision 6 DR.49.011001 Connect the power wire from the harness. Route it to the vehicle fuse box. Use a multi meter to determine which open terminal (accessory, etc.) works only when the key is in the “on” or accessory position (or refer to the owner’s manual for an available accessory fuse). - Page 10 11/18 Revision 6 DR.49.011001 bars, procéder à nouveau à une vérification à l’aide d’eau savonneuse, y compris sur le circuit des coussins d’air. NE JAMAIS FAIRE FONCTIONNER LE COMPRESSEUR DE FACON CONTINUE PLUS DE 4 MINUTES. LE LAISSER REFROIDIR AU MOINS 5 MINUTES AVANT DE LE REUTILISER.
Need help?
Do you have a question about the DR.49.011001 and is the answer not in the manual?
Questions and answers