Advertisement
Connector Introduction
12+4pin connector
Operation Instructions
Manual Mode
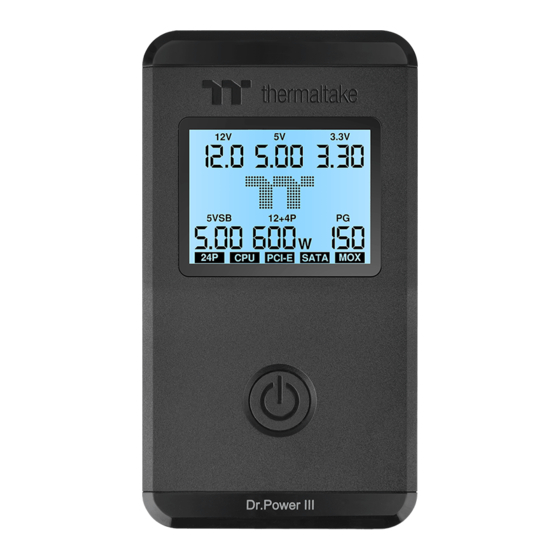
1. Plug the PSU connectors into Dr.Power III.
2.Switch the PSU I/O switch to the "-" position. The screen will then display the TT logo animation.
3.The screen will display the icons of the connectors that have been plugged into Dr.Power III.
4.Press the CHECK button to start the manual testing mode. The screen will display the 24P icon, the output voltage of
each group, and PG.
5.Press the CHECK button again. The system will proceed with the next test point CPU. The screen will display the CPU icon
and the corresponding voltage output.
6.Press the CHECK button again. The system will proceed with the next test point PCI-E. The screen will display the PCI-E icon
and the corresponding voltage output. If the PCI-E 12+4pin is connected, the screen will display the SENSE0/SENSE1
sideband signals of the PCI-E 12+4pin connector (150W/300W/450W/600W).
7.Press the CHECK button again. The system will proceed with the next test point MOX. The screen will display the MOX icon
and the corresponding voltage output.
8.Press the CHECK button again. The system will proceed with the next test point SATA. The screen will display the SATA icon
and the corresponding voltage output.
9.Press the CHECK button again to return to step 3.
10.If no fault occurs during the test, the LCD backlight will remain white. Once any fault occurs, the LCD backlight will turn red
and make a "beep" sound.
Connect all of the
connectors and
turn on the PSU
Check button
PCI-E 6pin or 8pin connector
24pin connector
Press button
SATA
Press button
Press button
Dr.Power III
Peripheral connector
SATA connector
Press button
Press button
SATA
User Manual
CPU 4pin or 8pin connector
Press button
Note: 12+4P will only be displayed when
PCI-E 12+4pin is connected.
Advertisement
Table of Contents

Summary of Contents for Thermaltake Dr.Power III
- Page 1 2.Switch the PSU I/O switch to the “-” position. The screen will then display the TT logo animation. 3.The screen will display the icons of the connectors that have been plugged into Dr.Power III. 4.Press the CHECK button to start the manual testing mode. The screen will display the 24P icon, the output voltage of each group, and PG.
- Page 2 6. After Dr. Power III has initiated the diagnostic testing, DO NOT disconnect any connector or turn off the PSU. This may cause permanent damage to the power supply tester. In some case, it may also cause the Dr.Power III to return to a false-positive signal.
Need help?
Do you have a question about the Dr.Power III and is the answer not in the manual?
Questions and answers