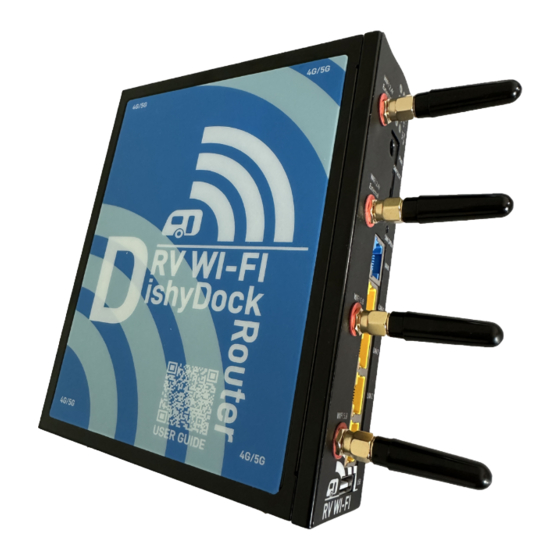
Summary of Contents for RV Wifi DishyDock Router
- Page 1 User Guide 2024v1 This purchase will give you greater freedom to link your Starlink Satelite system and enjoy your travelling without sacrificing the lifestyle that the internet provides.
- Page 2 What makes up your RV Wi-Fi Dishy Dock Router Congratulations on your purchase of an RV Wi-Fi Router. The RV WIFI DishyDock Router is the third kit in the Starlink Integration System. It works alongside the DishyDocks to connect Dishy to your RV and DishyDock Power, which converts your Starlink system to 12 volts.
- Page 3 Other kits available in the DishyDock system Kit 1. DishyDock Ports (enclosed setup) Connects your Starlink Dishy to your caravan or RV with ease. Includes: 2 x DishyDock Ports 1 x 5m AWG23 Shielded Ethernet Cable Kit 1a. DishyDock Ports (external setup) Connects your Starlink Dishy to your caravan or RV with ease.
- Page 4 Screw the 4 x Wi-Fi antenna’s into the Wi-Fi ports on the control Panel. NB: the ports top and bottom are for the upgradable RV WIFI 5G router. IMPORTANT: plug the ethernet cable labelled ‘BLUE- WAN PORT ’into the BLUE WAN PORT on the side panel of the router.
- Page 5 Insert the 12v power plug into one of the 12 volt wall sockets Insert the second 300mm ethernet cables (DD router/Blue WAN Port) into 1. DishDock Power RJ45 port labelled ‘DishyDock Router 2. Blue WAN port of Router. NB: DO NOT USE YELLOW LAN PORTS Insert the 12 volt power adapter into the Router.
- Page 6 Connection to the RV Wi-Fi+ Router Connecting your device via Wi-Fi to your RV Wi-Fi DishyDock Router Turn on the device/s (phone/laptop etc.), that you wish to connect to the internet. Click on: ‘Settings’ or equivalent page on your device Click on : ‘Wi-Fi’...
- Page 7 Setting your Wi-Fi Password. One of the great features of RV Wi-Fi is the security it provides whilst using the internet. This next section provides step by step instructions on setting your Wi-Fi password. Open the web/internet browser on your device and enter the address http://10.0.1.1 into the ‘search’...
- Page 8 Select/click on the following tab: Network. Select/click on the dropdown box: Wireless You will see two options here and will need to complete both. Choose the 5.8 option first as shown below. Select/Click on the ‘Edit’ box...
- Page 9 Go to the ‘Interface Configuration’ Section. • Click on the ‘Wireless Security’ tab. Next to the ‘Key’ drop down box, click on the astrix. This shows what the current Wi-Fi password is set to.
- Page 10 Delete the password, by backspacing or use the delete button. • In the Key box , type your new Wifi password - your choice! (Your password must be a minimum of 8 characters, and it is case sensitive). Click on the ‘Save and Apply’ button. The screen will indicate that it is ‘waiting for configeration to apply’...
- Page 11 • Wait for this to apply. Do not turn off your device during this time. You will see a countdown clock appear from 30 seconds. The next screen will say ‘Device Unreachable’ This is due to the password being changed and the two devices no longer recognising each other.
- Page 12 On your device (laptop/ipad/phone). Go to: Settings, Click on: Wifi, Wait for RV Wi-Fi to come up on the list. Click on this, Your device will now tell you that your Wi-Fi password is incorrect (that is because you have just changed it), Type in the ‘new’...
-
Page 13: Need Help
Need Help For help with your RV Wi-Fi unit please go to: info@rvwifi.com.au and a service agent will be in touch.


Need help?
Do you have a question about the DishyDock Router and is the answer not in the manual?
Questions and answers