Table of Contents
Advertisement
Quick Links
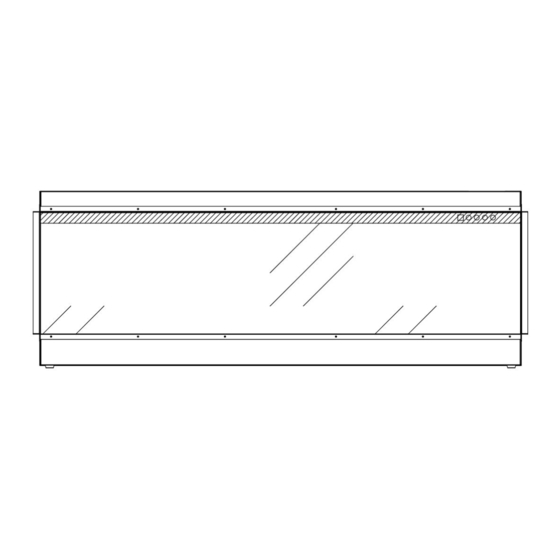
BESPOKE THREE SIDED VIEWING ELECTRIC FIREPLACE
Model# :
27"/40"/50"/60"/79" Built-in Electric Fireplace
WARNING
CAUTION
www.bespokefireplaces.co.uk
BS700PANO-S
BS1500PANO-S
BS1250PANO-X
BS2500PANO-X
OWNER'S MANUAL
AC 220V-240V 50Hz 1400-1600W
Read and understand this entire owner's manual, including all safety
information, before plugging in or using this product. Failure to do so could
result in fire, electric shock, or serious personal injury.
Keep this owner's manual for future reference. If you sell or give this
product away, make sure this manual accompanies this product.
BS1000PANO-S
BS2000PANO-S
BS1500PANO-X
BS3000PANO-X
BS1300PANO-S
BS2000PANO-X
Advertisement
Table of Contents

Summary of Contents for Bespoke BS700PANO-S
- Page 1 BESPOKE THREE SIDED VIEWING ELECTRIC FIREPLACE Model# : BS700PANO-S BS1000PANO-S BS1300PANO-S BS1500PANO-S BS2000PANO-S BS1250PANO-X BS1500PANO-X BS2000PANO-X BS2500PANO-X BS3000PANO-X OWNER’S MANUAL 27"/40"/50"/60"/79" Built-in Electric Fireplace AC 220V-240V 50Hz 1400-1600W Read and understand this entire owner’s manual, including all safety information, before plugging in or using this product. Failure to do so could WARNING result in fire, electric shock, or serious personal injury.
-
Page 2: Important Safety Information
IMPORTANT SAFETY INFORMATION! WARNING When using electrical appliances basic precautions should always be followed to reduce the risk of fire, electric shock and injury to persons, including the following: Read all instructions before using this heater. This heater is hot when in use. To avoid burning, do not touch hot surface. If provided, use ... -
Page 3: Parts And Hardware
Preparation This product includes a GLASS panel! Always use extreme caution when handling glass. Failure to do so could result in personal injury or property damage. Remove all parts and hardware from the carton and place them on a clean, soft, dry surface. Parts and assembly steps are grouped for wall-hanging or recessing use. -
Page 4: Installation And Assembly
PRODUCT DIMENSIONS Model No BS700PANO-S 702mm 750mm 232mm 737mm 571mm 698mm 602mm 110mm BS1000PANO-S 1002mm 478mm 232mm 1037mm 299mm 998mm 330mm 110mm BS1300PANO-S 1302mm 478mm 232mm 1337mm 299mm 1298mm 330mm 110mm BS1500PANO-S 1502mm 478mm 232mm 1537mm 299mm 1498mm 330mm 110mm... - Page 5 Three-sided installation • Glass exposed on front, left, AND right sides. • Appliance is fully recessed into the wall with both sides open. Two-sided installation • Glass exposed on front AND left OR right sides. • Appliance is fully recessed into the wall with one side open.
-
Page 6: Front Glass Installation / Removal
Front Glass Installation / Removal Take off all screws from the top the glass panel. Fig.1-1 Tilt the front glass forwards, and have two people to move out the glass panel. Fig.1-2 Reverse these steps to re-install the front glass. ... - Page 7 Model Number BS700PANO-S 704mm 240mm 760mm BS1000PANO-S 1004mm 240mm 488mm BS1300PANO-S 1304mm 240mm 488mm BS1500PANO-S 1504mm 240mm 488mm BS2000PANO-S 2004mm 240mm 488mm BS1250PANO-X 1245mm 325mm 545mm BS1500PANO-X 1450mm 325mm 545mm BS2000PANO-X 1975mm 325mm 545mm BS2500PANO-X 2515mm 325mm 545mm BS3000PANO-X 2975mm...
- Page 8 3.Fix back the fending bars after the panels are removed. Fig.2-4 Fig.2-4 4.Remove the screws from the fireplace as shown in the picture below. Fig.3-1 Fig.3-1 5.Fix the L shape brackets with the screws in the previous step. Fig.3-2 Fig.3-2...
- Page 9 Fig.3-3 6.Insert the fireplace into the wall opening. Drive the mounting screws into the brackets and the wall studs. Plug in and check if the fireplace works properly.Fig.3-3 Fig.3-4 Fig.3-5 7.Cover the glass panel with protective plastic 8.Decorate the plywood or drywall with glazed bag and install plywood or drywall.
- Page 10 Charred & Ice Glass / Pebbles Installation (NOTE:Please make the installation according to the embers which you liking.) A. Glass front must be removed and the appliance must be mounted in its final location before the ember media are installed. B.
-
Page 11: Methods Of Operation
This electric fireplace can be operated by the TOUCN ON CONTROL PANEL, or by the battery- powered REMOTE CONTROL. Before operating, please review the IMPORTANT SAFETY INFORMATION on Pages 2 and 3, and heed all warnings. Touc h Panel (BS700PANO-S—BS2000PANO-S) Touc h Panel (BS1250PANO-X—BS3000PANO-X) -
Page 12: Touch Control Panel Operation
Touch Control Panel Operation BUTTON FUNCTION ACTION & INDICATION ON: Enables control panel functions and 1. Press once. Indicator light turns on. remote control. Turns on flame effect. Power turns on. All functions enabled. OFF: Disables control panel functions and 2. - Page 13 BUTTON FUNCTION ACTION & INDICATION ON: Enables control panel functions and 1. Press once. Indicator light turns on. remote control. Turns on flame effect. Power turns on. All functions enabled. OFF: Disables control panel functions and 2. Press again. Flame effect turns off. Unit POWER remote control.
-
Page 14: Remote Control Operation
Press and hold the power button for 5s to be paired your remote control with your fireplace. 433MHZ (0.1W) Remote Control Operation BUTTON FUNCTION ACTION & INDICATION ON: Enables control panel functions and 1. Press once. Indicator light turns on. remote control. - Page 15 Flame speed button:Controls the speed 1. Press once. Flame speed gets changing. of the flame.There are 3 flame speed 2. Press again until desired setting is settings: 01 (slowest), 02 (Medium), 03 reached. Display shows the setting. (fastest). FLAME SPEED The Default setting is 03 (fastest speed) LED Ember light button: Makes the 1.
- Page 16 TIMER SETTINGS ON REMOTE CONTROL : Timer: Displays current day, time, and week. Press to enter or confirm timer settings. : Settings: Press to move to next step (use with Timer button). Press to confirm week timer. : Back: Press to clear timer settings. Press to return to the previous step (use with Settings button).
-
Page 17: Temperature Limiting Control
5. Repeat steps 1 to 4 to set the “ON/OFF” time and temperature for Tuesday, Wednesday, Thursday, Friday, Saturday, and Sunday. 6. Press to complete programming, ensuring to aim the remote control at the receiver, located in the middle of the appliance. The appliance will “beep” once to confirm that programming has been successful. -
Page 18: Maintenance
Metal: Buff using a soft cloth, slightly dampened with a citrus oil-based product. DO NOT use brass polish or household cleaners as these products will damage the metal trim. Glass: Use a good quality glass cleaner sprayed onto the cloth or towel. Dry thoroughly with a paper towel or lint-free cloth.
Need help?
Do you have a question about the BS700PANO-S and is the answer not in the manual?
Questions and answers