Table of Contents
Advertisement
Quick Links
Advertisement
Table of Contents

Summary of Contents for QBot inspira
- Page 2 Thank You Thank you for purchasing a QBOT™ - you have made an excellent choice. The QBOT will provide hours of troublefree automated quilting. Whether you are new to quilting or an experienced quilter, we are sure that you will enjoy the features and benefits of the QBOT automated quilting system.
-
Page 3: Table Of Contents
Lower Drive Assembly Installation Upper Drive Assembly Installation Upper Drive Wire Installation Lower Drive Wire Installation QBOT Installation Installing the Drive System - INSPIRA Quilting Frame 9-14 Upper Drive Assembly Installation Upper Drive Wire Installation 10-11 Lower Drive Assembly Installation... -
Page 4: Package Contents
Package Contents A. (1) QBOT ‘Brain’ F. Drive wire set B. (2) Drive Assemblies (1 ea.) 24”, 60”, 120” C. (1) Power supply and cord G. SD memory card D. (1) Wiring harness H. Tensioning template E. Hardware Pack I. Instructional DVD... -
Page 5: Installing The Drive System - Next Generation Quilting Frame
INSTALLING THE DRIVE SYSTEM Un-snap the locks on the upper handle assembly. Remove the handle assembly and set aside. Unplug all cords from the sewing machine, then lift it off of the upper carriage. Carefully place the machine in a convenient location. ®... -
Page 6: Lower Drive Assembly Installation
INSTALLING THE DRIVE SYSTEM For best performance of the QBOT, please replace all eight (8) wheels with steel wheels. If you already have steel wheels, then you do not need to replace them. If you have any questions, please contact your dealer. -
Page 7: Upper Drive Assembly Installation
Do not tighten at this point. Next, place the second 1½” button head screw into the slot in the assembly. Slide on a washer from the QBOT installation hardware pack, metal wheel, and 3 washer. Insert into the upper carriage and screw gently into the original nut. -
Page 8: Upper Drive Wire Installation
INSTALLING THE DRIVE SYSTEM Install the 24” upper drive wire to the lower carriage. You will need the following within reach when you begin this installation: 2 Y-axis wire holders, 24” wire, 4 mm hex key, one tensioner and tensioning template (found on last page of this manual.) FRONT Remove the upper right-hand screw... - Page 9 INSTALLING THE DRIVE SYSTEM Take one end of the 24” wire and place the eyelet around the hook of the Y-axis wire holder on the front of the lower carriage. Rest the upper carriage onto the drive assembly near the lower carriage. Place the drive wire over the top of the drive pulley wrapping twice around the drive wheel in a clockwise direction.
-
Page 10: Lower Drive Wire Installation
INSTALLING THE DRIVE SYSTEM You are now ready to install the lower drive wire. Use similar steps as with the upper wire. Gather the following within reach: 2 X-axis wire holders, 4 mm hex key, 60” or 120“ wire (depending upon your frame length), one tensioner and tensioning template. - Page 11 INSTALLING THE DRIVE SYSTEM Take one end of the lower drive wire and place the eyelet around the hook of the right X-axis wire holder. Lift the whole carriage unit off the rails and move slightly to the back of the frame.
-
Page 12: Qbot Installation
QBOT bracket onto the exposed bolt. Replace and tighten the black knob to hold your QBOT in place. Notice the QBOT bracket is adjustable so that you can move the QBOT to easily see the screen in any light. INSTALLING THE DRIVE SYSTEM... -
Page 13: Installing The Drive System - Inspira Quilting Frame
INSTALLING THE DRIVE SYSTEM The first step to installing the QBOT on the Inspira quilting frame is to drill holes in the upper and lower carriages and in the outer legs of the quilting frame. Follow the instructions and use... -
Page 14: Upper Drive Wire Installation
INSTALLING THE DRIVE SYSTEM You are now ready to install the Y-Axis drive wire. You will want to have the following items handy before performing the following steps: (2) #8 X 1” screws, (4) #8 nuts, (1) 24” drive wire, (1) tensioner. Place the two #8 screws through the holes in the side of the lower carriage as shown. - Page 15 INSTALLING THE DRIVE SYSTEM Next, wrap the drive wire around the spool on the drive assembly TWICE. When you wrap the wire around the spool be sure that the wire starts at the top of the spool and exits from the top of the spool.
-
Page 16: Lower Drive Assembly Installation
Install the X-Axis bracket adapter on the underside of the lower carriage of the Inspira frame. Use (2) #8 X 1” screws as shown in the picture to the right. Note the orientation of the bracket. For proper... -
Page 17: Lower Drive Wire Installation
Remember, these holes were drilled into the frame using the drilling templates from the Inspira hardware pack. One wire holder is marked ‘L’ and one is marked ‘R’. If you are standing at the front of the quilting frame, the one marked ‘L’... -
Page 18: Qbot Installation
INSTALLING THE DRIVE SYSTEM You are now ready to install the QBOT ‘Brain’ and make the connections to the Quilter’s Cruise Control. If you have a Quilter’s Cruise Control that is ‘hardwired’, meaning the encoder wires go directly into the Quilter’s Cruise Control ‘Brain’, please leave your encoders placed on your carriages. -
Page 19: Making The Connections
One end of the wiring harness has long wires. The other end has shorter wires. We are now going to plug in the shorter wires to the QBOT. Plug the cable marked with an ‘X’ into the corresponding port on the QBOT. -
Page 20: Wiring Harness-To-Drive Assemblies Connections
MAKING THE CONNECTIONS To keep your QBOT wires tidy, secure the wiring harness and power supply cord as shown using the included wire ties. Plug in the Y-axis cable from the wiring harness to the upper drive assembly (the assembly on the side of the carriage) -
Page 21: Wiring Harness-To-Quilter's Cruise Control Connections
Quilter’s Cruise Control. Next, connect the last connector from the QBOT wiring harness to the port labeled ‘Remote Switch’ on the QCC. The last connection to the QCC unit is the power supply connection. Use only the power supply that came with your QCC. - Page 22 Connect the power supply for the QCC into the port labeled ‘6VDC’ and then into a surge protector power strip. Plug in the QBOT power cord into a good surge protector at this time. You’re almost there. Ensure your QBOT power switch is toggled up, to the OFF (0) position.
-
Page 23: Verifying The Installation
The QBOT displays ‘Press GO = Move to Start’. Press ‘GO’ and the carriage will begin moving to the start point. The QBOT will wait at the start point. After the carriages move to the start position, turn off the sewing machine and raise the presser foot. - Page 24 “E” in “Exit”. Touch GO. You are ready to start quilting. Your QBOT is now installed and you are ready to begin quilting with your QBOT. Load some fabric onto your...
-
Page 25: Qbot Adjustments
You may now return to page 19 of this manual. BROTHER/BABYLOCK owners: Using a blunt tip of a paper-clip, slide the small switch on the right side of the QBOT to the right or up. The default position for this switch is the left or down position. -
Page 26: Quilting With Your Qbot
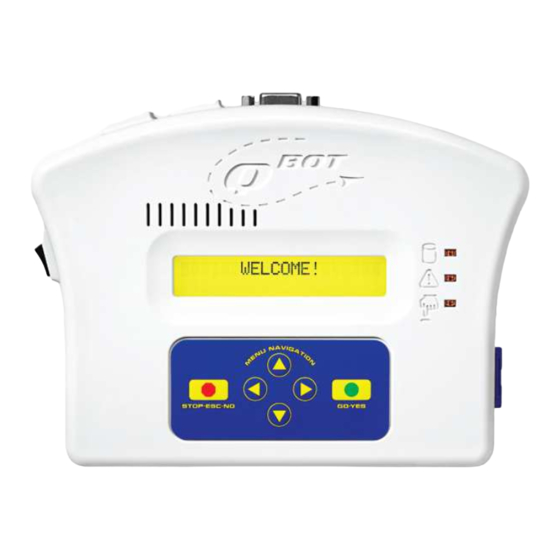
SD Card Access - Whenever information is taken from or written to the SD card, the access light will blink. Warning Indicator - If the QBOT encounters an error, the warning light will flash and an error message will show in the main display. -
Page 27: Printing Out The Design Collection
QUILTING WITH YOUR QBOT Your QBOT comes with a collection of over 18 quilt designs. With each of these designs you also have different rotation alternatives for most of the designs. Print out the design manual found on either your DVD or your SD card. - Page 28 QUILTING WITH YOUR QBOT Your QBOT now asks you to ‘Place on left-lower’. This will define the left lower corner of your quilting area. If you are using the QBOT technique quilt select the lower left corner of the first 5-inch square.
-
Page 29: Moving To Starting Point And Starting To Quilt
This is called the ‘Fine Tune’ menu. You can fine tune the start point by using the navigation arrows on the QBOT. You may need to do this if you are aligning two designs in a complex fashion. Here, you have nothing to align to, so you are ready to press ‘GO’... -
Page 30: Sizing A Design - Not Keeping Proportion
You have just completed the quilting process with the QBOT. About 80% of your QBOT quilting will be similar to the process that you just performed. You selected a design, sized the design... - Page 31 Press ‘GO’. Here at the ‘Keep Proportion?’ menu, select ‘No’. Press ‘GO’. The QBOT will scale the file to fill up the area of the rectangle. When finished, the design will look stretched in the vertical direc-...
-
Page 32: Stopping And Resuming Quilting
QUILTING WITH YOUR QBOT The QBOT will scale the file. Press ‘GO’ when you see the menu ‘GO = Move to Start’. Remember to pull up the bobbin thread and lower the presser foot before pressing ‘GO’ the final time. - Page 33 QUILTING WITH YOUR QBOT The carriages are now free to move. The QBOT knows the position of the carriages so you can move the carriages to either side of the quilt to re-thread the sewing machine or replace the bobbin. When you are done tending to...
- Page 34 ‘GO’. Your sewing machine and QBOT will finish quilting the design. That’s it for the basics of quilting with the QBOT. Please watch your DVD for more in-depth instructions on joining designs, recording, and pausing the quilting process. The instructions for these QBOT features are best shown by video so you can see the complete process rather than try to gain an understanding through still photos.
-
Page 35: Troubleshooting
TROUBLESHOOTING The following troubleshooting list covers some basic errors that may happen during installation of the QBOT. This list is not an all inclusive list of errors that may happen during installation, but represents the very most frequently occurring incidents during installation. If you have a support question that is not covered in this section, please visit http:www.myqbot.com for more support options. -
Page 43: Tensioning Templates
TEMPLATES... - Page 44 DREAM. DISCOVER. DESIGN. DONE! LiTen Up Technologies, Inc. VSM Sewing Inc. 27850 Irma Lee Circle, Suite 105 31000 Viking Parkway Lake Forest, IL 60045 Westlake, OH 44145...
Need help?
Do you have a question about the inspira and is the answer not in the manual?
Questions and answers