Table of Contents
Advertisement
Quick Links
Advertisement
Table of Contents

Summary of Contents for ELEVATE DIAMOND GF SiLine M RP03
- Page 1 DIAMOND MANUAL (2023 onwards)
- Page 2 Technical handbook ELEVATE DIAMOND 2023 onwards. GF SiLine M RP03 GF SiLine L RB03 18.11.2022 Technisches Handbuch 707 66 020 00 _ 011...
-
Page 3: Table Of Contents
GF SiLine L / GF SiLine M Contents 1. General ......................4 1.1 Identification ........................4 1.2 Intended users ........................4 1.3 Safety Information ......................4 1.4 Explanation of signs and symbols ..................5 2. Machine diagram ....................6 3. Maintenance schedule ..................7 4. Maintenance components ................10 4.1 Housing ..........................10 4.2 Instructions for chiller unit .................... - Page 4 Technical handbook EN 6. Build information ................... 30 6.1 Product basket light barrier .....................30 6.3 Product basket belt tension ....................31 6.2 Motor position .........................31 6.4 Electrical wires, cable connections .................33 6.5 Switches, buttons, locking mechanisms .................34 6.6 Actuator bracket for locating the shelf ................35 6.7 Calibrate the pendulum hook/lift calibration..............36 6.8 Taking out the sliding door unit ..................37 6.9 Sliding drawer unit wiring ....................38 6.10 Note on the diagrams .....................39 6.11 Protecting the basket during product delivery ..............40 6.12 Machine illumination: LED fitting left/right...............41 6.13 Lift system ........................42 6.13.1 Vertical track counterweight ................42 6.13.2 Belt drive, vertical track, lift system set-up ............42 6.13.3 Removing the vertical track ................44...
-
Page 5: General
General GF SiLine L / GF SiLine M General Variants Please note that these operating instructions cover different machine versions. For this reason some information may not apply to your machine. This manual covers the following versions: Model Part No....Variant GF SiLine L RB03 ....7050000013 ....RAL kickplate GF SiLine L RP03 ....7050000033 ....RAL kickplate, Public GF SiLine M RB03....7070000013 ....RAL kickplate GF SiLine M RP03 ..... -
Page 6: Explanation Of Signs And Symbols
Technical handbook EN General Explanation of signs and symbols This vending machine was manufactured in accordance with state-of-the-art technology standards. Nevertheless, even the most expertly designed machine, cannot be without risks. In order to ensure the machine operator a sufficient level of safety, additional safety tips are detailed below. Adequate safety during operation is ensured only when these safety precautions are observed. Text highlighted below symbolises the following: Danger Immediate danger which could result in death or severe injury. WARNING Possible dangerous situation which could result in death or severe injury. CAUTION Comments that refer to a dangerous situation with the possible consequences of minor injuries. NOTE Comments relating to machine damage prevention. Care when handling makes it simpler to fit. The following danger symbols may also be used in certain instances: WARNING electrical energy! Danger to life! This symbol warns that electrically live components are installed in this area. Covers marked with these symbols should only be removed by authorised electricians. Observe handling regulations when dealing with electrostatically sensitive components and modules (ESD) Behind covers marked with this symbol are parts and components that are susceptible to electrical discharge. -
Page 7: Machine Diagram
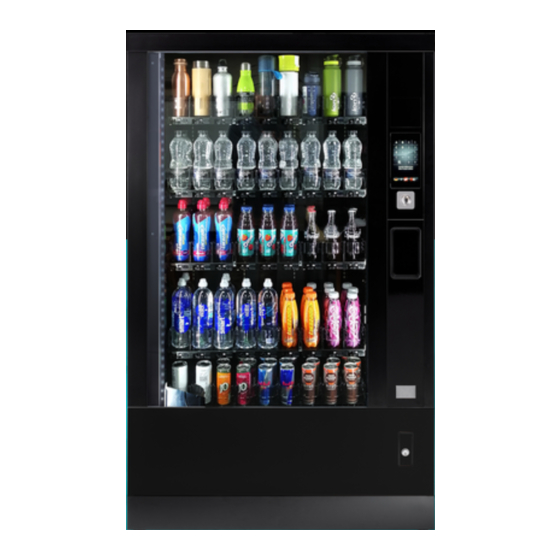
Machine diagram GF SiLine L / GF SiLine M Machine diagram Product container Door stop Telescopic sliding door unit Product basket on the lift arm Removable dust filter Air inlet for chiller Kickplate 6 of 57 707 66 020 00 _ 011... -
Page 8: Maintenance Schedule
Technical handbook EN Maintenance schedule Maintenance schedule To keep unexpected machine down-time to as low a level as possible, we recommend that the following maintenance schedule is adhered to. Depending on the environmental conditions on site it may be necessary to adapt the maintenance intervals. Every 30,000 vends - or every 12 months Housing, machine door Component Resources Action/ procedure Safe machine position Check Machine exterior Care and cleaning products Clean Machine door closes properly Check Insulating glass panel Glass cleaner Clean Coach bolts at top and bottom of 998 90 023 00 Lubricate machine door Locking hook 998 90 023 00 Lubricate Locking bar... - Page 9 Machine diagram GF SiLine L / GF SiLine M Payment system Component Resources Action/ procedure According to manufacturer's Coin mechanism (optional) instructions According to manufacturer's Card reader (optional) instructions According to manufacturer's Banknote reader (optional) instructions sliding drawer unit Component Resources Action/ procedure Coin chutes Rinsing water Clean Display Clean Coin return tray Clean Coin return motor - working Refund button [R] Check Product collection unit, internal area Clean Smooth operation of locking slide...
- Page 10 Technical handbook EN Machine diagram Product basket Component Resources Action/ procedure Upper part of basket Rinsing water Clean Brush, air, flashing mode at 5 second Product entry Clean, check intervals Damage on drive belt Check Damage to gear wheel pendulum Check Pendulum gear wheel assembly Berulub FR 43; 998 90 064 00 Check, lubricate Uniform power transmission when the Check pendulum is swung to and from Damage to pendulum hook Check Bearing for pendulum hook Microlube GL 261; 998 90 037 01 Check, lubricate Gear motor, upper shaft bearing Microlube GL 261; 998 90 037 01 Check, lubricate Chiller unit Component Resources Action/ procedure Dust filter Brush, compressed air Clean Compressor...
-
Page 11: Maintenance Components
Maintenance components GF SiLine L / GF SiLine M Maintenance components Housing Resources ▪ Lubricant Tunfluid DAB Aerosol, spray can part no. 998 90 023 00 Proceed as follows ▪ Check that the machine location is safe and secured. ▪ Check the machine connection cable. ▪ Check the operation and position of the closed machine door. ▪ Lubricate the bearing on the machine door to make sure it is intact and lubricate with Tunfluid DAB . ▪ Lubricate the catch on the contact surfaces. ▪ Check for correct functioning of bearing, locking bolts and lubricate. ▪ Check the seal on the door to ensure it is intact and take any necessary action. ▪ Maintain the door lock as per manufacturer's instructions. ▪ Check that the insulating glass panel is intact. ▪ Clean the insulating glass panel inside and out. ▪ Check that all the individual LEDs for the product illumination are working. TUNFUID Catch Torsion spring Partition wall flap closed... -
Page 12: Instructions For Chiller Unit
Technical handbook EN Maintenance components Instructions for chiller unit ▪ The machine operator is responsible for ensuring that personnel are skilled and trained, so that the machine can be regularly maintained to comply with site regulations! ▪ The machine should be installed so that the air inlet and outlet surfaces of the heat exchanger are always kept clear, thus avoiding a short circuit. ▪ The back of the machine must have clearance of at least 50 mm from the wall to enable the hot air to escape. ▪ A hot air back-flow must be avoided. This is achieved by fitting suction protection correctly on the back of the machine (exception: promo rear panel). ▪ In order to ensure that the slatted heat exchanger works properly, the individual slats must not be bent out of shape. CAUTION! Risk of injury! Risk of cuts when touching the slats. Wear protective gloves The chiller unit should be operated in accordance with the operating regulations specified (BetrSichV). It has been leak tested. ▪... -
Page 13: Removing The Chiller Unit
Maintenance components GF SiLine L / GF SiLine M Removing the chiller unit NOTE The chiller unit can be damaged if it is tilted over! Only store and transport the chiller unit in its installati- on position. If the chiller unit has been tilted over, it must be stored in installation position for at least 24 hours before it is switched on again. Removing the chiller unit: 1. Remove the mains plug. Open the machine door. 2. Empty and remove the bottom right product container. The plug-in connectors are now accessible. 3. Open the clamping units and remove the ribbon cable. 4. Take out the screws and remove the metal cover. 5. Unscrew the bracket. Remove the floor insulation. 6. Variant M only: remove the screw and take out the elbow joint. 7. Slowly move the lift system to the right and push the product basket into the product delivery bin. 8. Remove the plug-in connectors: the thin cable is for the temperature sensor; the thick cable for the supply volta- 9. Slowly pull out the chiller module using the strapping. Do not crush the electrical cable! Install the chiller unit: ▪... - Page 14 Technical handbook EN Maintenance components Take care not to crush the cable Seal Sealing block (important) Strapping Ribbon cable Corner piece (if fitted) 707 66 020 00 _ 011 13 of 57...
-
Page 15: Cleaning The Evaporator And Condenser
Maintenance components GF SiLine L / GF SiLine M Cleaning the evaporator and condenser ▪ Cleaning tasks should only be carried out by trained personnel. If the chiller unit is not cleaned properly damage and break-downs may result. ▪ Do not use sharp-edged tools. ▪ Do not use cleaning agents containing abrasives or acids. ▪ The evaporator and condenser must be cleaned using a vacuum cleaner or compressed air at least every six months. Any dirt residue reduces performance and increases energy costs. ▪ Areas more prone to dust collection need to be cleaned more regularly. Compressor Evaporator Condenser Note Risk of damaging the compressor Do not start the compressor more than 5 times per hour! Do not reduce the 5 minute minimum period of idleness for the compressor! ▪ Every time the door is closed the machine is ready for vending; the compressor can be heard running and the ligh- ting comes on. ▪ Each time the service key is inserted a closed door is simulated. 14 of 57 707 66 020 00 _ 011... -
Page 16: Check The Gas Sensor
Technical handbook EN Maintenance components Check the gas sensor Check the gas sensor visually for possible damage. Clean the gas sensor Clean the glass inlet only using a brush. The gas inlet must never be obstructed. NOTE Never clean the gas sensor with compressed air! Compressed air damages the sensor. Initiate self test To carry out the test the machine must be switched on and operatio- nal. Press the button on the service board for at least 2 seconds. When the button is pressed the machine is disconnected from the mains supply, the yellow LED goes out and a self-test is activated. → During this test the machine is checked for dual pole mains dis- connection via both cut-off relays. If the self- test is successful the green LED lights up. If the red LED is permanently on, repeat the test. If the red LED is still permanently on, the switch-off device must be replaced. → When the button is released there is still voltage for operating the machine in the power supply and the yellow LED is on. The machine is operational. 707 66 020 00 _ 011 15 of 57... -
Page 17: Testing The Sensor
Maintenance components GF SiLine L / GF SiLine M Testing the sensor Requirements • The gas sensor must be accessible (gas inlet) • commercial universal lighter How to proceed 1. Switch on the machine 2. Ignite the lighter outside the machine (flame h eight 2 cm) 3. Extinguish the lighter flame, whilst holding down the actuator on the lighter. 4. Hold the opening of the lighter for approx. 20 seconds in front of the gas inlet opening on the gas sensor. 5. Put the lighter to one side and wait a few seconds. → Safety switch-off device disconnects the machine from mains power. Display, machine illumination etc. goes out. 9 Safety switch-off device is working. -
Page 18: Changing The Gas Sensor
Technical handbook EN Maintenance components Changing the gas sensor Proceed as follows 1. Remove the screw on the mounting and unhook the gas sensor (keyhole) 2. Remove container lower right 3. Remove the guide stop for the container on the right hand side 4. -
Page 19: Machine Door
Maintenance components GF SiLine L / GF SiLine M 4.10 Machine door Insulating glass panel LED-product illumination 18 of 57 707 66 020 00 _ 011... - Page 20 Technical handbook EN Maintenance components Sliding drawer unit The outlet flap is pushed downwards when the unlocking device is pressed by hand. During a sale the unlocking process is activated by pins at the top of the product basket. Delivery unit flap Unlocking mechanism Mounting peg 707 66 020 00 _ 011 19 of 57...
- Page 21 Maintenance components GF SiLine L / GF SiLine M Compartments Container lock-in function ▪ The containers must be correctly clicked in to ensure exact positioning. Only then will the basket travel during opera- tion with the coupling of the gear wheels. ▪ The circular part on the lower side of the container must click into the semi-circular part on the plastic sliders. A defi- nite click can be heard. Circular part Semi-circular part Plastic slider 20 of 57 707 66 020 00 _ 011...
-
Page 22: Removing And Inserting The Product Container
Technical handbook EN Maintenance components 4.11 Removing and inserting the product container Rear guide Removing the container To take out the container, remove all products first. Using one hand lift the product container slightly at the rear whilst pulling it out at the front with the other hand. The rear guide must be lifted up through the cut-out in the guide rail. Gap in the guide rail Slider Inserting the product container Position the container onto the guide rails and push it in. Shortly before the stop on the rear wall the sliding guide can be heard clicking into the gap in the guide rail. When it is inserted, the product shelf should be horizontal and located against the rear side. Tilting the pusher container Containers can be tilted. The tilting mechanism on pusher cont- ainers is disabled when the machine leaves the factory. Containers are tilted at the operator’s own risk. Caution! Products may fall out if the container is tilted! The tilt mechanism should not be used for glass bottles. 707 66 020 00 _ 011 21 of 57... -
Page 23: Exchanging The Product Container Drive
Maintenance components GF SiLine L / GF SiLine M 4.12 Exchanging the product container drive The drive of the compartment is designed in a maintenance-free and easy-to-service way. All components can be exchanged if damaged. How to proceed Turn the container over. Remove the two screws using a TX 20 screwdriver. Lift off the metal and plastic supports. Pull out the spindles. Release the locking catch on the cover and lift off. Unhook the ribbed belt from the slider. To re-install follow the instructions above in reverse order. Notch Cover for pusher Cover for pusher Slider TX20 screw Support metal plastic End position Fit the sliding guide to the base Hold the pusher and click in the Move the sliding guide to end of the product container sliding guide. position. 22 of 57 707 66 020 00 _ 011... -
Page 24: Container Numbering
Technical handbook EN Maintenance components Drive correctly assembled 4.13 Container numbering The containers start with chute number 10 top left and run consecutively to 16 or 18 on the right. The second row starts at number 20 and ends at 28. A maximum of eight shelves can be fitted. If the shelves have been modified, menu M10 AutoConfig must be accessed so that the shelves are automatically identified. 10 11 12 13 10 11 12 13 14 15 16 17 18 14 15 16 17 18 20 21 22 23 24 25 26 27 28 30 31 32 33 34 35 36 37 38 40 41 42 43 44 45 46 47 48 50 51 52 53 54 55 56 57 58 20 21 .. -
Page 25: Removing The Components
Removing the components GF SiLine L / GF SiLine M Removing the components Adjusting the container heights 24 of 57 707 66 020 00 _ 011... -
Page 26: Moving The Container Shelves
Technical handbook EN Removing the components Moving the container shelves The shelves can be installed to suit the product heights. The spacing is 19.35 mm, i.e.the shelf can be moved by this amount. A reference run must be carried out after the shelves have been relocated. See ““6.14 Initiate reference run: [Shelf lookup]“ on page 48. Product requirements Can 0.25 l Ø 53 mm / Height 134 mm Bottle 0,5 l Ø 66 mm / Height 234 mm Bottle 0,6 l Ø 72 mm / Height 240 mm Maximum product heights 5 shelves 240 mm 8 shelves 123 mm Transportable through 270 mm division wall. Distance between product floors Minimum distance 154,8 mm Maximum distance 1161,0 mm Product floor How to proceed ▪... -
Page 27: Install The Product Shelves
Removing the components GF SiLine L / GF SiLine M Install the product shelves Position the cross brace at the required height. On the right hand side insert a securing screw, on the left hand side secure the actuator bracket using two securing screws. Insert the guide, top first into the recess provided, finally secure the guide at the front with the guide block. Please note: There is a "right hand guide" with a "right hand guide block" for the right hand side. Check the guide installation to ensure that all the shelves are fitted horizontally. Rear panel Securing screw Actuator bracket 26 of 57 707 66 020 00 _ 011... -
Page 28: Fit Double 63 Mm Container
Technical handbook EN Removing the components Fit double 63 mm container The cross brace is fitted on the back wall and secured with screws. Rear cross brace Rear cross brace: fit and secure Screw with screw Actuator bracket for double 63 mm container In a five piece shelf: Front cross brace double 63 mm container The actuator bracket must be fitted at zero position right at the bottom 707 66 020 00 _ 011 27 of 57... -
Page 29: Taking Out The Product Basket
Removing the components GF SiLine L / GF SiLine M Taking out the product basket 1. At the same time press the locking nipples front and back. 2. Tip the basket upwards slightly. 3. At the same time pull the baskset downwards and backwards. To re-install follow the instructions above in reverse order. 28 of 57 707 66 020 00 _ 011... -
Page 30: Exchanging The Basket Holder
Technical handbook EN Removing the components Exchanging the basket holder The basket holder can be unhooked and exchanged without using tools. 5.6.1 Removal Hold the carriage for the vertical rail with your left hand and activate the lever using your index finger (push to the left). Then separate the basket holder from the bracket with a slight tap underneath on the basket holder. After unhooking it separate disconnect the electrical cables from the plug connections. Push lever Basket holder Vertical track Plug-in connection 5.6.2 Assembly Lay the electric cables in the clamping units provided underneath the basket holder and re-connect the plug. Mount the basket holder and swivel backwards. Place both guide bushes from above into the slotted holes, press the basket holder downwards whilst pressing the lever. Take care to fit correctly. Slotted hole Guide bush Basket holder correctly mounted 707 66 020 00 _ 011 29 of 57... -
Page 31: Build Information
Build information GF SiLine L / GF SiLine M Build information Product basket light barrier The light barrier in the product basket must detect the product in the basket. This is done by several rays being arranged in parallel, just one ray breaking is sufficient for product detection. A status-LED will flash on the receiver board. Flashing frequency Status Slow (every 5 sec.) Fast Light barrier faulty The cut-outs and the lenses on both boards must be dust-free; remove foreign bodies (e. g. labels) if necessary. Cleaning with compressed air from a spray is sufficient. Caution, sensitive components! Do not get too close with the spray nozzle. Cut-outs Lens Product entry Basket holder Transmitting side LED-status Receiving side Light barrier The board must be positioned correctly in the appropriate holder. Be careful not to damage the board! If the product basket is inserted incorrectly the light barrier board may be damaged. For this reason be careful not to damage the board with the indentation in the bottom of the basket! If the basket is incorrectly positioned, the indentation... -
Page 32: Product Basket Belt Tension
Technical handbook EN Build information Product basket belt tension The toothed belt for the Z-axis drive with the pendulum drive is located on the underside of the basket. In order to adjust the belt tension use a box spanner SW7 (and an adjusting gauge if available). NOTE! Do not tighten the belt too much, risk of damage! Adjusting nut Motor position There are 3 electric drive motors in the vending machine. Motor 1: is located on the right at the top and can be seen once the sliding drawer unit has been pulled out. Motor 2: is located on the vertical rail outside the product basket. Motor 3: is located under the product basket. Grub screw Motor 1 Encoder 707 66 020 00 _ 011 31 of 57... - Page 33 Build information GF SiLine L / GF SiLine M X-axis Motor 1 Movement X-axis Motor 2 Movement Y-axis Light barrier rays with reflector Z-axis Motor 3 Movement Z-axis Vertical track Light barrier 32 of 57 707 66 020 00 _ 011...
-
Page 34: Electrical Wires, Cable Connections
Technical handbook EN Build information Motor 3 Motor 3 Z-axis Z-axis Home position, Transportation status, hook disengaged. Hook engaged Products in the container are pushed forward when the drive is active Gear wheel The hook catches Hook in the product container cut-out. Electrical wires, cable connections HG-adapter board Slot X506 Motor 2 Y-axis Highly flexible ribbon cable from motor 2 to HG-adapter control board (long cable) 707 66 020 00 _ 011 33 of 57... -
Page 35: Switches, Buttons, Locking Mechanisms
Build information GF SiLine L / GF SiLine M Motor 1 X-axis Cables to board ▪ Encoder plug connection at X509 Board ▪ Motor plug connection at X501 Switches, buttons, locking mechanisms This is where the button for Locking mechanism the home position of the with button for X-axis is located. delivery unit flap (shutter). Actuators The pin on the Actuators are available se- product basket parately as a spare part. unlocks the delivery unit flap. 34 of 57 707 66 020 00 _ 011... -
Page 36: Actuator Bracket For Locating The Shelf
Technical handbook EN Build information Actuator bracket for locating the shelf The home position of the Y-axis is determined via a light barrier on the product basket: - narrow actuator bracket = container - wide actuator bracket = home position at the bottom Refer also to „6.14 Initiate reference run: [Shelf lookup]“ on page 48. X-axis narrow activation bracket 74 mm wide actuator bracket 63 mm 74 mm light barrier 63 mm Standard: container width 74 mm, 9 product containers on a shelf. Optional: standard container width 63 mm, 10 product containers on a shelf. If, due to an oversight, the actuator bracket is omitted when the shelf is converted, this shelf will be ignored! Actuator bracket Light barrier 707 66 020 00 _ 011 35 of 57... -
Page 37: Calibrate The Pendulum Hook/Lift Calibration
Build information GF SiLine L / GF SiLine M Calibrate the pendulum hook/lift calibration When calibrating the lift 3 positions are automatically accessed and checked via the gear wheel assembly. As a rule it is necessary to calibrate the lift on new or older machines. New machines are calibrated at the factory. However due to transportation and calibration it may be necessary to re-calibrate the lift. Remove the basket so that you can see that the gear wheel assembly is engaged. See „5.5 Taking out the product basket“ on page 28 Requirements ▪ Manually push the product pusher on the 3 relevant containers right to the back. ▪ Service key How to proceed 1. Press tab 4 [Products] 2. Press [Shelf configuration] and then [Lift calibration] 3. Insert service key 4. -
Page 38: Taking Out The Sliding Door Unit
Technical handbook EN Build information Taking out the sliding door unit The sliding door unit can be hooked out for repair work. This process does not take very long. Disconnect the power supply leads to the sliding drawer unit. Disconnect the two protective earth connectors with ring cable lug. Pull the sliding door unit out as far as it will go and press the isolating levers at the top and bottom. Pull the sliding door unit out so that the runners are disconnected. Hold and secure the sliding door unit sufficiently. Fitting the sliding door unit: Pull the ball bearing assembly forwards until it stops. Insert the sliding door unit with the two mounted rails into the protruding rails and ball bearing assembly. Ensure that the ball bearing assembly cannot slide backwards as the rail must be inserted into it. Ball bearing Sliding drawer assembly unit Earth conductor Lever Drawer unhooked 707 66 020 00 _ 011 37 of 57... -
Page 39: Sliding Drawer Unit Wiring
Build information GF SiLine L / GF SiLine M Sliding drawer unit wiring Cables from the machine to the drawer unit must be laid in large loops with strain relief. Ensure that there are no kinks in the cable when laying and ensure it does not catch and is not subjected to any tension. Main cables, form large radii! Power supply Connection Connection cable Drink outlet illumination Ribbon cable 38 of 57 707 66 020 00 _ 011... -
Page 40: Note On The Diagrams
Technical handbook EN Build information 6.10 Note on the diagrams Cable clamp For simplification purposes the cables and plugs are either only indicated or not drawn in the diagrams. Cable clamp sliding drawer unit Motor 1 / X-axis Cable tie Lay cables in large loops! Flap for the division panel There is a flap between the chilled area and the ambient area. It is pushed into locking position with two springs on the hinge axis. If a product in the basket is to be dispensed, the basket simply pushes this flap in the division panel open. When the basket moves away, the flap closes again. Flap in division panel in open position, product basket not shown in the diagram! Flap Divider wall Spread angle 707 66 020 00 _ 011 39 of 57... -
Page 41: Protecting The Basket During Product Delivery
Build information GF SiLine L / GF SiLine M Fitting and removing the flap in the division wall Disconnect the two circlips on the spindle. Pull the spindles out. The flap can now be removed. To re-install follow the instructions above in reverse order. Finally, check the functioning of the flap to avoid unnecessary loss of energy. The flap must be self-closing! 6.11 Protecting the basket during product delivery When the vertical rail with the product basket is in the delivery unit, the pendulum hook is pulled out thereby blo- cking the spread angle. This prevents the product basket from being pushed back mechanically (theft protection). -
Page 42: Machine Illumination: Led Fitting Left/Right
Technical handbook EN Build information 6.12 Machine illumination: LED fitting left/right The products are illuminated by two energy-saving, long-life LED light fittings. The left fitting folds out when the door is opened. This prevents damage when the left product containers are pulled out. The right hand fitting is firmly mounted. The light fittings can be exchanged by loosening the fixing screws. The supply line is connected with a reverse polarity protected plug. Do not touch the green LED light fitting board! It contains sensitive components. Pivotable LED fitting Plug Green control board Left fitting Right fitting 707 66 020 00 _ 011 41 of 57... -
Page 43: Lift System
Build information GF SiLine L / GF SiLine M 6.13 Lift system 6.13.1 Vertical track counterweight A counterweight of approx. 0.8 kg is built in to balance the weight of the basket. The two parts are connected via a d eflection roller with ball bearing and a toothed belt. The counterweight is accessible once the cover has been removed. Note: Deflection roller, toothed belt Counterweight and deflec- tion roller are maintenan- ce-free. Cover Counterweight 6.13.2 Belt drive, vertical track, lift system set-up Detailed diagrams to follow 42 of 57 707 66 020 00 _ 011... - Page 44 Technical handbook EN Build information Guide rail Deflection roller Limit switch X-axis Runner Toothed belt Insulation X-axis drive motor Decoder Toothed belt Vertical track Toothed belt Belt tension adjusting screw Deflection roller Toothed belt Insulation Y-axis drive motor, Decoder Flexible flat cable Flexible flat cable 707 66 020 00 _ 011 43 of 57...
-
Page 45: Removing The Vertical Track
Build information GF SiLine L / GF SiLine M 6.13.3 Removing the vertical track How to proceed Empty and remove the lower right container. Push the vertical rail to the right. 1. Unscrew the two guide screws on the lower belt bushing completely; the vertical-rail/toothed belt connection is now free. 2. Remove the two fixing screws at the top of the vertical-rail. The vertical rail is now free and can be completely removed. Note when installing To fit the vertical rail follow the instructions above in reverse order. The lower roller guide must be inserted in the rail from underneath. After installing push the vertical rail into the centre and check parallelism. For this purpose align top and bottom on the left side of the vertical rail with the product containers. With care and accuracy the alignment can be checked. Vertical track Belt bush 44 of 57 707 66 020 00 _ 011... -
Page 46: Setting The Belt Tension (X-Axis)
Technical handbook EN Build information Must be parallel Product container side wall Vertical track 6.13.4 Setting the belt tension (X-axis) The belt tension and its parallel alignment is adjusted on the clamping bracket by turning the clamping nut. After adjusting the parallelism must be checked! Clamping bracket Clamping nut Ribbon cable NOTE! Observe the fitting instructions and the testing information for part no. 704 01 001 00! 707 66 020 00 _ 011 45 of 57... -
Page 47: Unhooking The Runner At The Top
Build information GF SiLine L / GF SiLine M 6.13.5 Unhooking the runner at the top The runner together with two inserted screws clamps the belt bushing. The belt bushing itself is moved by the belt. The belt bushing consists of two identical halves that are clipped together. Screws Carrier at the Belt Belt bush Open belt bush (clip fastening) 46 of 57 707 66 020 00 _ 011... -
Page 48: Setting The Belt Tension (Y-Axis)
Technical handbook EN Build information 6.13.6 Setting the belt tension (Y-axis) The belt tension is adjusted by the clamp screw. Clamp screw Toothed belt Y-axis NOTE! Observe the fitting instructions and the testing information for part no. 704 01 230 00 707 66 020 00 _ 011 47 of 57... -
Page 49: Initiate Reference Run: [Shelf Lookup]
Build information GF SiLine L / GF SiLine M 6.14 Initiate reference run: [Shelf lookup] [Shelf configuration] The function is in [Products] This menu analyses the machine type, number and container fitting height. You should always go into this menu when you have changed the machine layout (e,g changing the container heights or number of containers on a shelf). Each product shelf must have an activation bracket (metal bracket) to enable detection during the shelf lookup process. The light barrier runs past the activation brackets and in this way can determine the positions. 74 mm Narrow activati- on bracket 63 mm Activation bracket 74 mm for zero position bottom left Light barrier 63 mm 48 of 57 707 66 020 00 _ 011... -
Page 50: Error Messages
Technical handbook EN Error messages Error messages Yellow error messages, red error messages As soon as the machine door is opened, the display changes from vend mode in the start menu. There is important information in the status window for the filler or service technician: ▪ Window with red background: machine out of order ▪ Window with yellow background: machine working, but warnings highlighted Example: [No payment system found] In the following example the error text [-EC 3001 -] is shown in red. The relevant text [No payment system found] helps the filler or service engineer. Presumably [MDB] is programmed in the settings but the coin mechanism has been removed. The software sear- ches for communication via the MDB-protocol with the coin mechanism and cannot find any. This is a serious error which will lead to the machine ceasing to function. What must you do now? ▪ Log in i.e. register yourself as *Operator" or "Technician" ▪ Install a coin mechanism and connect it to the MDB. ▪ Press Tab 5 [Payment Systems] and then [General]. In the menu [Credit system Protocol] must be set to [MDB]. Start menu (1/2) MDB payment system missing - EC 3001 - No payment system found Test v end Diagnostic Full clean Delete... - Page 51 Error messages GF SiLine L / GF SiLine M Error message Possible cause Suggested course of action Error code a) Check motor voltage, door contact switch; The voltage is not cons- Mains failure b) check motor M3, M5; refer to circuit tant. diagram a) Check motor voltage on the mains supply circuit. The temperature is too Temperature performance high. b) Make sure that the lift system and the product basket can be moved easily. a) Sensor check available. No sensor detected du- RESET_NoSensor b) Check if the sensors are connected. ring the system check.
- Page 52 Technical handbook EN Error messages Error message Possible cause Suggested course of action Error code a) Check limit switch. Y-direction motor cannot MY_Zero b) Check motor. find a limit switch. d) Mechanical jam Obstruction removed. Y-direction motor cannot MY_Ref find a limit switch. No encoder signal for MY_EncoderMove motor moving in Y-direc- a) Check if cable connection between motor tion. encoder and control board is OK. No encoder signal for MY_EncoderHold Y-direction motor stop d) Mechanical jam? Obstruction removed. function. Time out error on Y-di- MY_RunTimeout rection movement; tar- get position not reached.
- Page 53 Error messages GF SiLine L / GF SiLine M Error message Possible cause Suggested course of action Error code ROBIMAT_ERROR_Aus- gabeAuf ROBIMAT_ERROR_Aus- gabeAuf_MotorTimeout ROBIMAT_ERROR_Aus- gabeAuf_ShutterTimeout Internal, should not occur. ROBIMAT_ERROR_Aus- gabeZu ROBIMAT_ERROR_Aus- gabeZu_MotorTimeout ROBIMAT_ERROR_Aus- gabeZu_ShutterTimeout ROBIMAT_ERROR_Read- Position_EepromNotIdle ROBIMAT_ERROR_InitE- WPo_EepromNotIdle ROBIMAT_ERROR_Read- Eeprom not ready. Software error or Eeprom faulty. HWCfgCRC_EepromNo- tIdle ROBIMAT_ERROR_RE- SELECT_ReadPosition_...
-
Page 54: Wiring Diagrams
Technical handbook EN Wiring diagrams Wiring diagrams 707 66 020 00 _ 011 53 of 57... - Page 55 Wiring diagrams GF SiLine L / GF SiLine M 54 of 57 707 66 020 00 _ 011...
- Page 56 Technical handbook EN Wiring diagrams 707 66 020 00 _ 011 55 of 57...
-
Page 57: Index
Index GF SiLine L / GF SiLine M Index Adjusting the belt tension ........47 Angle of twist (function) ........40 Anti-theft device ............ 40 Buttons - place of installation........ 34 Changing product shelf heights ......25 Changing the gas sensor........17 Cleaning condenser..........14 Error messages ............ 49 Exchange container motor........22 Exchanging the basket holder ......29 Lift system ............42 Light barrier on product basket ......30 Motor positions, place of installation..... - Page 58 Index GF SiLine L / GF SiLine M 57 of 57 707 66 020 00 _ 011...
Need help?
Do you have a question about the DIAMOND GF SiLine M RP03 and is the answer not in the manual?
Questions and answers