Table of Contents
Advertisement
Available languages
Available languages
READ BEFORE USE
English ................................... 2
Visit hamiltonbeach.com for our
complete line of products and
Use and Care Guides – as well
as delicious recipes, tips, and to
register your product online.
LIRE AVANT UTILISATION
Français ................................ 13
Visitez hamiltonbeach.ca/fr pour
découvrir notre gamme complète
de produits, consulter nos guides
d'utilisation et d'entretien, obtenir
des conseils et de délicieuses
recettes, et inscrire votre produit
en ligne.
LEA ANTES DE USAR
Español ................................ 24
Visite hamiltonbeach.com para
consultar nuestra línea completa
de productos y las guías de uso y
cuidado, así como deliciosas recetas,
consejos y para registrar su producto
en línea.
Appearance varies with models.
L'apparence varie selon les modèles.
La apariencia varía con los modelos.
FlexBrew
Advanced 5-in-1
Coffee Maker
Cafetière
5 en 1 FlexBrew
Advanced
Cafetera
5 en 1 FlexBrew
Advanced
Advertisement
Table of Contents

Related Manuals for Hamilton Beach FlexBrew Advanced 5-in-1


Summary of Contents for Hamilton Beach FlexBrew Advanced 5-in-1
- Page 1 READ BEFORE USE English ........2 Visit hamiltonbeach.com for our complete line of products and FlexBrew Use and Care Guides – as well as delicious recipes, tips, and to register your product online. Advanced 5-in-1 LIRE AVANT UTILISATION Coffee Maker Français ........
-
Page 2: Important Safeguards
IMPORTANT SAFEGUARDS When using electrical appliances, basic safety precautions should always be followed to reduce the risk of fire, electric shock, and/or injury to persons, including the following: 1. Read all instructions. 13. Do not place coffee maker on or near a hot gas or electric 2. - Page 3 Other Consumer Safety Information This appliance is intended for household use only. The length of the cord used on this appliance was selected to reduce the hazards of becoming tangled in or tripping over a longer cord. If a w WARNING Electrical Shock Hazard: This appliance is provided longer cord is necessary, an approved extension cord may be used.
-
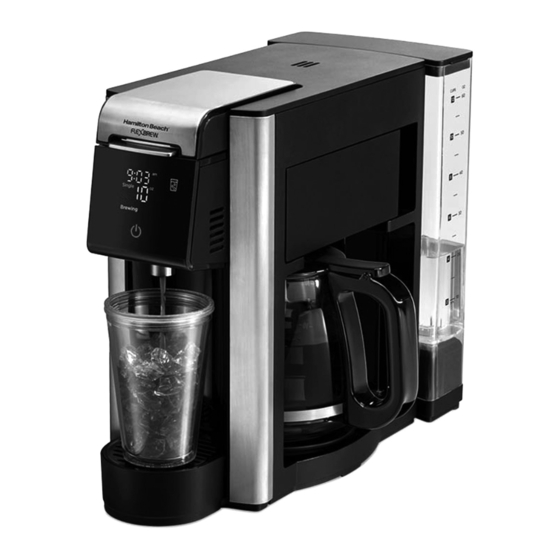
Page 4: Parts And Features
Parts and Features Before first use: Wash all removable parts in hot, soapy water. Rinse and dry. Brew one cycle with water on each side and discard water. To order parts, visit: hamiltonbeach.com/parts Lid Latch Single-Serve Lid Brown Needle Holder with Black Seal (removable) Piercing Needle Funnel... -
Page 5: Control Panel
Control Panel Icon Description Press to start brewing or to manually turn on and off. Illuminates white when machine is off. Illuminates Power ON/OFF red when machine is on/brewing. Hot Single Used to brew hot single-serve and select cup size 8, 10, 12, or 14 oz. Iced Single Used to brew iced single-serve and select cup size 10, 12, or 14 oz. - Page 6 How to Brew Hot Single-Serve Coffee 1. Lift up Reservoir and remove Lid. Add water w WARNING Burn Hazard. to at least MIN fill line (10 oz.) or to the size If overflow occurs, unplug and allow coffee maker to cool. you plan to brew, but no more than to MAX fill To avoid hot coffee overflowing: line (60 oz.).
- Page 7 How To Brew Single-Serve Iced Coffee 1. Lift up Reservoir and remove Lid. Add w WARNING Burn Hazard. water to at least MIN fill line (10 oz.) up to If overflow occurs, unplug and allow coffee maker to cool. MAX fill line (60 oz.). Add Lid and place To avoid hot coffee overflowing: Reservoir onto Coffee Maker.
- Page 8 How to Brew a Carafe 10. When brewing is complete, machine automatically switches to w WARNING Burn Hazard. (Keep Warm) for 2 hours. If brew basket overflow occurs, unplug coffee maker and allow coffee 11. Press (Power ON/OFF) button to turn off; button will illuminate white in brew basket to cool before removing brew basket.
-
Page 9: Care And Cleaning
Care and Cleaning Routine Cleaning w WARNING Shock Hazard. Do not immerse cord, plug, or coffee maker in any liquid. All coffee makers should be cleaned at least once a month (once a w WARNING Burn Hazard. week for areas with hard water). The clean cycle can be performed at Failure to allow coffee maker to cool down may cause hot water or any time. -
Page 10: Troubleshooting
Troubleshooting – Single-Serve Coffee Maker will not brew/coffee not dispensing. Control Panel notifications. • • CLOSE LId: Single-Serve Lid is not closed properly. Push Lid down to Piercing Needle may be clogged. Always remove Brown Needle lock into place. Holder. Clean Piercing Needle in Lid of Coffee Maker as shown on •... - Page 11 Troubleshooting – Carafe Side Longer than normal brew time. Coffee tastes bad. • • Bold will pause during the cycle. The coffee stream will stop to Coffee Maker needs cleaning. See Care and Cleaning on page 9. • allow coffee to bloom to produce a rich, full-bodied cup of coffee. Coffee ground too coarsely or too finely.
-
Page 12: Limited Warranty
To make warranty claim, do not return this appliance to the store. To make warranty claim, do not return this appliance to the store. Please write Hamilton Beach Brands, Inc., Attn: Consumer Affairs, 261 Yadkin Road, Southern Pines, NC 28387, or visit hamiltonbeach.com/customer-service in the U.S. -
Page 13: Précautions Importantes
PRÉCAUTIONS IMPORTANTES Pour utiliser un appareil électroménager, vous devez toujours prendre des mesures élémentaires de sécurité pour réduire le risque d’incendie, d’électrocution et/ou de blessure corporelle, en particulier les mesures suivantes : 1. Lire toutes les instructions. 13. Ne pas placer la cafetière sur ou près d’un brûleur à gaz ou électrique ou 2. - Page 14 Autres consignes de sécurité pour le consommateur Cet appareil est destiné à un usage domestique uniquement. de réduire les risques d’enchevêtrement ou de faux pas causés par un fil trop long. L’utilisation d’une rallonge approuvée est permise si le w AVERTISSEMENT Risque de choc électrique : Cet appareil est cordon est trop court.
- Page 15 Pièces et Avant la première utilisation : Laver toutes les pièces amovibles dans de l’eau chaude savonneuse. Rincer et sécher. Faire un cycle d’infusion en ayant ajouter de l’eau de chaque côté puis jeter l’eau à la fin du cycle. caractéristiques Pour commander des pièces, visiter : hamiltonbeach.ca/parts...
-
Page 16: Panneau De Commande
Panneau de commande Icône Description Bouton utilisé pour lancer l’infusion ou pour allumer et éteindre manuellement l’appareil. L’icône Alimentation s’illumine en blanc lorsque l’appareil n’est pas en marche. Elle s’illumine en rouge lorsque l’appareil est en marche ou en cours d’infusion. Café... - Page 17 Infusion d’un café chaud individuel 1. Soulever le réservoir et retirer le couvercle. Ajouter de l’eau au w AVERTISSEMENT Risque de brûlures. moins jusqu’à la ligne de remplissage MIN (10 oz [295 mL]) ou Si un débordement se produit, débrancher et laisser refroidir la cafetière. jusqu’à...
- Page 18 Infusion d’un café glacé individuel w AVERTISSEMENT Risque de brûlures. 1. Soulever le réservoir et retirer le couvercle. Ajouter de l’eau au moins jusqu’à la ligne de remplissage Si un débordement se produit, débrancher et laisser refroidir la cafetière. MIN (10 oz [295 mL]) et au plus jusqu’à la ligne Pour éviter le débordement de café...
- Page 19 Infusion pour verseuse 10. Une fois l’infusion terminée, l’appareil passera automatiquement au mode (garde au w AVERTISSEMENT Risque de brûlures. chaud) pour deux heures. Si le panier-filtre déborde, débrancher la cafetière et laisser refroidir le café du 11. Appuyer sur le bouton d’alimentation (ON/OFF [marche/arrêt]) pour éteindre panier-filtre avant de retirer le panier-filtre.
-
Page 20: Entretien Et Nettoyage
Entretien et nettoyage Nettoyage de routine w AVERTISSEMENT Risque de choc électrique. Ne pas immerger le cordon, la fiche ou la cafetière dans aucun liquide. Toutes les cafetières doivent être nettoyées au moins une fois par w AVERTISSEMENT Risque de brûlures. mois (une fois par semaine pour les zones à... - Page 21 Dépannage – Côté tasse La cafetière n’infusera pas/le café ne se verse pas dans la tasse. Notifications de panneau de commande. • CLOSE LId (fermer le couvercle) : le couvercle de la cafetière est mal fermé. • L’aiguille de perçage peut être obstrué. Toujours retirer le support d’aiguille Abaisser le couvercle jusqu’à...
-
Page 22: Dépannage
Dépannage – Côté verseuse Durée d’infusion plus longue que la normale. Le café a un mauvais goût. • Lors d’une infusion d’intensité Bold (corsée), la cafetière s’interrompra en cours de • La cafetière a besoin d’être nettoyée. Voir le chapitre « Entretien et nettoyage » à la cycle. -
Page 23: Garantie Limitée
à votre cas. Pour faire une réclamation au titre de la garantie, veuillez ne pas retourner cet appareil au magasin. Veuillez nous écrire à Hamilton Beach Brands, Inc., Attn: Consumer Affairs, 261 Yadkin Road, Southern Pines, NC 28387, ou visiter le site hamiltonbeach.com/customer-service aux États-Unis ou hamiltonbeach.ca/customer-service au Canada. -
Page 24: Salvaguardias Importantes
SALVAGUARDIAS IMPORTANTES Cuando utilice aparatos eléctricos, siempre deben seguirse precauciones de seguridad básicas a fin de reducir el riesgo de incendio, descarga eléctrica, y/o lesiones a personas, incluyendo las siguientes: 1. Lea todas las instrucciones. 11. Use solo la jarra provista con este aparato. 2. - Page 25 29. ¡ADVERTENCIA! Para que no salga agua caliente de la aguja 30. Utilice solamente las cápsulas destinadas para este aparato. Si la perforadora, no levante la tapa durante el proceso de preparación. cápsula no encaja, no fuerce la capsula en la máquina. GUARDE ESTAS INSTRUCCIONES Otra información de seguridad para el cliente Este aparato ha sido diseñado solamente para uso doméstico.
- Page 26 Piezas y Antes del primer uso: Lave todas las piezas desmontables en agua caliente jabonosa. Enjuague y seque. Prepare un ciclo con agua en cada lado y descarte el agua. características Para ordenar piezas, visite: hamiltonbeach.com/parts Cierre de tapa Tapa del servicio individual Portaagujas marrón con sello negro (removible) Aguja perforadora...
-
Page 27: Panel De Control
Panel de control Icono Descripción Encendido Presione para iniciar la infusión o para encender y apagar manualmente. Se ilumina en blanco cuando la ON/OFF máquina está apagada. Se ilumina en rojo cuando la máquina está en funcionamiento/infusión. Caliente un Se utiliza para preparar porciones individuales calientes y seleccionar el tamaño de taza de 8, 10, 12 ó 14 onzas. - Page 28 Cómo preparar café caliente para un servicio individual 1. Levante el depósito y retire la tapa. Agregue agua por lo w ADVERTENCIA Riesgo de quemaduras. menos hasta la línea de llenado MIN (10 onzas) o hasta Si ocurre un derrame, desenchufe la cafetera y deje que se enfríe. el tamaño que planea preparar, pero no más de la línea Para evitar el desborde de café...
- Page 29 Cómo preparar café helado para un servicio individual 1. Levante el depósito y retire la tapa. Agregue w ADVERTENCIA Riesgo de quemaduras. agua por lo menos hasta la línea de llenado MIN Si ocurre un derrame, desenchufe la cafetera y deje que se enfríe. (10 onzas) hasta la línea de llenado MAX (60 Para evitar el desborde de café...
- Page 30 Cómo preparar una jarra 10. Una vez finalizada la infusión, la cafetera pasa automáticamente a mantener w ADVERTENCIA Riesgo de quemaduras. caliente (mantener caliente) durante 2 horas. Si ocurre un desborde de la canasta de infusión, desenchufe la cafetera y deje 11.
-
Page 31: Cuidado Y Limpieza
Cuidado y limpieza Limpieza de rutina w ADVERTENCIA Riesgo de descarga eléctrica. No sumerja el cable, enchufe o cafetera en ningún líquido. Todas las cafeteras deben limpiarse por lo menos una vez por w ADVERTENCIA Riesgo de quemaduras. mes (una vez por semana en áreas de agua dura). El ciclo de limpieza No permitir que la cafetera se enfríe puede provocar que agua caliente o café... -
Page 32: Resolviendo Problemas
Resolviendo problemas – Un servicio individual La cafetera no funciona/no sale café. Notificaciones del panel de control. • CLOSE LId (cerrar la tapa): No se ha cerrado bien la tapa de la cafetera. Presione la • La aguja perforadora puede estar tapada. Retire siempre el portaagujas marrón. Limpie tapa hacia abajo para trabarla en su lugar. - Page 33 Resolviendo problemas – Lado de la jarra Tiempo de preparación más largo de lo normal. El café sabe mal. • • Bold (fuerte) hará una pausa durante el ciclo. El flujo de café se detendrá para La cafetera necesita limpiarse. Vea “Cuidado y limpieza” en la página 31. •...
- Page 34 Grupo HB/PS, S.A. de C.V. Monte Elbruz No. 124 - 401 Col. Polanco V Sección, Miguel Hidalgo Ciudad de México, C.P . 11560 GARANTÍA PARA PRODUCTOS COMPRADOS EN MÉXICO PRODUCTO: MARCA: MODELO: Grupo HB/PS, S.A. de C.V. cuenta con una Red de Centros de Servicio Autorizada, por favor consulte en la lista anexa el nombre y dirección de los establecimientos en la República Mexicana en donde usted podrá...
- Page 35 PROCEDIMIENTO PARA HACER EFECTIVA LA GARANTÍA • Para hacer efectiva la garantía, lleve su aparato al Centro de Servicio Autorizado más cercano a su domicilio (consulte la lista anexa). • Si no existe Centro de Servicio Autorizado en su localidad llame a nuestro Centro de Atención al Consumidor para recibir instrucciones de como hacer efectiva su garantía. FECHA DE ENTREGA SELLO DEL VENDEDOR QUEJAS Y SUGERENCIAS...
- Page 36 Modelo: Tipo: Características eléctricas: 49965F A140 120 V~ 60 Hz 1200 W Los modelos incluidos en las instrucciones de Uso y cuidado pueden estar seguidos o no de un sufijo correspondiente a una o varias letras y sus combinaciones, separadas o no por un espacio, coma, barra o guión. Ejemplos de los sufijos pueden ser: “Y” y/o “MX” y/o “MXY”...
Need help?
Do you have a question about the FlexBrew Advanced 5-in-1 and is the answer not in the manual?
Questions and answers
I ran the clean cycle which seemed to work. When I try to run a normal cycle the add water indicator comes on. I’ve tried the clean cycle again and the same thing happens. The add water indicator comes on and nothing happens.
If the add water indicator stays on after running the clean cycle, add water to the Water Reservoir, press the Power ON/OFF button to clear the display, and restart the brew cycle.
This answer is automatically generated
Why do water back up in my k cup when brewing a single cup ?
Water may back up in the K-Cup when using the Hamilton Beach FlexBrew Advanced 5-in-1 due to a missing black seal around the needle in the brown needle holder. Ensure the seal is properly placed around the needle and pushed into place.
This answer is automatically generated
How do I change the position of the reservoir from back to side
To change the reservoir position from back to side on the Hamilton Beach Advanced 5-in-1:
1. Do not remove any screws.
2. Firmly pull up on the reservoir base.
3. Slide it over to the desired position (side or back).
4. Be careful not to disconnect the water supply line.
5. No tools are needed.
Follow the guide instructions for best results.
This answer is automatically generated
Coffee leaking from Carafe Side to the Single-Serve Side.