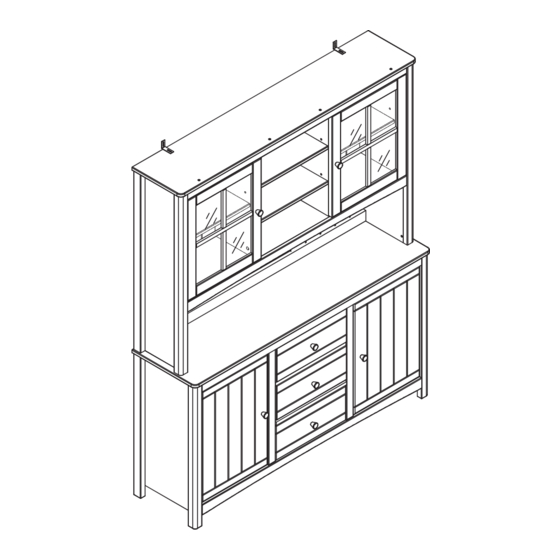
Summary of Contents for Habitat Bournemouth Sideboard Hutch Blue
- Page 1 Bournemouth Sideboard Hutch Blue Spare Parts Customer Support 0345 640 2020 www.argos-support.co.uk Help@ClickSpares.co.uk 0370 112 1928 Issue 1 - 08/28/23...
- Page 2 Do not use abrasives cleaning agents,as these may scratch the glass. Always supervise young children around glass product. Habitat, Argos Limited and Sainsbury's Supermarkets Ltd, London EC1N 2HT, UK. Argos (N.I.) Ltd and Sainsbury’s (NI) Ltd. Forestside Shopping Centre, Upper Galwally, Belfast, BT8 6FX, UK...
- Page 3 Avoid impacts on the side or edges of the glass, as this is where the glass is most vulnerable. Catolugue number: 4722353. Habitat, Argos Limited and Sainsbury's Supermarkets Ltd, London EC1N 2HT, UK. Argos (N.I.) Ltd and Sainsbury’s (NI) Ltd. Forestside Shopping Centre, Upper Galwally, Belfast, BT8 6FX, UK...
- Page 4 Fittings (Shown to scale) Bag 1 Ø8 Wooden Dowel x 46 Locking Pin x 74 Locking Nut x 74 20 mm Screw x 26 15 mm Screw x 48 Angle Iron x 2 40 mm Screw x 4 30 mm Screw x 16 Ø...
- Page 5 Fittings (Shown to scale) Bag 2 15 mm Screw x 8 Screw x 7 Handle x 7 Ø6*18 mm Washer x 2 Large Head Screw x 4 Shelf Support x 24 15 mm Black Screw x 2 Connection x 2 Foot Pad x 5...
- Page 6 Hardware Door Hinge x 8...
-
Page 7: Tools Required
Tools required Phillips screwdriver Ruler/tape (small & medium) measure Eye protection (when using a Phillips screwdriver hammer or glue) (small & medium) Power Drill Small hammer Drill Heads Mallet... - Page 8 Panels 1 Lower Support Bar ×1 Panel ×1 Side Panel Left ×1 (1390× 45mm) (1500× 400mm) (780× 389mm) Side Panel Right ×1 Middle Panel Left ×1 Bottom Panel ×1 (780× 389mm) (663× 368mm) (1390× 366mm) Bottom Panel Front Support Bar ×2 Removable Panel ×2 Lower Support Bar ×2 Door ×2...
- Page 9 Panels 2 Upper Top Panel ×1 Upper Top Panel Support Bar ×1 Upper Side Panel ×1 Left (1500× 310mm) (1390× 45mm) (982× 299mm) Upper Back Panel ×1 Upper Side Panel Right ×1 Upper Board ×1 (1399.5× 985mm) (982× 299mm) (1390× 258mm) Middle Board Left ×1 Middle Board Right ×1 Side Removable Board ×2...
- Page 10 Ø8 Wooden Dowel x 46 Locking Pin x 74 Locking Nut x 74 15 mm Screw x 8 Screw x 7 Handle x 7 20 mm Screw x 26 15 mm Screw x 48 Angle Iron x 2 Ø6*18 mm Washer x 2 Large Head Screw x 4 Shelf Support x 24 15 mm Black Screw x 2...
- Page 11 Ø8Wooden Dowel x 6 Locking Pin x 26...
- Page 12 15 mm Screw x 8 10 mm Screw x 2 Screw x 2 Door Hinge x 4 Left Door Right Door...
- Page 13 Ø8Wooden Dowel x 6 15 mm Screw x 4 Door Stopper x 2 8 ×2...
- Page 14 Locking Nut x 2 Locking Nut x 2...
- Page 15 Locking Nut x 4 Locking Nut x 6...
- Page 16 Locking Nut x 4 Locking Nut x 1...
- Page 17 Locking Nut x 5...
- Page 19 40 mm Screw x 4 Locking Nut x 12...
- Page 20 Shelf Support x 8...
- Page 21 Locking Nut x 12 Locking Pin x 12 30 mm Screw x 12 ×3...
- Page 22 door 15 mm Screw x 16...
- Page 23 Angle Iron x 2 Ø8Wooden Dowel x 4 Locking Pin x 8 Ø6*18 mm Washer x 2...
- Page 24 Ø8Wooden Dowel x 18 Locking Pin x 14 15 mm Screw x 4 Door Stopper x 2...
- Page 25 15 mm Screw x 8 10 mm Screw x 2 Screw x 2 Door Hinge x 4 30 Left Door...
- Page 26 Locking Nut x 4 Locking Nut x 2...
- Page 27 Locking Nut x 2 Locking Nut x 1...
- Page 28 Locking Nut x 3 Locking Nut x 1...
- Page 29 Locking Nut x 5...
- Page 30 Locking Nut x 8 x 18...
- Page 31 Shelf Support x 8 door 15 mm Screw x 16 x 16...
- Page 32 Shelf Support x 8...
- Page 33 Large Head Screw x 4 Connection x 2...
- Page 34 Supplier Guide - Wall Strap Warning STEP 1: Fix the bracket on the the below drawing. STEP 2: Make a mark on the wall through the bracket Wall Cabinet top STEP 3: Wall Insert screw through bracket into the hole in wall Wall Drill a hole in the Cabinet top...


Need help?
Do you have a question about the Bournemouth Sideboard Hutch Blue and is the answer not in the manual?
Questions and answers