Table of Contents
Advertisement
Advertisement
Table of Contents

Related Manuals for Visionix Retinomax K-PLUS 5


Summary of Contents for Visionix Retinomax K-PLUS 5
- Page 1 User Manual 8226-9030-01/V00_EN/2022-12-06...
-
Page 3: Table Of Contents
3.b) Continuous Measurement Mode (CONT) ....................53 3.c) KERATO Peripheral(PERI) Measurement ..................... 54 3.d) CHILD/QUICK mode ............................57 IV.4 - Various Functions ............................59 4.a) Pupil Diameter Measurement Function ....................59 4.b) Alignment Direction Indication Function ..................... 60 Retinomax K-plus 5 - User Manual... - Page 4 V.9 - MESSAGE Screen [MESSAGE] ........................95 V.10 - INITIALIZING Screen [INITIAL] ........................96 V.11 - VERSION confirmation [VERSION] ......................96 VI - Connecting to external instruments .........................97 VI.1 - Wireless transmission to the Remote Vision RV-II ................98 Retinomax K-plus 5 - User Manual...
- Page 5 VII.9 - Lifetime of the instrument ......................... 102 VIII – Troubleshooting ..............................103 VIII.1 - Main unit ................................104 VIII.2 - Station ................................106 VIII.3 - Printer ................................107 II - Main Specifications ..............................109 Retinomax K-plus 5 - User Manual...
- Page 6 If any serious incident, as referred to in Regulation (EU) 2017/745 Article 2 (57) and (58), has occurred in relation to the device should be reported to the manufacturer and the competent authority of the Member State in which the user and/or patient is established. Retinomax K-plus 5 - User Manual...
- Page 7 ・ Do not measure under environment if there are many people or strong lights around the patient where disturbing measurement, it may cause failure of measurement. Retinomax K-plus 5 - User Manual...
- Page 8 The instrument conforms to the EMC standard (IEC60601-1-2:2014), but discharges weak radio waves. If the instrument in operation interferes with other equipment, such as a TV or radio, take appropriate action, such as increasing the distance between the instruments or changing each direction. Retinomax K-plus 5 - User Manual...
- Page 9 ・ Although printer cutter is located at not accessible place by finger, caution when changing the paper roll. ・ Use accessory cable enclosed with the unit. (→See “0I.1 - Instrument Overview, Components and Options”) Retinomax K-plus 5 - User Manual...
- Page 10 ・ Make sure that when the batteries are in storage, their contacts are not touched by metals, etc. If they are short-circuited to a metal, heating or even a fire can occur. Retinomax K-plus 5 - User Manual...
- Page 11 The battery pack is a consumable item. It can be recharged, but eventually wears out. When the battery pack is no longer usable, purchase a new one from your local dealer of the instrument. Retinomax K-plus 5 - User Manual...
- Page 12 This product is designated as an item to be collected separately at an appropriate spot. Do not dispose of it as household waste. For further information, contact the retailer or the local authorities responsible for waste management. Retinomax K-plus 5 - User Manual...
-
Page 13: Emc (Electromagnetic Compatibility)
Retinomax K-plus5 and result in improper operation. (A):Environments for Retinomax K-plus5 This device is applied for use in professional healthcare facility environment and home healthcare environment. −Doctor's offices, clinics, medical facilities, hospital, optician's, etc. Retinomax K-plus 5 - User Manual... - Page 14 *2: This test is not applicable in this environment unless the ME EQUIPMENT and ME SYSTEMS used there will be connected to the PUBLIC MAINS NETWORK and the power input is otherwise within the scope of the Basic EMC standard. Retinomax K-plus 5 - User Manual...
- Page 15 If the RISK ANALYSIS shows that the ME EQUIPMENT or ME SYSTEM will be used closer than 15 cm to sources of power frequency magnetic field, the IMMUNITY TEST LEVEL shall be adjusted as appropriate for the minimum expected distance. Retinomax K-plus 5 - User Manual...
- Page 16 ± 2 kV line(s) to earth and ± 1 kV line(s) to line(s). *11: Not applicable to CLASS II ME EQUIPMENT and ME SYSTEMS. *12: Direct coupling shall be used. Retinomax K-plus 5 - User Manual...
- Page 17 MHz, 5,3 MHz to 5,4 MHz, 7 MHz to 7,3 MHz, 10,1 MHz to 10,15 MHz, 14 MHz to 14,2 MHz, 18,07 MHz to 18,17 MHz, 21,0 MHz to 21,4 MHz, 24,89 MHz to 24,99 MHz, 28,0 MHz to 29,7 MHz and 50,0 MHz to 54,0 MHz. Retinomax K-plus 5 - User Manual...
- Page 18 *2: The carrier shall be modulated using a 50% duty cycle square wave signal. *3: As an alternative to FM modulation, 50% pulse modulation at 18Hz may be used because while it does not represent actual modulation, it would be worst case. Retinomax K-plus 5 - User Manual...
-
Page 19: I - Overview
Overview Retinomax K-plus 5 - User Manual... -
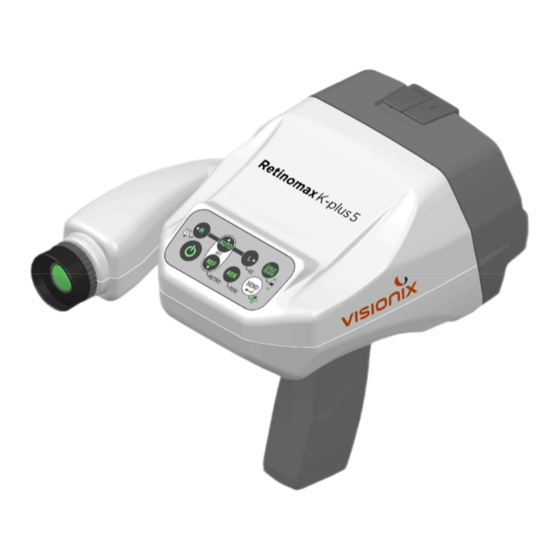
Page 20: Instrument Overview, Components And Options
(φ5 x 20 mm250 V, T1.6 AH (021501.6XP)) ● Power cord (1) ● Dust cover (1) ● Quick guide (1) ● QR cord of Instruction manual (1) ■ Options ● Carrying case ● Battery pack Retinomax K-plus 5 - User Manual... -
Page 21: Instrument Classification
: This symbol indicates that the type of protection against electric shock for the applied part is type B This symbol indicates that has place where forehead rest has put and : pull. Retinomax K-plus 5 - User Manual... - Page 22 : This symbol means this equipment conform to WEEE directive (2012/19/EU) in EU. This symbol is designed to promote the recycling of used lithium ion : battery in Japan. : This symbol is designed to promote the recycling of used batteries in Taiwan. Retinomax K-plus 5 - User Manual...
-
Page 23: Labels And Marks
The product includes labels and marks to draw user's attention to important information and precautions. If you found some scratch or rack of words, please contact to dealer whom you purchased from. ●Main body ●Bottom Manufacturing year ●Type B applied part ●Battery part ●Station Retinomax K-plus 5 - User Manual... - Page 24 ●Rear of the station Manufacturing year Retinomax K-plus 5 - User Manual...
- Page 25 ●Printer ●Bottom Manufacturing year ●Battery part Retinomax K-plus 5 - User Manual...
- Page 26 ●Battery pack Specifications are subject to change without notice for product improvement or modification. For detail, please refer to the instruction manual of the battery. Retinomax K-plus 5 - User Manual...
-
Page 27: Name Of Parts
II - Name of parts Retinomax K-plus 5 - User Manual... -
Page 28: Ii.1 - Main Unit
Forehead rest Measuring part Center of measuring window Right/Left eye sensor Target line for measuring window height position Data transmission window Lighting part in CHILD mode Battery Measurement switch charging contacts (4) Retinomax K-plus 5 - User Manual... -
Page 29: Ii.2 - Operation Panel
When the power is off, symbol turns off. Pressing in standby mode restore from standby mode. Hold down more than 2 sec in Turn the power off. standby mode Perform REF measurement. Push Symbol turns on. Retinomax K-plus 5 - User Manual... - Page 30 After hold down 2 sec, push measurement ANGLE Refer to right switch to select the angle and push section determine. Selectable angle switches to 0°/45°/90°/135°/180°/-135°/-90°/-45°/0°…. SEND Push Transfer the measured data to the printer. Retinomax K-plus 5 - User Manual...
-
Page 31: Ii.3 - Station
Contacts for connection to Accessories printer (5) mount Power indicator lamp Charge lamp for main unit Charge lamp for printer ●Accessories mount Place the model eye mounted Fuse Model eye ● Rear Contact lens holder Retinomax K-plus 5 - User Manual... -
Page 32: Ii.4 - Printer
Orange unit Charge lamp for printer Orange II.4 - Printer Power lamp Paper cover Power switch Lever opening/closing of paper cover Data receiving window Connection the station (5) Battery cover Printing part USB port Retinomax K-plus 5 - User Manual... - Page 33 During battery operation, the lighting pattern will change depending on the capacity of the battery pack. CAUTION ・There is a cutter on the printing part of the printer. Please be careful not to insert your finger into the print part when changing paper. Retinomax K-plus 5 - User Manual...
-
Page 34: Setup
III - Setup Retinomax K-plus 5 - User Manual... -
Page 35: Iii.1 - Attaching/Detaching The Strap
To close the grip cover, slide it in the opposite direction of ②. If the grip cover comes off, the screen will not be displayed even if the power is on. Please install it securely. ① ④ Clicks Clicks ② ③ Retinomax K-plus 5 - User Manual... -
Page 36: B) Printer
If optional spare battery is purchased, set the battery pack in the Printer (refer to 0) for battery charge. Install the print paper roll onto the printer (refer to 0 VII.2 - Replacing the Print Roll Retinomax K-plus 5 - User Manual... -
Page 37: Iii.4 - Charging The Battery Pack
III.4 - Charging the Battery Pack Be sure to read the following precautions before starting charging. ・ Retinomax K-plus 5 - User Manual... -
Page 38: A) Automatic Charging Of The Main Unit
When the main unit is placed onto the station, the charge lamp lights with orange color. The station automatically checks the state of charge and decides whether the battery needs charging If charging is not needed→the lamp goes out. If it is needed→the lamp continues lighting with orange color. Retinomax K-plus 5 - User Manual... -
Page 39: B) Automatic Charging Of The Printer
Insert the battery pack you want to charge into the printer and charge it. See "0 2 .b) Printer " for how to install the battery pack and "0 4.b) Automatic Charging of the Printer " for charging method. Retinomax K-plus 5 - User Manual... -
Page 40: Measurement
IV – Measurement Retinomax K-plus 5 - User Manual... - Page 41 (AUTO, AUTO2, AUTO3) CONT measurement mode KERATO peripheral (PERI) measurement mode CHILD/QUICK measurement mode Various function Measurement finished Print out/External output the data Print out How to connect with external device Power off Retinomax K-plus 5 - User Manual...
-
Page 42: Iv.1 - Power On
/ Axis Horizontal indicat Right / Left eye VD value indicator during measurmenet Measurement mode Pupil size measurement value Patient No. Measuring subject Spherical power Cylindrical power Cylinder axis Reference and examples of measurement screen Retinomax K-plus 5 - User Manual... - Page 43 QUICK mode by AUTO QUICK function Measurement subject REF measurement KERATO measurement KERATO peripheral (PERI) data has already been acquired Target Mire ring Indicator of the alignment direction Alignment mark Reflected light from corneal Retinomax K-plus 5 - User Manual...
-
Page 44: C) Setting Conformation
Change CHILD mode setting OTHER Change other setting CLOCK Change time setting POWER OPTION Change power supply setting PATIENT No Set patient No. MESSAGE Input a message INITIAL Implement initialization VERSION Confirm the version Retinomax K-plus 5 - User Manual... - Page 45 Initialization following. See ”0 V - Setting Up the Instrument”. ■MEASURE AUTO3 TYPE − 12.0 mm/D 1.3375 INDEX STEP AUTO ■OUTPUT ■OUTPUT SETTING PRINT&USB OUTPUT PRINT ID USB FORMAT ■OUTPUT FORMAT PERI Retinomax K-plus 5 - User Manual...
- Page 46 R cyl MESSAGE ■CONT FORMAT OUTPUT DATA LAST5 R cyl MESSAGE Retinomax K-plus 5 - User Manual...
- Page 47 CHART BRIGHTNESS AUTO PARALLEL FOCUS ASSIST AUTO QUICK AUTO START ■CLOCK 120V area MDY DATE-FORM 230V area DMY 120V area AM/PM TIME-FORM 230V area 24H ■POWER OPTION 3MIN STAND-BY 3MIN SHUT-DOWN ■PATIENT No. 0001 Retinomax K-plus 5 - User Manual...
-
Page 48: D) Measuring The Model Eye
Also check for dirt as described in “0 VII.5 - Cleaning the Measurement Window ” and “0 VII.6 Cleaning Model Eye ”. If dirty, perform cleaning. If the values still do not fall within the above ranges, contact your local dealer. Retinomax K-plus 5 - User Manual... -
Page 49: Iv.2 - Preparation For Patient
・Back and forth:Position the measuring window approximately 50mm away from the eye. Hold the patient’s head gently to facilitate anteroposterior positioning. The positioning can be made still easier by bringing the forehead rest into contact with the patient's eyebrow. Retinomax K-plus 5 - User Manual... -
Page 50: C) Before The Measurement
V.1 - Measurement setup [MEASURE]. To select measurement subject, push on the operation panel. The symbol lights with green while the subject is selected. The operation of each measurement mode and subject is shown on the following table. Retinomax K-plus 5 - User Manual...
Need help?
Do you have a question about the Retinomax K-PLUS 5 and is the answer not in the manual?
Questions and answers
Retinomax will not charge when placed on the charger
The Visionix Retinomax K-PLUS 5 may not be charging on the charger due to the following reasons:
1. Incorrect Battery Pack – The device requires the RT-01XR battery pack. Using any other battery voids the warranty and may prevent charging.
2. Battery Already Fully Charged – If the battery does not need charging, the charge lamp will turn off.
3. Poor Contact with Charger – Ensure the main unit is properly placed on the charging station with correct alignment on the charging contacts.
4. Short-Circuited Battery Contacts – If the battery contacts touch metal objects, it could cause short-circuiting, preventing charging.
5. Damaged or Modified Battery Pack – Never disassemble or modify the battery pack, as this could affect its functionality.
6. Charger Not Powered On – The station’s power switch should be turned ON (“|” side) for charging to occur.
7. Faulty Charging Station or Battery Pack – If the charge lamp does not light up, the charger or battery pack may be defective.
Checking these factors can help identify and resolve the charging issue.
This answer is automatically generated