
Summary of Contents for AVMAT SHARK S4 PLUS
- Page 1 4-CH SDI&HDMI SHARK S4 PLUS VIDEO SWITCHER SHARK S4 PLUS PORTABLE 4-CH SDI&HDMI LIVE STREAM MULTI-FORMAT VIDEO SWITCHER...
- Page 2 4-CH SDI&HDMI SHARK S4 PLUS VIDEO SWITCHER USING THE UNIT SAFELY Before using this unit, please read below warning and precautions which provide important information concerning the proper operation of the unit. Besides, to assure that you have gained a good grasp of every feature of your new unit, read below manual.
-
Page 3: Table Of Contents
4-CH SDI&HDMI SHARK S4 PLUS VIDEO SWITCHER CONTENTS 1. BRIEF INTRODUCTION ..........................1 1.1. Overview ..............................1 1.2. Main Features .............................1 2. INTERFACES ..............................1 2.1. Interface Overview ............................. 2 2.2. Tally PIN Definition ............................ 2 3. SPECIFICATION ............................3 4. FRONT CONTROL PANEL ........................5 5. - Page 4 4-CH SDI&HDMI SHARK S4 PLUS VIDEO SWITCHER 11.2. Multiview Out ............................21 11.3. PGM Out ..............................22 11.4. Stream Port .............................22 11.5. Output Format Setting ...........................22 11.6. FTB ................................23 12. AUDIO SETTING ............................24 12.1. Master Audio ............................24 12.2. Audio On (MIX) ............................24 12.3.
-
Page 5: Brief Introduction
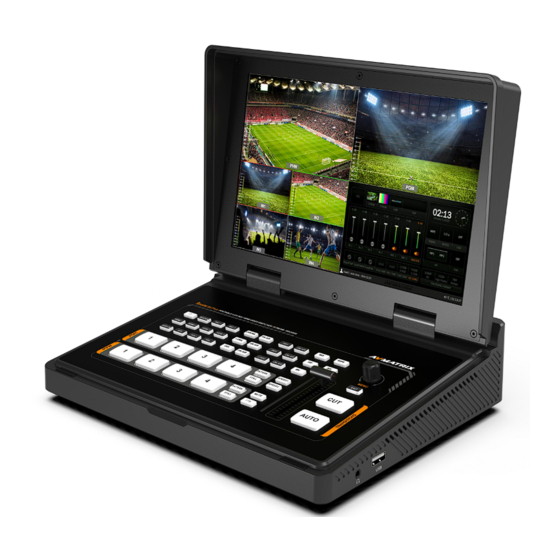
1. BRIEF INTRODUCTION 1.1. Overview SHARK S4 PLUS is a portable design 4-channel HDMI&SDI multi-format video switcher integrated with a full HD 10.1inch FHD LCD panel. It supports various functions including streaming, recording, video switching, audio mixing, PGM/ multiview/ Aux out, different transition effects, Luma Key Chroma Key, DSK, LOGO, PIP/ POP, media library etc. -
Page 6: Interfaces
4-CH SDI&HDMI SHARK S4 PLUS VIDEO SWITCHER 2. INTERFACES 2.1. Interface Overview MIC IN × 2 SDI IN × 2 HDMI IN × 2 PGM(AUX) OUT × 2 MULTIVIEW(AUX) OUT × 1 USB OUT × 1 (for live streaming on PC) -
Page 7: Specification
4-CH SDI&HDMI SHARK S4 PLUS VIDEO SWITCHER 3. SPECIFICATION CONNECTION Video In HDMI ×2, SDI ×2 HDMI PGM ×2 HDMI Multiview ×1 Video Out USB Capture: USB type-C ×1 Streaming: LAN ×1 Audio In MIC/ Line level (3.5mm stereo audio) ×2 PC Control Port LAN×1... - Page 8 4-CH SDI&HDMI SHARK S4 PLUS VIDEO SWITCHER 1080p 60/ 59.94/ 50/ 30/ 29.97/ 25/ 24/ 23.98 HDMI In Format 1080i 50/ 59.94/ 60 Support 720p 60/ 59.94 /50/ 30/ 25/ 24 576i 50, 576p 50, 480p 59.94/ 60, 480i 59.94/ 60 HDMI PGM Out 1080p 60/ 59.94/ 50/ 48/ 47.95/ 30/ 29.97/ 25/ 24/ 23.98;...
-
Page 9: Front Control Panel
4-CH SDI&HDMI SHARK S4 PLUS VIDEO SWITCHER 4. FRONT CONTROL PANEL Power Start the device Selecting the signal source for Program. PATTERN for setting a pattern to PGM, STILL for freezing the input source. PGM:1-4 Note: different patterns can be set including Black/Color Bar/Color1 /Color2/ In1/ In2/ In3/ In4/Image. -
Page 10: Power On/ Off
4-CH SDI&HDMI SHARK S4 PLUS VIDEO SWITCHER PIP1/PIP2: Enable two group of Picture in Picture. Size and position can be set via Menu. ON AIR: make the corresponding Chroma/Luma/PIP on air. MV: quickly switch between Multiview and the configured multiview out (Refers to Part 11.2) -
Page 11: Status Page
4-CH SDI&HDMI SHARK S4 PLUS VIDEO SWITCHER 6.1. Status Page In the status page, there are status information of FTB (Fade to Black), P-PVW (Pattern in PVW row), P-PGM (Pattern in PGM row), Logo, Still, Audio, Transition Effect, Transition Speed, USK (Upstream Key), DSK (Downstream Key),streaming time, recording time, USB disk / SD card status, encoding format and System Time. -
Page 12: Layouts
4-CH SDI&HDMI SHARK S4 PLUS VIDEO SWITCHER The information on the status page will be updated in real time as the settings are changed. It is clear and visible for the user to know the current situation and settings. Pressing the menu button on the switcher will switch the status page to the menu page. See below image. - Page 13 4-CH SDI&HDMI SHARK S4 PLUS VIDEO SWITCHER - Vertical Layout: - Web Page Layout Connect the video switcher to the PC through the LAN port (see Section 15.6), log in to the web control.The web page includes PVW (Preview), network speed, hardware status, streaming status, recording status, other runtime, input video,output mode, and system settings, encode settings, record and stream settings, etc.
-
Page 14: Audio Meter
4-CH SDI&HDMI SHARK S4 PLUS VIDEO SWITCHER 6.3. Audio Meter There are audio meters in each windows of Multiview, including IN 1-2 ,IN3-4, PGM and MIC to show the audio status of each audio. The audio meters of MIC 1 and MIC 2 show in the left and right of PVW window. -
Page 15: Input Information
4-CH SDI&HDMI SHARK S4 PLUS VIDEO SWITCHER 6.4. Input Information There is an Overlay in each window of the IN 1-4 that shows the resolution and frame rate of the SDI and HDMI input. The user can turn on or off the Overlay in each input window, and set the Overlay Opacity (50%, 75%, 100%), Size (Small, Medium, Large), and Position X and Y (1-100), as well as the Text Color and Background Color.See below image. -
Page 16: Pgm Pvw Switching
4-CH SDI&HDMI SHARK S4 PLUS VIDEO SWITCHER The UMD content for each SDI and HDMI input can be set from the on-screen menu. The user can use a virtual keyboard and rotary button to rename the UMD content for each window. The UMD content can be up to 10 characters long.Below image as an example, rename the IN1 to CAM1. -
Page 17: Still
4-CH SDI&HDMI SHARK S4 PLUS VIDEO SWITCHER 7.2. STILL The video switcher supports STILL function, which user can freeze the input sources. Press the channel you want to freeze in the PGM or PVW row, then press the STILL button to make the input source freeze. -
Page 18: Wipe
4-CH SDI&HDMI SHARK S4 PLUS VIDEO SWITCHER 8.1. WIPE Press the WIPE button to perform the wipe transition effect. User can choose different style of WIPE through menu; as well as set the softness of edge. Select the direction from Normal/ Invert/ Flip-Flop when use AUTO transition. -
Page 19: Upstream Key
4-CH SDI&HDMI SHARK S4 PLUS VIDEO SWITCHER 9. UPSTREAM KEY Upstream Key essentially means that these are keys that are included as part of the transition, so in the transition from whatever on Preview to Program, anything that's an Upstream Key is going to be transitioned with it. -
Page 20: Chroma Key
4-CH SDI&HDMI SHARK S4 PLUS VIDEO SWITCHER Menu Sub-menu Item Parameter Default Luma Status OFF/ KEY (PVW)/ ON AIR (PGM)/ KEY & ON AIR Black/ Color Bar/ Color 1/ Color 2/ IN 1/ IN 2/ IN 3/ Fill Source Color1... - Page 21 4-CH SDI&HDMI SHARK S4 PLUS VIDEO SWITCHER two images or video streams together based on color hues (chroma range). The technique has been used in many fields to remove a background from the subject of a photo or video, particularly the newscasting, motion picture, and video game industries.
-
Page 22: Pip & Pop
4-CH SDI&HDMI SHARK S4 PLUS VIDEO SWITCHER Mask Left 0%-100% Mask Top 0%-100% Mask Right 0%-100% Mask Bottom 0%-100% 9.3. PIP & POP The video switcher supports two groups PIP or one POP. When press PIP1 or PIP2 button, there will be a small image display on the top left corner of PVW window. -
Page 23: Downstream Key
4-CH SDI&HDMI SHARK S4 PLUS VIDEO SWITCHER Black/ Color Bar/ Color 1/ Color 2/ PIP2 Source IN 2 IN 1/ IN 2/ IN 3 /IN 4/ Image PIP2 Size 1/2 1/3 1/4 1/8 PIP2 Position X 0~100 PIP2 Position Y 0~100... -
Page 24: Logo
4-CH SDI&HDMI SHARK S4 PLUS VIDEO SWITCHER OFF/ KEY (PVW)/ ON AIR (PGM)/ KEY & DSK Status ON AIR Black/ Color Bar/ Color 1/ Color 2/ IN 1/ IN 2/ Fill Source Color 1 IN 3/ IN 4/ Image Black/ Color Bar/ Color 1/ Color 2/ IN 1/ IN 2/... -
Page 25: Output Setting
OUTPUT SETTING 11.1. Output Interfaces SHARK S4 PLUS has 3 HDMI output and 1 USB output. The three HDMI output are default as 1 Multiview out and 2 PGM out.All outputs also can be defined as an AUX OUT from IN1, IN2, IN3, IN4, PVW, PGM, Clean PGM, Color Bar and Multiview out. -
Page 26: Pgm Out
4-CH SDI&HDMI SHARK S4 PLUS VIDEO SWITCHER 11.3. PGM Out When one of outputs defined as PGM out, user can connect it to an external LCD display to monitor the PGM out video. The PGM out video is the program video including the overlay images from USK and DSK. -
Page 27: Ftb
4-CH SDI&HDMI SHARK S4 PLUS VIDEO SWITCHER The switcher supports up/ down scaling output. Besides, user can switch the Frame Rate Mode between Integer or Decimal. When the Frame Rate Mode is integer, there are 1080i50, 1080i60, 1080p24, 1080p25, 1080p30, 1080p48, 1080p50, 1080p60 options available. When the Frame Rate Mode is Decimal, there are 1080i50, 1080i59.94, 1080p23.98, 1080p25, 1080p29.97, 1080p47.95, 1080p50,... -
Page 28: Audio Setting
4-CH SDI&HDMI SHARK S4 PLUS VIDEO SWITCHER the menu to fade the PGM to black with mute. AUDIO SETTING All audio status show in the status page of Multiview, and in each Multiview window there is an audio meter for monitoring all the audio status. -
Page 29: Afv(Audio-Follow-Video)
4-CH SDI&HDMI SHARK S4 PLUS VIDEO SWITCHER 12.3. AFV(Audio-Follow-Video) Each channel of the 2HDMI & 2SDI embedded audios can be set to AFV (Audio-Follow-Video). When one HDMI audio is set to AFV mode, then the audio will be turned on only when the PGM switches to this channel video source. -
Page 30: Audio Keyboard Configuration
4-CH SDI&HDMI SHARK S4 PLUS VIDEO SWITCHER earphone from Master audio, 2SDI & 2HDMI embedded audios, and 2 MIC audios. User can turn on/off the earphone or adjust audio volume. 12.7. Audio Keyboard Configuration The audio not only can be configured by the menu but also can be configured by the keyboard control of the switcher. -
Page 31: Mute
4-CH SDI&HDMI SHARK S4 PLUS VIDEO SWITCHER 12.7.2. Audio Configuration Steps Step 1. Press one button from Part A to select the audio for configuration, the LED indicator of the button will keep flashing, which means it is available to make configuration. -
Page 32: Image Setting
4-CH SDI&HDMI SHARK S4 PLUS VIDEO SWITCHER 13.3. Image Setting The Image as one of sources for PVW Pattern and PGM Pattern. User can choose the Image source from Default Image, Local Image or Capture Image. The selected image is the last selection from Default image, Local Image, and Capture Image. -
Page 33: Stream & Record
4-CH SDI&HDMI SHARK S4 PLUS VIDEO SWITCHER 13.3.3. Capture Image The capture image comes from screenshot of IN1, IN2, IN3, IN4, Clean PGM, PGM. The captured image will be listed in the media list. Up to 16 captured images supported. User can press the rotary button to select the captured image as source for PVW/ PGM pattern by selecting the option Select. - Page 34 4-CH SDI&HDMI SHARK S4 PLUS VIDEO SWITCHER such as OBS, PotPlayer etc. The following is the USB acquisition method: Connecting the USB output to a PC with a type-C USB2.0 cable, users can use software like OBS, PotPlayer, VMix, etc. to play or store the captured USB Out video and audio on live streaming platforms like Zoom,Teams, Skype, etc.
- Page 35 4-CH SDI&HDMI SHARK S4 PLUS VIDEO SWITCHER Step2:Open the live streaming settings of the stream platform and get the Stream URL and streaming key of the live platform. Step3:Open the web page, select "Stream settings", copy the stream URL and streaming key into the URL, and click "√", click "Start Streaming"...
- Page 36 4-CH SDI&HDMI SHARK S4 PLUS VIDEO SWITCHER When the streaming status in the multiview turns green, and the streaming time on the menu status page start to count , it means the live streaming starts. When the streaming status in the multiview turns orange, this means the state of being connected.
- Page 37 4-CH SDI&HDMI SHARK S4 PLUS VIDEO SWITCHER Step 2: Cancel the local file setting, add "local address URL’’ in the "input", and then click “OK” to finish local streaming. How to play the RTSP Stream by the VLC Player: Step 1: Open the VLC Player, and click “Open Network” key in the Media.
-
Page 38: Recording
4-CH SDI&HDMI SHARK S4 PLUS VIDEO SWITCHER Step 3: Please enter the RTSP address (av0 means main stream; av1 means sub stream) 14.2. Recording The switcher has two recording methods, one is recording through USB disk and the other is recording through SD card. -
Page 39: System Setting
4-CH SDI&HDMI SHARK S4 PLUS VIDEO SWITCHER Overwrite At the same time, the switcher recording has an overwrite function that will automatically delete and overwrite the previously recorded content and re-record the new content when the SD card and USB disk memory is full, user can enable/disable the overwrite function in the menu and click “... -
Page 40: Time Setting
4-CH SDI&HDMI SHARK S4 PLUS VIDEO SWITCHER Check the switcher’s Software Version, FPGA Version, MCU Version, PCB Version. 15.5. Time Setting 15.5.1. Setting Time Manually User can set Year/ Month/ Day/ Hour/ Minute directly through the Menu. The time format can be set to 12h and 24h. -
Page 41: User Setting
4-CH SDI&HDMI SHARK S4 PLUS VIDEO SWITCHER 15.7. User Setting User can save all current settings into an account in the switcher. Adding a new user account, renaming the account, switching between accounts, deleting the account or even user can import or export the account to a USB flash disk.
Need help?
Do you have a question about the SHARK S4 PLUS and is the answer not in the manual?
Questions and answers