Advertisement
Quick Links
AIDA Imaging
1278 Center Court Dr
Covina, CA 91724
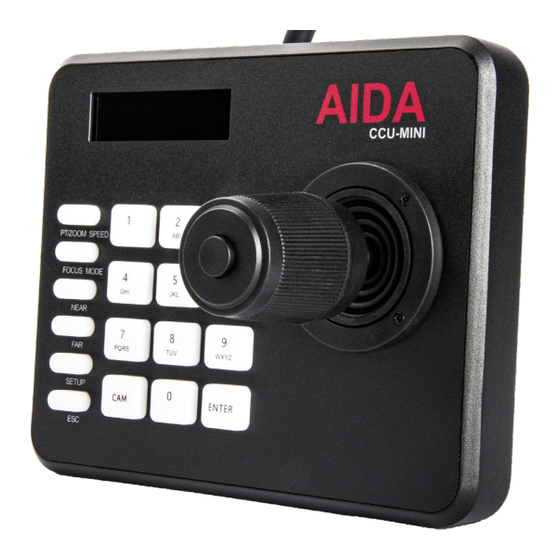
CCU-MINI
OPERATIONS MANUAL
VERSION 1.0 - DEC 2023
*Please note that the features listed below are representative of the
capabilities encompassed within our camera lineup and are not exclu-
sive to any single camera model.
www.aidaimaging.com
support@aidaimaging.com
1
support@aidaimaging.com
aidaimaging.com/support
@aidaimaging
Toll-Free (844) 631-8367
US (909) 333-7421
Advertisement

Summary of Contents for AIDA CCU-MINI
- Page 1 AIDA Imaging support@aidaimaging.com 1278 Center Court Dr aidaimaging.com/support Covina, CA 91724 @aidaimaging CCU-MINI OPERATIONS MANUAL VERSION 1.0 - DEC 2023 *Please note that the features listed below are representative of the capabilities encompassed within our camera lineup and are not exclu- sive to any single camera model.
-
Page 2: Table Of Contents
Table of Content SECTION 1 INTRODUCTION PAGE 03 ..........................................................SECTION 2 SAFETY & OPERATIONAL GUIDE PAGE 04 ............................................... SECTION 3 PACKAGE CONTENTS PAGE 06 ......................................................SECTION 4 QUICK START GUIDE PAGE 07 ................................................SECTION 5 SUPPORT & TROUBLESHOOTING PAGE 12 .............................................. -
Page 3: Introduction
The CCU-MINI mirrors the user-friendly experience of the CCU-IP, but in simplified form! Connect any IP-supported camera with ease - up to 7 cameras via VISCA serial protocol, or control IP cameras over a LAN. Our PTZ controller provides a streamlined and cost-effective solution for both personal and professional broadcast and Pro AV productions. -
Page 4: Safety & Operational Guide
Safety & Operational Guide CAUTION: RISK OF ELECTRIC SHOCK. DO NOT OPEN. CAUTION: TO REDUCE THE RISK OF ELECTRIC SHOCK, DO NOT REMOVE COVER (OR BACK) NO USER SERVICEABLE PARTS INSIDE. REFER SERVICING TO QUALIFIED SERVICE PERSONNE L. WARNING PRECAUTION This symbol indicate s that dangerou s This exclamation point symbol is intended to alert the user to the presen ce of important operatin g and... - Page 5 Safety & Operational Guide (cont.) PRECAUTION Please read this Operation Guide before installing and using the camera & retain this copy for your reference. 1. Always follow the instructions in the operations guide when applying power. Fire and equipment damage can occur if power is applied incorrectly.
-
Page 6: Package Contents
Package Contents 1 - CCU-MINI controller 1 - Power Adapter (12v) www.aidaimaging.com support@aidaimaging.com Toll-Free (844) 631-8367 US (909) 333-7421... -
Page 7: Quick Start Guide
STEP 2: Choose between the CCU-MINI’s RJ45 Ethernet port, or RS232/RS422 ports STEP 2a: For VISCA over IP, please plug in an Ethernet cable into the CCU-MINI, and directly connect it to your router or switch. The default IP address of the CCU-MINI is: 192.168.1.108. - Page 8 Quick Start Guide (RS422) www.aidaimaging.com support@aidaimaging.com Toll-Free (844) 631-8367 US (909) 333-7421...
- Page 9 Quick Start Guide (RS232/RS485) www.aidaimaging.com support@aidaimaging.com Toll-Free (844) 631-8367 US (909) 333-7421...
- Page 10 Controlling via VISCA over IP (Ethernet) STEP 3: To connect an IP camera, press the button SETUP found on the bottom left of the CCU-MINI. The default IP address of the CCU-MINI is: 192.168.1.108 To change the IP address, head to page 05/08 labeled IP MODE: STATIC You can change the status to DHCP by tilting the joystick left or right, and selecting ENTER to confirm your selection.
- Page 11 (RS232, RS422, RS485) STEP 4: To connect a Serial camera, press the SETUP and head to STEP 5: With the CCU-MINI, you can adjust point/tilt/zoom speed, menu page 03/08 - labeled Switch to Ana change & adjust the focus mode and set presets. To set a preset...
-
Page 12: Support & Troubleshooting
Regular Business Hours: Monday - Friday from 8 am - 5 pm, excluding major U.S. holidays and events Subscribe to our newsletter which keeps you up to date on the latest news, product launches, and firmware updates from AIDA Imaging at https://bit.ly/3pyyShp... -
Page 13: Warranty & Repair
Warranty & Repair AIDA Imaging stands behind the quality of its cameras and accessories, providing a comprehensive warranty for a period of two years from the date of purchase. This warranty ensures that the products are free from manufacturer defects in materials and workmanship under normal use conditions. To apply for warranty coverage, the original purchaser must present valid proof of purchase, such as a sales receipt or invoice, indicating the purchase date from an authorized AIDA dealer. - Page 14 Thank you for choosing our CCU-MINI. We are committed to providing you with a reliable and innovative prod- uct that meets all your broadcasting needs. We take pride in the quality and compliance of our products. The NDI3 POV camera is...
Need help?
Do you have a question about the CCU-MINI and is the answer not in the manual?
Questions and answers