Table of Contents
Advertisement
Quick Links
Advertisement
Table of Contents

Related Manuals for TWERD Power Electronics PS300


Summary of Contents for TWERD Power Electronics PS300
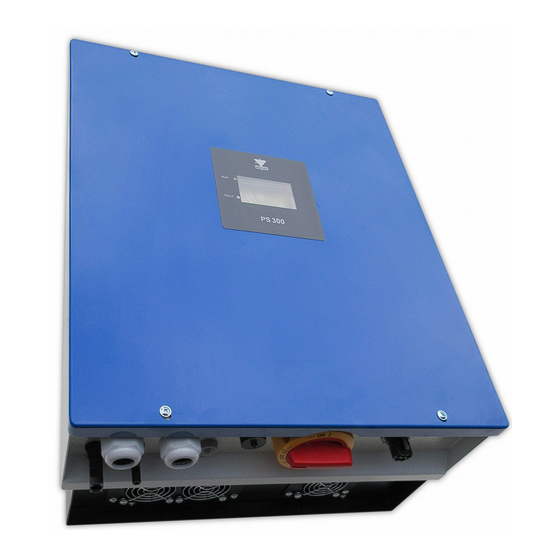
- Page 1 ® TWERD Renewable Energy Sources Renewable energy sources three-phase inverter PS300 type in variants: PS300-PV photovoltaic systems PS300-WT wind turbine systems PS300-H photovoltaic / wind turbine systems 3 kW, 5 kW, 8 kW, 10 kW, 20 kW, 30 kW On-Grid...
-
Page 3: Table Of Contents
Contents Contents 1. Device description............................5 2. Conditions of safe operation........................6 2.1. Warnings............................... 6 2.2. Basic rules............................6 2.3. Protection against electric shock......................7 2.4. Operation list after receiving the device....................7 2.5. Environmental conditions........................7 2.6. Recycle..............................7 3. - Page 4 GROUP 10 – Service parameters......................53 GROUP 99 – Service statistics......................54 13. Faults............................... 55 14. Ordering information..........................61 15. Warranty conditions..........................61 Appendix A: EU Declaration Of Conformity....................62 Appendix B: PN-EN-50549-1:2019-02 and NC RfG Certificate Of Conformity.........63 PS300 – User manual...
-
Page 5: Device Description
• against too high an inverter heat sink temperature. Limitation of Liability Despite all efforts and due diligence, TWERD Power Electronics Limited does not guarantee that the published data is free of errors. The information in this document is subject to change without notice. The latest version of this document is available on our website www.twerd.pl. -
Page 6: Conditions Of Safe Operation
2.2. Basic rules • The PS300-WT inverter should not be connected to cooperate with the synchronous generator without load resistors, as this may cause the turbine to run out, and consequently damages for which the manufacturer is not responsible. -
Page 7: Protection Against Electric Shock
2.6. Recycle Equipment containing electrical and electronic components may not be disposed of in municipal waste containers. Separate such equipment from other waste and attach it to electrical and electronic waste in accordance with applicable local regulations. PS300 – User manual... -
Page 8: Specification
Chapter 3. Specification 3. Specification 3.1. Technical data Table 3.1. PS300 inverter technical data Nominal power Description Symbol 3 kW 5 kW 8 kW 10 kW 20 kW 30 kW WT input (alternating voltage): synchronous generator with permanent magnets PS300-WT and PS300-H inverters 1.1 Working voltage range from the AC... - Page 9 Inverters 3 kW – 10 kW: 30 A, AC1 operation of braking resistors Inverters 20 kW and 30 kW: use an external PS300-WT and PS300-H inverters contactor, the K4 relay is dedicated to control the operation of this contactor 16 Protections - Before the generator run-up.
-
Page 10: Mechanical Dimensions And Weight - 3Kw, 5 Kw, 8 Kw, 10Kw Inverters
Chapter 3. Specification 3.2. Mechanical dimensions and weight – 3kW, 5 kW, 8 kW, 10kW inverters Mounting Frame Fig.3.1. Mechanical dimensions of the 3kW-10kW inverters Weight of the inverter with mounting frame: 33 kg. PS300 – User manual... -
Page 11: Mechanical Dimensions And Weight - 20 Kw And 30 Kw Inverters
Chapter 3. Specification 3.3. Mechanical dimensions and weight – 20 kW and 30 kW inverters Mounting Frame Ramka montażowa ps300-31-en Fig.3.2. Mechanical dimensions of the 20kW and 30kW inverters Weight of the inverter with mounting frame: 58 kg. PS300 – User manual... -
Page 12: View From The Connectors Side - 3Kw, 5 Kw, 8 Kw, 10 Kw Inverters
Electrical grid 3 x 400V, 50Hz PV SWITCH ps300-33-en Fig. 3.4. View from the connectors side – 20 kW, 30 kW inverters. Note: PV connectors and a PV switch only exist in the PS300-PV and PS300-H inverters PS300 – User manual... -
Page 13: Preparing For Installation
4.2. Environmental condition The PS300 inverter should work in dry rooms with little dust. Ambient temperature should not exceed C and relative humidity 85% according to tab. 2.1 on page 7. 4.3. Cooling In order to ensure the required air circulation, the inverter should be mounted so as to keep a free space of at least 20 cm from the top and bottom and 10 cm from both sides. -
Page 14: Power Line Connector - 3 Kw, 5 Kw, 8 Kw, 10 Kw Inverters
Fig.4.1. View of the mains connector Pictures 4.3 - 4.5 below show the subsequent stages of connector preparation. Picture 6.2 shows how to disconnect the connector. Connecting the electrical network cable ps300-26.3 Fig.4.2. Connector preparation PS300 – User manual... - Page 15 Chapter 4. Preparing for installation Tightening torque typ. 4+1 Nm ps100-27-1en Fig. 4.3. Closing the connector ps100-28-1 Fig. 4.4. Connecting the connector to the inverter PS300 – User manual...
- Page 16 Chapter 4. Preparing for installation Note: If you need to disconnect the connector, remember to latch - 1. in Fig. 4.4 ps100-29-1 Fig. 4.5. Unlocking and separating the connector PS300 – User manual...
-
Page 17: Power Line Connector - 20 Kw And 30 Kw Inverters
During preparing the connector, pay attention to correct assembly– Fig. 4.7. Fig. 4.7. Assembly of the connector Wieland RST50I5S B1 ZR7 S SW Full assembly instructions for the RST50I5S B1 ZR7 S SW connector are available on the Wieland website. PS300 – User manual... - Page 18 If the connection is made via the Wieland RST50I5S B1 ZR7 S SW connector, the Wieland RST50I5S S1 ZM02V SW socket, product number 97.052.5553.1, is installed in the inverter. Fig. 4.8. View of the Wieland RST50I5S S1 ZM02V SW connector PS300 – User manual...
-
Page 19: Installation Position
2. Hang the inverter on the mounting frame and secure it with two screws and optionally with a padlock. ATTENTION: The assembly should be performed by at least two people with appropriate protection measures. ps300-13-2-en Fig. 4.9. Wall mounting of PS300 3kW-10kW inverters PS300 – User manual... - Page 20 ATTENTION: Due to the high weight of the inverter, its assembly should be carried out by at least two people (recommended three) with appropriate protection measures. ps300-32-en Fig. 4.10. Wall mounting of PS300 20 kW and 30 kW inverters PS300 – User manual...
-
Page 21: Power Circuit Terminals
For this reason, the replacement of fuse can only be done by the manufacturer's service. 4.8. Usage of residual current devices Due to the built-in RFI filter, the residual current must be at least 200 mA. PS300 – User manual... -
Page 22: On-Grid Installation
WT input (AC voltage input): permanent magnet synchronous generator input – used for PS300-WT and PS300-H inverters; • PV1, PV2 inputs (DC voltage inputs): photovoltaic panels input – used for PS300-PV and PS300-H inverters. Installation operations must be carried out in accordance with chapter 5.1, 5.3, 5.4. After their execution, the inverter will be ready for autonomous operation without user intervention. -
Page 23: Wind Turbine Wt Inverter With Ac Input - 3 Kw, 5 Kw, 8 Kw, 10 Kw
Electrical grid ps300-02.3-en load resistors 3 x 400V, 50 Hz Fig. 5.1. Schematic diagram of power circuit connection of PS300-WT: 3 kW, 5 kW, 8 kW, 10 kW The order of installation operations: 1. Switch On the Emergency STOP. 2. Unscrew the inverter cover by 4 screws. -
Page 24: Wind Turbine Wt Inverter With Ac Input: 20 Kw And 30 Kw
3 x 400V, 50 Hz Generator’s dump ps300-27-en load resistors Fig. 5.2. Schematic diagram of power circuit connection of PS300-WT: 20 kW i 30 kW The order of installation operations: 1. Switch On the Emergency STOP. 2. Unscrew the inverter cover. -
Page 25: Photovoltaic Panels Pv Inverter With Dc Inputs: 3Kw, 5 Kw, 8 Kw, 10 Kw, 20 Kw, 30 Kw
Electrical grid 3 x 400V, 50 Hz ps300-03.3-en Fig. 5.3. Schematic diagram of PS300-PV (3 kW – 30 kW) power circuit connection The order of installation operations: 1. Switch OFF the PV switch. 2. Be sure that there is no dangerous voltage on wires(!) and then connect to L1, L2, L3, N, PE terminal strip the electrical line. -
Page 26: Hybrid Inverter: 3 Kw, 5 Kw, 8 Kw, 10 Kw
3 x 400V, 50 Hz Fig. 5.4. Schematic diagram of PS300-H (3 kW, 5 kW, 8 kW, 10 kW) power circuit connection The order of installation operations: 1. Switch On the Emergency STOP. 2. Switch OFF the PV switch. -
Page 27: Hybrid Inverter: 20 Kw, 30 Kw
230Vac, 2A dump load ps300-28.1-en resistors Fig. 5.5. Schematic diagram of PS300-H 20 kW and 30 kW power circuit connection The order of installation operations: Switch On the Emergency STOP. Switch OFF the PV switch. Unscrew the inverter cover. -
Page 28: Built-In Control Panel
Type of light Description LEDs off, the display shows basic Too low inverter input power, inverter in None information energy saving mode Flashing light Inverter is ready to work Green Continuous light Inverter is working Continuous light Fault PS300 – User manual... -
Page 29: Information Displayed On The Operator Panel Without Removing The Inverter Cover
• Present output power. • Present output current. • Temperature of inverter. • Velocity of wind. Energy 333 kWh Pow out Curr out 0.0 A Temp. 25 C Wind V 0.0 m/s Fig. 6.6. Screen 5 PS300 – User manual... -
Page 30: Operating The Control Panel Using Buttons
Service and enter the code: 123321. • Energy menu ◦ "Total" - total energy generated since the inverter was connected to the grid ◦ "Now" - instantaneous power generated Total 333 kWh Fig. 6.9. „Energy” menu PS300 – User manual... - Page 31 Summer time 2019:10:13 Ntp update h 07:54:02 Set clock Ntp server Ntp force Fig. 6.13. Setting time and date Fig. 6.12. CLOCK Menu NTP adres 1 pool.ntp.org NTP adres 2 pool.ntp.org Fig. 6.14. Ntp server address PS300 – User manual...
-
Page 32: Updating The Control Panel Software
Connect the USB micro cable to the J2 USB micro connector. Connect the other end of the cable to your computer. Supply the inverter from the 230V 50 Hz network via terminals L, N, PE MIKRO USB Fig. 6.18. View of the Control Panel prepared for software update PS300 – User manual... - Page 33 5. Select the "Start updating application" button - the new software upload process will start. 6. The software update process takes about 3 minutes. After it finishes, it will restart. Note: If the program stops responding, close the program and restart it. Fig. 6.20. View of the PS100 program window PS300 – User manual...
-
Page 34: The First Run
7.1. Maximum Power Point Tracking (MPPT) and Global Maximum Power Point Tracking (GMPPT) PS300-PV and PS300-H inverters with PV input (DC voltage input) are using Maximum Power Point Tracking (MPPT) algorithm. This algorithm constantly analyzes the voltage-current characteristic of a PV panels and adjusting the load current in such a way as to obtain the greatest possible power from the system - Fig. -
Page 35: Point Load Characteristic Of A Synchronous Generator
Deep sleep state: the inverter's intermediary circuit is disconnected from the mains, it may take about 1 ÷ 2 min to start working. In this mode, energy consumption is less than in the sleep mode. PS300 – User manual... -
Page 36: Dump Load Resistors
The inverter generates reactive power by changing the value of the power factor cosφ. The size of the power factor is determined by changing the setting of parameter 12.38, whereby a positive value means over- excitation (reactive power generation), while a negative under-excitation (reactive power consumption). PS300 – User manual... -
Page 37: Mode Q(U)
Q (U), the active power generation limitation is inactive. Qmax= +48% QuV2 12.40 QuV1 12.42 12.43 12.45 U/Un 12.39 12.41 QoV1 12.44 QoV2 12.46 Qmin= -48% ps300-21-1 Fig. 8.1. Control curve Q(U) PS300 – User manual... -
Page 38: Mode Cosφ(P)
Parameter name Description 12.50 P1 power value 12.51 cosfi(P1) Setting cosφ for power P1 12.52 P2 power value 12.53 cosfi(P2) Setting cosφ for power P2 12.54 P3 power value 12.55 cosfi(P3) Setting cosφ for power P3 PS300 – User manual... -
Page 39: Reactive Power Compensation Mode
PS Energy Guard measuring device. PS Energy Guard calculates the current reactive power consumption in the user's installation and sends this information to the PS300 inverter, which on this basis generates the required reactive power value locally. -
Page 40: Digital Inputs And Outputs
50mA. Fig. 9.1 shows the view of the terminal blocks on the PS300 inverter series. To view the status of digital inputs and outputs enter the I/O PREVIEW in the MAIN MENU of the inverter. -
Page 41: Generator Load Control
Chapter 9. Digital inputs and outputs 9.1. Generator load control The PS300 inverter, in addition to the turbine run-out protection, is adapted to regulate the frequency of the generator (and thus the power generated) by switching ON the dump load resistors. -
Page 42: Anemometer
When the switch is close; inverter stops, K3 contactor switching off, output relays switching off and if the inverter is for the wind turbine, dump load is switching on. PS300-WT PS300-PV PS300-H 1 2 3 4 5 6 7 ps300-25.1 Fig. 9.5. Remote stop of the inverter PS300 – User manual... -
Page 43: Communication Parameters Setting
Chapter 10. Communication parameters setting 10. Communication parameters setting The PS300 inverter is equipped with the RS-485 communication interface and the Ethernet port. This allows the inverter to be controlled by a computer or an external controller. Basic features and the possibilities are: RS-485: •... -
Page 44: Connecting The Inverter To The Internet
Data available on the charts are recorded at 15-minute intervals. Due to the necessity of querying the inverter's IP address, it is recommended to set a static IP address (see chapter 10.1 Connecting the inverter to the Internet page 44). PS300 – User manual... -
Page 45: Inverter Monitoring System Via "Www.inverters.pl
2 - Enter the hash admin numbers. 3 - For register click to “Zarejestruj” Note: Serial number and hash admin numbers will be attached on the user manual. After whole processes users are able to monitoring their devices via www.inverters.pl web site. PS300 – User manual... - Page 46 Chapter 11. Inverter Monitoring System via “www.inverters.pl” PS300 – User manual...
-
Page 47: Account Settings
2 - In this menu users replace name of inverter. To change the name of inverter user should choose related inverter and insert the box new name than click to save button “zmien zaznaczone”. 3 - Nazwy grup - users can see and manage created inverter groups. PS300 – User manual... - Page 48 1-Here(usuwanie grup) users could delete group. 2-Here(lokalizacja) users could change the localization details of inverters. To change the localization of inverter user should choose related inverter and insert the box new localization than click to save button “zmien zaznaczone”. PS300 – User manual...
-
Page 49: Configuration Of Parameters
Service parameter 00.28 Input 3 curr [A] Service parameter 00.30 Turbine freq [Hz] Turbine generator frequency 00.31 Wind speed [m/s] Wind speed 00.32 Resistance [kΩ] Insulation resistance The sign "-" means energy consumption from the electricity grid. PS300 – User manual... - Page 50 00.80 Eth. IP 1 IP address 00.81 Eth. IP 2 IP address 00.82 Eth. IP 3 IP address 00.83 Eth. IP 4 IP address 00.84 Eth. MASK 1 Subnet mask 00.85 Eth. MASK 2 Subnet mask PS300 – User manual...
-
Page 51: Inverter Configuration Parameters
GROUP 2 – Input 1: PV1 Parameter Access Name Description level 02.01 Uin autostop [V] Voltage at which Input 1 boost switches Off 02.09 DC curr limit [A] Input current limit PS300 – User manual... -
Page 52: Group 4 - Input 3
Umin battery [V] Minimal battery voltage 05.08 Tmax battery [°C] Maximum battery temperature 05.09 Block run Module charger operation lock 0 → charger module is working 1 → charger module is not working 05.10 Nominal battery voltage PS300 – User manual... -
Page 53: Group 10 - Service Parameters
Phase determination when using Energy guard 10.48 High wind speed Wind speed that turns On the storm protection 10.49 High wind timer Time duration of storm protection 10.50 Language Language selection 10.51 Contrast 10.52 Remote par. edit PS300 – User manual... -
Page 54: Group 99 - Service Statistics
10.53 Remote login 10.54 Min ground res. Permits to carry out an insulation resistance test GROUP 99 – Service statistics Parameter Access Name Description level 99.00 Service stats Service parameter 99.01 Service stats Service parameter PS300 – User manual... -
Page 55: Faults
Iterator reading error Memory corruption Earthing Leakage current is too high. 1. Check if the inverter is connected correctly. Earthing Sudden change the value of 2. Check the value of the insulation the leakage current. resistance. PS300 – User manual... - Page 56 The amplitude of the input 1. Check the input current measurement and input 2 current at input 2 has the voltage measurement in the DC-link exceeded the limit. circuit. 2. Check the reference voltage in the DC-link circuit. PS300 – User manual...
- Page 57 High electric grid The electric grid frequency is 1. Check the electrical grid frequency. frequency – work too high or inverter 2. In case of frequent failures contact the state measurement module is service. damaged PS300 – User manual...
- Page 58 PARTIAL_CRC_ER 2. Check the correctness of the Wi-Fi module settings. 3. Check if the Ethernet cable is connected ETHERNET_REST properly. 4. Contact the service. ETHERNET_PHY_ RESTART RTC_CLOCK_BRO ETHERNET_DMA_ STUCK PLOT_OK PLOT_REPEAT PLOT_ERROR_EL PLOT_ERROR PLOT_NO_DATA PLOT_SN_ERROR PS300 – User manual...
- Page 59 - U In case of repeated failure please contact the phase service. High mains voltage High RMS grid voltage with 10 minutes an average of 10 minutes phase V during inverter operation - V phase PS300 – User manual...
- Page 60 Note: The inverter monitors the electrical grid for 60 seconds before starting work. After a failure with incorrect electrical parameters in the grid (fault 91 ÷ 94) or failure of the grid current controller (fault 95), the inverter also monitors the electrical grid for 60 seconds before restarting. PS300 – User manual...
-
Page 61: Ordering Information
PV – photovoltaic WT – permanent magnet generator: one AC input H – hybrid 2. Built-in battery charger module: PS300 inverter does not have an implementation with a charger module. 3. Power of the inverter: 3 kW 5 kW 8 kW... -
Page 62: Appendix A: Eu Declaration Of Conformity
Appendix A: EU Declaration Of Conformity Appendix A: EU Declaration Of Conformity... -
Page 63: Appendix B: Pn-En-50549-1:2019-02 And Nc Rfg Certificate Of Conformity
Appendix B: PN-EN-50549-1:2019-02 and NC RfG Certificate Of Conformity Appendix B: PN-EN-50549-1:2019-02 and NC RfG Certificate Of Conformity PS300 – User manual... - Page 66 Zakład Energoelektroniki TWERD Sp. z o.o. ul. Aleksandrowska 28-30 87-100 Toruń, Poland tel: +48 56 654 60 91 e-mail: twerd@twerd.pl www.twerd.pl Design - Production - Service...
Need help?
Do you have a question about the PS300 and is the answer not in the manual?
Questions and answers