Advertisement
Quick Links
Advertisement

Related Manuals for OUTR KAMADO XL 60


Summary of Contents for OUTR KAMADO XL 60
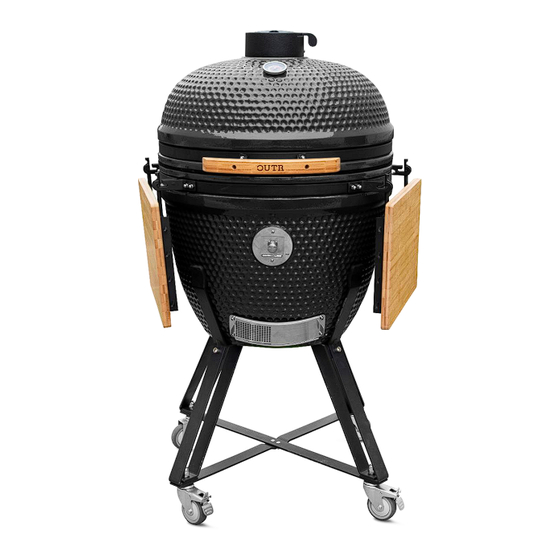
- Page 1 KAMADO XL 60 ASSEMBLE AND OPERATION MANUAL...
-
Page 2: Warnings - Caution
• ALWAYS keep children and pets at a safe distance from the oven when in use. • ALWAYS check the unit for wear and damage before use and repair where necessary. OUTDOOR CAMPUS | KORTRIJKSESTEENWEG 1266 | 9051 GENT | BELGIUM | info@outr.be... - Page 3 • When cleaning the outside, wait for the Kamado to cool down completely and use a damp cloth with a mild detergent. Maintance • Check regularly that the screws of rings and support are tight. • Oil the hinges twice a year. OUTDOOR CAMPUS | KORTRIJKSESTEENWEG 1266 | 9051 GENT | BELGIUM | info@outr.be...
- Page 4 • Check the temperature until the desired temperature is reached. See page 5 • Close the upper air control for 1/2 and check the temperature for another few minutes. • You can now bake on the Kamado! OUTDOOR CAMPUS | KORTRIJKSESTEENWEG 1266 | 9051 GENT | BELGIUM | info@outr.be...
- Page 5 (e.g. when roasting a large piece of meat or slow smoking), you may need to add more charcoal. Add this charcoal and proceed as indicated above. Temperature instructions OUTDOOR CAMPUS | KORTRIJKSESTEENWEG 1266 | 9051 GENT | BELGIUM | info@outr.be...
- Page 6 WARNING: DO NOT overtighten bolts; tighten under medium pressure so as not to damage bolts or parts of the Kamado grill. OUTDOOR CAMPUS | KORTRIJKSESTEENWEG 1266 | 9051 GENT | BELGIUM | info@outr.be...
- Page 7 2 upright brackets. Install flat washer H with cap nut I, repeat for the other caster wheels and tighten securely. OUTDOOR CAMPUS | KORTRIJKSESTEENWEG 1266 | 9051 GENT | BELGIUM | info@outr.be...
- Page 8 Position the Kamado so that the ventilation hatch between the 2 uprights is accessible. Push the Kamado gently downwards so that it can sit in the nest. OUTDOOR CAMPUS | KORTRIJKSESTEENWEG 1266 | 9051 GENT | BELGIUM | info@outr.be...
- Page 9 Kamado Grill as shown above. STEP 9 – Push down the handles of the castors to lock the wheels so that the Kamado cannot move when in use. OUTDOOR CAMPUS | KORTRIJKSESTEENWEG 1266 | 9051 GENT | BELGIUM | info@outr.be...
- Page 10 STEP 13 – Attach the 2 table brackets (19) to the Kamado Grill (12) using the pre-mounted bolts and cap nuts for each bracket. Place them in the position shown above. OUTDOOR CAMPUS | KORTRIJKSESTEENWEG 1266 | 9051 GENT | BELGIUM | info@outr.be...
-
Page 11: Warranty Conditions
• The warranty period starts from the date of purchase, with the receipt serving as proof. • The gasket must be replaced annually to ensure a good seal and to prevent the two ceramic parts from touching each other. OUTDOOR CAMPUS | KORTRIJKSESTEENWEG 1266 | 9051 GENT | BELGIUM | info@outr.be... - Page 12 OUTR KORTRIJKSESTEENWEG 1266 9051 GENT BELGIUM info@outr.be OUTDOOR CAMPUS | KORTRIJKSESTEENWEG 1266 | 9051 GENT | BELGIUM | info@outr.be...
Need help?
Do you have a question about the KAMADO XL 60 and is the answer not in the manual?
Questions and answers