Table of Contents
Advertisement
Quick Links
Advertisement
Table of Contents

Related Manuals for AVYCON AVC NSZ81X04SPL

Summary of Contents for AVYCON AVC NSZ81X04SPL
- Page 1 NSZ81X04SPL QUICK START GUIDE CAMERA INSTALLATION...
-
Page 2: Ceiling Mount
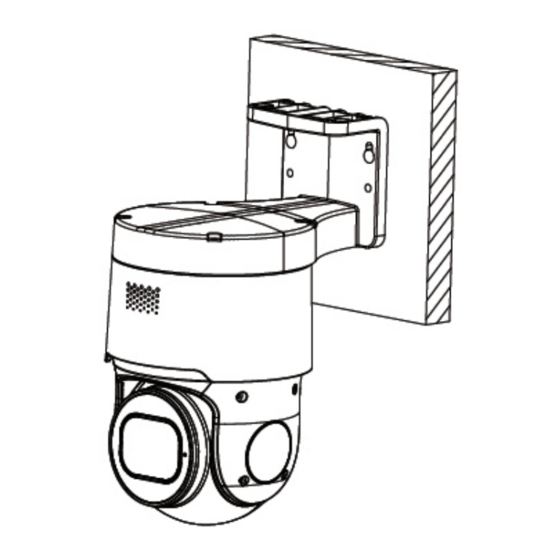
1. Installation Wall Mount Step 1: Stick the mounting template to the wall, drill 4 screw holes and 1 tail cable hole. Step 3: Align the camera bracket with the 4 swelling colloidal particles screw holes, and lock the screws to fix it. Ceiling Mount Step 1: Stick the mounting template to the wall, drill 4 screw holes and 1 tail cable hole. -
Page 3: Installation Method
Installation Method Step 2: Hammer the 4 anchor into the drilled wall holes. Step 3: Align the camera bracket with the 4 swelling colloidal particles screw holes, and lock the screws to fix it. -
Page 4: Camera Connection Diagram
2. Camera Connection Diagram 3. Install the App There are two methods to install the App. • Search for “AVY Mobile One” in App Store or Google Play. • Scan the QR code below to download the App. Attention:There are two connection modes: 1. -
Page 5: Camera Settings
4. Camera Settings If add the device successfully, you will see the following interface. Open “AVY Mobile One”, you will see the following interface to add the cameras. Please refer to “Help” section for more detailed instruction. - Page 6 3. Open the Internet Explorer and input the device’s IP address; Input the username & password in the following interface to log in to the device. 1. Log in to the website www.al8.co and click “Device Search for Windows” to download “AVYCON Device Tool”, it will help to search all the available devices on your local network.
- Page 7 6. MAC OS 1. Open your router web interface and log in. 2. Find the “Attached device” or “Connected device” menu. Find the device’s IP address according to its MAC address. The Mac address is labeled on the device. 3. Input the device’s IP address in Safari, log in with your username & password. 4.
- Page 8 Copyright @ AVYCON. All rights reserved. Specifications and pricing are subject to change without notice. phone: 949-752-7606 email: info@avycon.com social: @avycon_aivo website: avycon.com...
Need help?
Do you have a question about the AVC NSZ81X04SPL and is the answer not in the manual?
Questions and answers