Advertisement
Available languages
Available languages
Quick Links
®
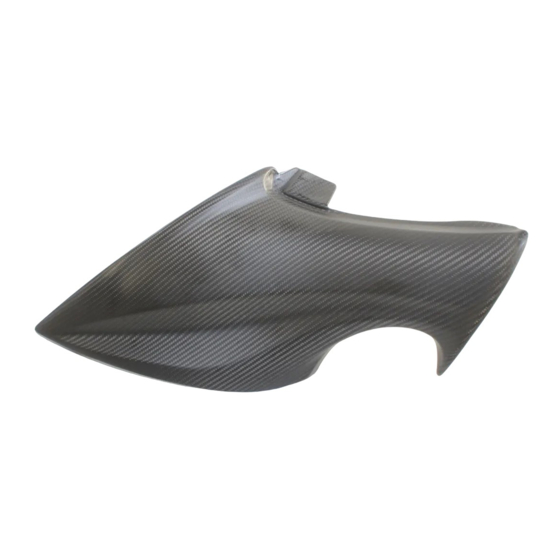
Carbon frame cover set - matt finish
Description:
Applications:
GSX-S1000/F AL6
Ref. Description
Part List
Carbon frame cover LH (990D0-04KFC-00L)
1
Carbon frame cover RH (990D0-04KFC-00R)
2
Protection sticker
3
Mounting Instructions
4
Ref. Description
Tools Required
1
Allan key (5mm)
!
WARNING /
!
CAUTION / NOTICE / NOTE.
Important
Please read this manual and follow its instructions carefully. To emphasize special
information, the symbol
have special meanings. Pay particular attention to messages highlighted by these
signal words:
Indicates a potential hazard that could result in death or serious injury.
Indicates a potential hazard that could result in minor or moderate injury.
Indicates a potential hazard that could result in vehicle or equipment damage.
NOTE: indicates special information to make maintenance easier or instructions
clearer.
1
SUZUKI Deutschland GmbH, Suzuki-Allee 7, D-64625 Bensheim
MOUNTING INSTRUCTIONS
990D0-04KFC-CRB
Part Number:
Mounting Time:
Qty.
1
1
2
1
!
and the words WARNING, CAUTION, NOTICE and NOTE
WARNING
!
!
CAUTION
NOTICE
Precautions for
Installation
20 Min
1
2
3
4
Tightening
Torque
1
Mounting
1. Remove passenger and driver seat according to owner's manual (Fig 1).
2. Remove original frame cover by pulling velcro tape (F), pin (B) and pin (C) from positioning brackets, then
slide the frame cover backwards (Fig 2).
3. Remove plastic pin (C) from bracket on original plastic frame cover and place into carbon frame cover
bracket (Fig 3).
4. Clean surface and apply protective sticker 3 around bracket on fuel tank to prevent scratching it while
mounting (Fig 4).
5. Assemble the carbon frame cover 1 in reverse sequence (Fig 5). Please make sure that front hook (D),
tank bracket (E) and pins (B) and (C) (Fig 3) are mounted correctly.
6. Press carbon frame cover 1 to fix velcro tape (F).
7. Replace opposite frame cover 2 using same procedure.
8. Install driver and passenger seat according to owner's manual (Fig 6).
Care and
Maintenance
Inspection
1. Check that the kit includes all the parts listed on the first page.
2. Check each part in the kit for scratches or any form of damage.
3. Park the vehicle on level ground.
4. Remove the ignition key from the switch and store it in a safe place.
5. Protect any items removed or to be installed from scratches by placing them on a
soft cloth first before putting them on the ground.
6. Use care not to cause any damage to the body of the vehicle during installation
of the accessory.
!
CAUTION
If you do not feel technical qualified to install this product on your own,
please consult with your nearest SUZUKI dealer.
Tighten bolts to the torque indicated in the right
table as standard value unless otherwise explicitly
specified. The value shows conventional or "4"
marked bolt tightening torque. For other bolts not
listed in the table, please refer to owner's manual.
NOTE: Read these instructions carefully before assembly and examine
whether all parts are enclosed in accordance with the parts list.
To clean, rinse carbon part with water to remove grit and soften dirt. Use a mild non -
abrasive liquid soap, plenty of warm water, and a clean flannel cloth or soft chamois.
Rinse well to remove all soap residue. Pat dry, do not wipe.
Due to mounted SUZUKI Genuine Accessories the service and maintenance flat rate
might be affected. Dismounting/Mounting of SUZUKI Genuine Accessories is
possibly necessary for service and maintenance.
!
CAUTION
In case of fall, check all screws and parts. Check also the tightness.
If necessary replace screws or damaged parts.
The holder of the vehicle should always be in possession of the mounting instruction.
SUZUKI GENUINE ACCESSORIES
Diameter
Tightening Torque
(mm)
N·m
kgf-m
lbf-ft
5
3.0
0.3
2.2
6
5.5
0.55
4.0
8
13.0
1.3
9.5
10
29.0
2.9
21.0
12/2015 ENG
Advertisement

Related Manuals for Suzuki 990D0-04KFC-CRB


Summary of Contents for Suzuki 990D0-04KFC-CRB
- Page 1 Rinse well to remove all soap residue. Pat dry, do not wipe. signal words: WARNING Due to mounted SUZUKI Genuine Accessories the service and maintenance flat rate Inspection Indicates a potential hazard that could result in death or serious injury. might be affected. Dismounting/Mounting of SUZUKI Genuine Accessories is possibly necessary for service and maintenance.
- Page 2 Weist auf eine mögliche Gefahr hin, die leichte bis mittelschwere Verletzungen SUZUKI Original Zubehör möglicherweise beeinflusst werden. Eventuell ist die verursachen kann. Demontage / Montage des SUZUKI Original Zubehörs für Service- und Wartungsarbeiten notwendig. HINWEIS Weist auf eine mögliche Gefahr hin, die zu Fahrzeug- und Ausrüstungsschäden VORSICHT ...
- Page 3 Indique un danger potentiel pouvant résulter en blessures graves ou mortelles. Les temps de référence pour les travaux d'entretien et de maintenance peuvent, le Inspection cas échéant, être influencés par le montage d'accessoires SUZUKI d'origine. Il peut ATTENTION être nécessaire de démonter /monter les accessoires SUZUKI d'origine pour les ...
-
Page 4: Istruzioni Di Montaggio
Usare un panno asciutto, non strofinare. ATTENZIONE Indica un pericolo che può portare alla morte o ferimenti gravi. Il montaggio di accessori originali SUZUKI può influire sui tempi standard degli Ispezione interventi di manutenzione. Per effettuare interventi di manutenzione, può essere AVVERTENZA ... - Page 5 Inspección por el montaje de accesorios originales SUZUKI. Puede resultar necesario el ATENCIÓN montaje o desmontaje de accesorios originales SUZUKI para trabajos de servicio y Indica un posible peligro que podría causar lesiones menores o moderadas. mantenimiento. AVISO ...
- Page 6 ® Part Number: 990D0-04KFC-CRB Fig 1. Fig 2. Fig 3. Fig 4. Fig 5. Fig 6. SUZUKI GENUINE ACCESSORIES SUZUKI Deutschland GmbH, Suzuki-Allee 7, D-64625 Bensheim 12/2015 DRW...
Need help?
Do you have a question about the 990D0-04KFC-CRB and is the answer not in the manual?
Questions and answers