Table of Contents
Advertisement
Quick Links
Advertisement
Table of Contents

Related Manuals for CardioTech GT-900


Summary of Contents for CardioTech GT-900
- Page 1 QUICK START GUIDE GT-900 Vital Signs Monitor...
- Page 2 GT-900 VITAL SIGNS MONITOR Contact Us: info@cardiacdirect.com 888-354-2968...
-
Page 3: Table Of Contents
Contents Basic Setup Powering on the CardioTech GT-900 Before taking an SpO2 Measurement Before taking an NIBP Measurement Configurations Tympanic Temperature Module Setup Taking a Temperature Reading (Tympanic Temp) Oral Temperature Module Setup Taking a Temperature (Oral Temp) How to Set Up Automatic Blood Pressure Readings How to Set up Trigger Printing How to Fix “Loose Cuff Error”... -
Page 4: Powering On The Cardiotech Gt-900
Basic Setup Powering on the CardioTech GT-900 Place the CardioTech GT-900 on its back (screen side up) to reveal the underside of the machine. Lift and remove the bottom of the battery compartment cover. (Figure A) Place battery in the compartment. Ensure the barcode information is facing right before inserting. -
Page 5: Before Taking An Spo2 Measurement
• GREEN Light: The battery is inserted and charging. • YELLOW/ORANGE Light: The GT-900 comes patient ready! The unit is now ready to use. Before Taking an SpO2 Measurement Connect the SpO2 Sensor Cable to the SpO2 Connector Port, labeled ‘SpO2’, located towards the bottom right of the unit. -
Page 6: Before Taking An Nibp Measurement
Place the cuff on the patient’s arm, about one inch above the bend of the elbow. Ensure that the patient cuff matches the patient type on the GT-900. When you are ready to take a measurement, press the “NIBP Start/Stop Button”, which will inflate the cuff and start measuring. - Page 7 BASIC SETUP COMPLETE Continue to Next Pages for Oral & Tympanic Configuration Setup...
-
Page 8: Configurations
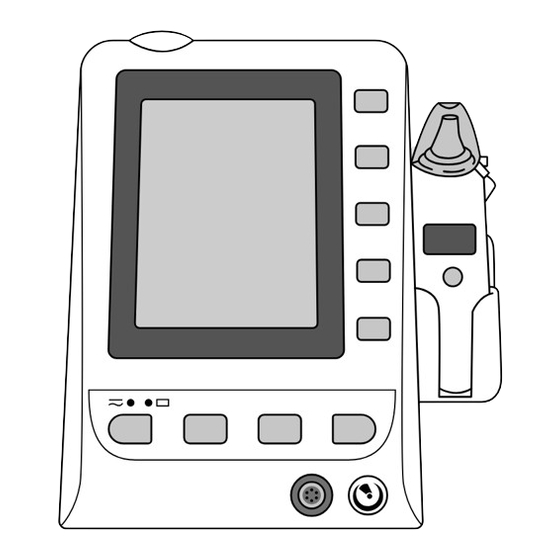
Configurations Tympanic Temperature Module Setup Plug one end of the Ear Thermometer Communication Cable into the bottom of the Infrared Ear Temperature Module (Thermometer). Plug the other end into the TEMP port, located on the back of the TEMP Module holder. Unlatch the Probe Shield to reveal the probe. -
Page 9: Oral Temperature Module Setup
Oral Temperature Module Setup Plug the Oral/Axillary Probe into the TEMP port, located on the back of the Oral/Axillary Probe holder. Remove the Oral/Axillary Probe from the Oral/Axillary holder to allow the probe to warm up. Once the probe beeps, a “Warm-Up Over”... -
Page 10: Faq
How to Set Up Automatic Blood Pressure Readings 1. Go to: > “System Menu” > Select “NIBP Set Up” > Turn “Inflation Mode” to “Auto” > Select the interval of your choice How to Set up Trigger Printing 1. Go to: 2. -
Page 11: How To Change The Recording Interval
How to Change the Recording Interval 1. Go to: > “NIBP” > Select “NIBP Set Up” > Configure time intervals to the parameters that you need 2. Adjust Trigger: > “User Configuration Settings” > Select “NIBP Set Up” > Turn on “Trigger” How to Connect/Turn on Recorder to Set up Trigger Printing 1. - Page 12 Providing Value Without Sacrafice 5963 Olivas Park Drive info@cardiacdirect.com Suite F, Ventura 888-354-2968 CA 93003...
Need help?
Do you have a question about the GT-900 and is the answer not in the manual?
Questions and answers