Advertisement
Advertisement

Related Manuals for AUTOBACS EAGLE-i

Summary of Contents for AUTOBACS EAGLE-i
- Page 1 2K + FHD DUAL DASH CAM Version 1.2...
- Page 2 CONGRATULATIONS ON YOUR PURCHASE OF THE EAGLE-i DASH CAM...
- Page 3 DISCLAIMER: 1. Please read the set-up and usage instructions carefully before operation. 2. Do not install this product in way that will obstruct the driver’s vision. 3. You should not change the dash cam’s setting or mode of operation when the vehicle is in motion.
- Page 4 NOTE: 1. Never attempt to disassemble, repair or make modifications to your unit; this will void your warranty. 2. Do not use harsh chemicals or solvents. To clean this unit use a damp soft cloth. 3. Please limit exposure to dust or sand ingress, this may affect functions of the unit. 4.
-
Page 5: Table Of Contents
CONTENT GUIDE 1. Overview---------------------------------------------------------------------------------------------- 6 2. Precautions ------------------------------------------------------------------------------------------ 8 3. Installation Guide -------------------------------------------------------------------------------8, 9 4. Specifications ---------------------------------------------------------------------------------- 10,11 5. App Operation Instructions --------------------------------------------------------------------- 12 6. Trouble Shooting ----------------------------------------------------------------------------------13 7. Warranty --------------------------------------------------------------------------------------- 14 -16... -
Page 6: Overview
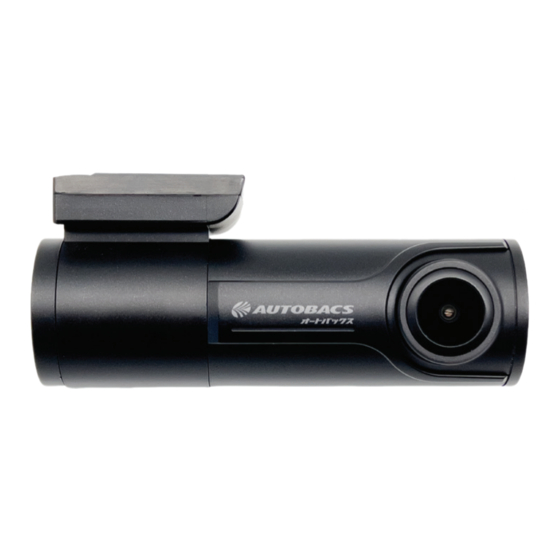
1. 3M Adhesive windsheild mounting bracket 2. Micro SD Slot 1. 3M Adhesive windsheild mounting brac 3. Micro USB port (5V power input) 2. Micro SD Slot 2. Micro SD Slot 4. Rear camera input 3. Micro USB port (5V power input) 3. - Page 7 KEY AND FUNCTIONS Function Instruction Press and hold the WiFi button for Turn on/off WiFi 3 seconds to turn WiFi on/off. Triple press the Wifi button to change the Switch between 2.4GHz WiFi WiFi Band and 5GHz Wi-Fi bands “Format SD card” “Press and hold the WiFi button for 10 seconds to format the SD card”...
-
Page 8: Precautions
PRECAUTIONS 1. Before the installation, please check that all the accessories are in the box, and test that the system is functional. 2. Please do not turn on vehicle accessory power until installation is complete. 3. Dash cam will automatically turn on when vehicle accessory power is on. Turn on unit and check function of cameras. - Page 9 3. Peel the sticker off the dash cam bracket to expose the adhesive pad and stick the dash cam to the windshield in a position near the rear-view mirror that will not obstruct the driver’s vision. 4. Connect the power cable to the micro USB port on the dash cam, then run the cable up to and along the edge of the windshield/roof lining, then down the windshield/A-pillar, around the passenger foot-well and into the cigarette socket (car charger) or fuse box (hard wire kit).
-
Page 10: Specifications
- Lens Diagonal Viewing Angle: Front 135.4° Rear: 130° - Memory Support: Up to 1 x 128GB Micro SD Card - Micro SD: Includes 64GB SanDisk High Endurance - WiFi: Dual Band 2.4GHz & 5GHz - App: Yes, “AUTOBACS DRIVE” App... - Page 11 SPECIFIATIONS - GPS Function: - Mapping Data: Route, Speed - Night Vision: WDR (Wide Dynamic Range) - G-Sensor: - Parking Monitoring: - Seamless Loop Recording: - Video Format: - Power Supply: 12/24V Cig Power Lead - Hard Wiring Kit: Input: 10-30V DC, Output: 5VDC 2A Low voltage protection: 11.9V/23.9V 3 Fuse Taps Input 0.5m + Output 3.5m Cable length...
-
Page 12: App Operation Instructions
APP OPERATION INSTRUCTIONS Android Open “Google Play”. Search for “Autobacs Drive” to download and install APP. Open “Apple Store”. Search for “Autobacs Drive” to download and install APP. WiFi Connection Open your smartphone WiFi settings and select Dash Cam Network: EAGLE-i Password to connect: 88889999. -
Page 13: Trouble Shooting
TROUBLE SHOOTING Under normal operating conditions, if there is problems with the device, please refer to the following methods to solve. • Unable to record video or take a snapshot: Please check SD card may be full of write protected file. Delete some file or reformat card. •... -
Page 14: Warranty
Removal and installation costs, if any, would be paid by the owner as well as any freight or postage costs of transporting the product to AUTOBACS AUSTRALIA PTY LTD and shall not be liable or responsible for any loss of use of this product or any form of consequential loss. - Page 15 AFTER 30 DAYS OF PURCHASE DATE: Warranty repair and service is carried out by our National Service Centre. Repair and service will be carried out at no cost to the owner if proof of ownership and the date of purchase can be verified to the satisfaction of the authorised centre concerned with this repair.
- Page 16 Clearly describe the fault in detail b) Safely and securely pack the unit for transport c) Include your return address d) Provide proof of purchase date as outlined above National Service Contacts: AUTOBACS AUSTRALIA PTY LTD Telephone: 1300 288 029 Email: services@autobacs.com.au...
Need help?
Do you have a question about the EAGLE-i and is the answer not in the manual?
Questions and answers
How do I know if it’s working
To check if the AUTOBACS EAGLE-i is functioning properly, follow these steps:
1. Recording and Snapshot Test: Ensure the device can record video and take snapshots. If not, check if the SD card is full or write-protected. Delete files or reformat the card if needed.
2. Continuous Recording: Verify that recording does not stop unexpectedly. If it does, check if the SD card is compatible, meets the required speed and class, or replace it if it has been in use for over six months.
3. Playback Test: Play back recorded videos and photos. If "wrong file" appears on the LCD, format the SD card to fix storage errors.
4. Image Quality Check: Inspect the image for clarity. If it is fuzzy, clean the lens with a microfiber cloth. If images appear dark or washed out, check lighting conditions.
5. WiFi and App Connection: Connect to the dash cam via WiFi (SSID: EAGLE-i, Password: 88889999) and use the “Autobacs Drive” app to view live video, track journeys, and change settings.
If issues persist after these checks, consider troubleshooting or warranty support.
This answer is automatically generated
The app on my phone does not show the video from the camera. it is stuck in preview mode.