Advertisement
CUPOLA
Assembly Instructions
®
Due to Plyco Corporations on going commitment to product improvement, we reserve the right to change, without notice, product specifi cations,
availability, prices and conditions of sale.
Products are shown with options, please contact your representative.
C-332-CUP-GUST INST rev 02-01-2021
Advertisement
Table of Contents

Summary of Contents for PLYCO Cupola
- Page 1 CUPOLA Assembly Instructions ® Due to Plyco Corporations on going commitment to product improvement, we reserve the right to change, without notice, product specifi cations, availability, prices and conditions of sale. Products are shown with options, please contact your representative.
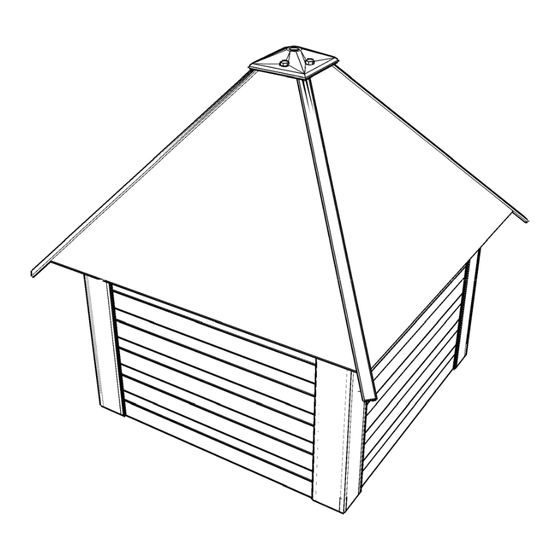
- Page 2 The hemmed edge of the roof panel hooks onto the hemmed edge of the top flange of side section. Mitered edge should be exposed on underside to give a finished appearance. 2’ x 2’ Cupola is shown here.
- Page 3 6. Bolt roof cap onto roof sections. Bolts are furnished with lock washers to grip metal. Thread bolts into holes in the threaded plate. Finger tighten only, at this point. A 2’ Cupola is shown here. Weather vane screw hole for threaded mast.
- Page 4 12. For 3’ and 4’ cupolas only with formed metal corner gussets: Using #10 x 1” self-drilling fasten- 11. Attach the completed cupola to the base ers (provided), install 2 fasteners through under- with fasteners to complete the installation.
Need help?
Do you have a question about the Cupola and is the answer not in the manual?
Questions and answers