Table of Contents
Advertisement
Quick Links
Advertisement
Table of Contents

Related Manuals for SENSAHEAT TDX Series

Summary of Contents for SENSAHEAT TDX Series
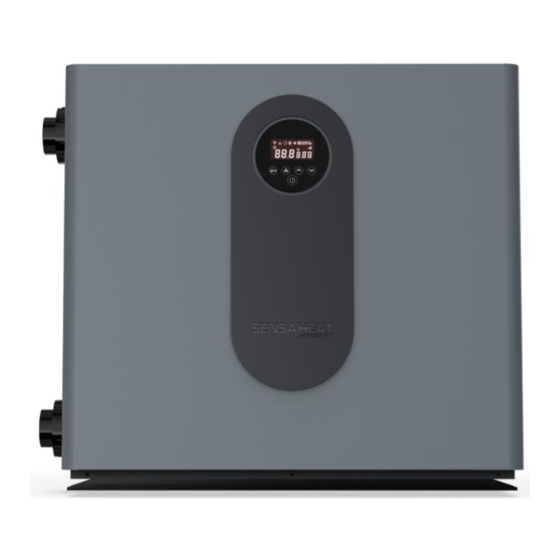
- Page 1 TDX Series INVERTER POOL & SPA HEAT PUMP USER MANUAL...
-
Page 2: Table Of Contents
Table of contents Introduction Safety Precautions Warnings Attention Safety About your heat pump Transportation Accessories Features Operating condition and range Modes of operation Technical parameters Dimensions Installation guidance Installation reminder Clearances Typical plumbing installation Wiring Electrical wiring diagram Reference for protection devices and cable specification Operation 13-15 Testing... -
Page 3: Introduction
The TDX Series Heat Pump has been specifically designed for Pool & Spa applications ensuring optimum performance and many years of trouble-free operation. Please read and understand this user manual before attempting to install your TDX Series Heat Pump. To register your product visit www.sensaheat.com.au... -
Page 4: Safety Precautions
2.Safety Precautions We have provided important safety information in this manual for the installation and maintenance of your heat pump. Please thoroughly read and obey all safety information in this manual. Environment friendly R32 Refrigerant is used in this heat pump. 2.1 Warnings This WARNING sign denotes a hazard. -
Page 5: Attention
2.2 Attention a. Please read the following instructions before installation, use and maintenance. b. Installation must be carried out by a competent person in accordance with this manual. c. Check all plumbing before operating the heat pump, ensuring there are no water leaks. d. -
Page 6: About Your Heat Pump
3.About your heat pump 3.1 Transportation a. Always keep upright. b. Do not lift the heat pump by the water unions as this may cause internal damage to the titanium heat exchanger inside the heat pump. 3.2 Accessories... -
Page 7: Features
3.3 Features Turbo Fan DC Twin-rotary inverter compressor from Mitsubishi DC Brushless fan motor EEV Technology Reverse cycle defrosting with 4-way valve High efficiency twisted titanium heat exchanger Sensitive and accurate temperature control and water temperature display High-pressure and low-pressure protection Full protection on electrical system 3.4 Operating condition and range a. -
Page 8: Technical Parameters
3.6 Technical Parameters Model HPTDX11 HPTDX14 HPTDX18 HPTDX22 HPTDX27 HPTDX32 HPTDX32S HPTDX40S Advised pool volume (m 20~45 25~50 30~60 40~75 50~100 65~120 65~120 90~160 PERFORMANCE CONDITION: Air 27°C/ Water 27°C/ Humid. 80% Heating 11.7 14.9 18.4 23.4 27.5 27.5 35.4 capacity (kW) Standard Mode... -
Page 9: Dimensions
3.7 Dimensions Model HPTDX11 75.5 HPTDX14 75.5 HPTDX18 75.5 HPTDX22 75.5 HPTDX27 75.5 HPTDX32 75.5 HPTDX32S 75.5 HPTDX40S 75.5 *All measurements are in mm *Above data is subject to modification without notice. Note: The table above lists relevant heat pump dimensions for the purposes of installation. Dimensions are subject to change without notice. -
Page 10: Installation Guidance
4.Installation guidance 4.1 Installation reminder Only competent people are authorized to install the TDX heat pump and should be educated with the relevant building codes and standards of their state or local governing body. All electrical connections must be performed by a licensed electrician. a. -
Page 11: Clearances
The TDX heat pump shall be installed in an outdoor location with adequate ventilation. The below diagram displays the minimum ventilation area; for optimum performance it is advised to exceed the minimum clearances. 4.2 Clearances HPTDX11 HPTDX14 HPTDX18 HPTDX22 HPTDX27 HPTDX32/S HPTDX40S A (mm) -
Page 12: Typical Plumbing Installation
4.3 Typical plumbing installation NOTE: If installing the heat pump on an existing pump/filtration setup, the heat pump must be installed after the pump/filter and before the chlorinator/sanitizer Please note: Water connections may differ from this diagram; to be used as a guide only. For optimum efficiency you may need to adjust the inlet and outlet valves to achieve a temperature differential of 2-3 degrees. -
Page 13: Wiring
Avoid installing water pipes in such a way that they pass behind the heat pump's evaporator. In the case this cannot be avoided, cover the pipes with thermal insulation foam. 4.4 Wiring WARNING: The electrical connection must be made by a licensed electrician or similarly qualified person in accordance with national, state or local codes, regulations or standards. -
Page 14: Reference For Protection Devices And Cable Specification
b. For power supply: 400V 50Hz Heat Pump Circuit Breaker Enclosure Electrical Connection Box Power Cord Breaker 4.6 Reference for protection devices and cable specification. MODEL HPTDX11 HPTDX14 HPTDX18 HPTDX22 HPTDX27 HPTDX32 HPTDX32S HPTDX40S Rated Current 22.5 25.5 28.5 11.3 15.0 (A)... - Page 15 Frequency percentage Outlet water Inlet water temperature temperature Symbol Heating & cooling models 1. Power On/Off 2. Wi-Fi setting 1. Lock/Unlock Screen 2. Heating mode (18-40°C) 3. Cooling mode (12-30°C) 4. Auto mode (12-40°C) 1. Boost 2. Standard 3. Silence Temperature Setting Attention: The controller has power-down memory function.
- Page 16 2) Automatic Lock Period: 30 seconds if no operation b. Power On Press for 3 seconds to unlock screen, then press to power on machine. c. Temperature Setting Press to display and set temperature. d. Mode Selection 1) Heating/Cooling/Auto mode Press to switch among heating , cooling...
-
Page 17: Testing
2) Manual Defrosting: To enter forced defrosting mode, the compressor must have been running for more than 10 minutes. In heating mode, press on touch controller simultaneously for 5 seconds to start forced defrosting, is flashing and defrost starts, stop flashing and defrosting stops. (Remarks: the interval between manual defrosting should be more than 30 minutes.) 5.5 Heat Pump Status Check 1. -
Page 18: Maintenance
a. Check the heat pump has adequate ventilation, ensure air inlets and outlets are not obstructed. b. Ensure heat pump is not installed in a corrosive environment. c. Check electric wiring is fastened and wired correctly, ensure unit is fully earthed. (All electrical work must be carried out by a licensed electrician) d. -
Page 19: Troubleshooting
1. In the winter season when the heat pump is not in operation. a. Cut off power supply to prevent any damage to the heat pump. b. Drain all water from the heat pump. c. Cover the heat pump when not in use. !!Important: Unscrew the water nozzle of inlet pipe to let the water flow out. - Page 20 WARNING If repair or removal is required, please contact an authorized service center. Any person who is involved with working on a refrigerant circuit should hold a current valid certificate from an industry-accredited assessment authority, which authorizes their competence to handle refrigerants safely in accordance with an industry recognized assessment specification.
- Page 21 Display Protection code description No water protection Power supply excess operation range Excessive temp difference between inlet and outlet water (Insufficient water flow protection) Ambient temperature too high or too low protection Anti-freezing reminder Display Failure code description High pressure protection Low pressure protection 3 phase sequence protection (three phase only) Water outlet temp too high or too low protection...
-
Page 22: Water Pump Control
The TDX series heat pump can be externally controlled via an interface or control system. All options will need to be installed by a licensed electrician or suitably qualified person. Heat Pump Interface As most pools are filtered for 8 hours a day, extra run times may be required to maintain the water at the desired temperature. - Page 23 9.1.e Locate the main power cord to the DT-H5RO-I and plug into mains power and switch on. For more detailed information please refer to the manual supplied with the DT-H5RO-I or visit www.sensaheat.com.au. 9.2 The DT-H5RO-S controller is designed to operate a pump independent of a filtration/sanitisation system.
- Page 24 5 and 6 on the terminal block behind the front panel are connected via a loop wire. As control systems vary in how they interact with external sources, a specific procedure can’t be detailed here. For guidance contact your local Sensaheat dealer or email enquiries@sensaheat.com.au Depending on the control system used an external relay kit may be required.
-
Page 25: Wi-Fi Operation
1. Download and install the InverGO app on your smart device 2. Create an account via email or third-party app. 3. Enter the verification code you receive. - Page 26 4. App Pairing – Wi-Fi (connects via your router to the heat pump) On your Smart Device: Select add device and tap Pool Heat Pump Icon Select a 2.4GHz Wi-Fi network and enter the password On the Heat Pump: Press for 3 seconds and release to unlock the touch screen Press for 3 seconds and release.
- Page 27 On your Smart Device: Tap the circle beside “Confirm indicator rapidly blink” and tap “Next”. The app will add the Heat Pump and register to your account. Once the heat pump connects to the Wi-Fi successfully will stop flashing on the touch screen. The Heat Pump will now be available in the app home screen.
- Page 28 5. App Pairing – Wi-Fi Direct (connects directly to the heat pump) On your Smart Device: Select add device and tap Pool Heat Pump Icon Select a 2.4GHz Wi-Fi network and enter the password Select “EZ Mode” in the top right corner, from the dropdown select “AP Mode” On the Heat Pump: Press for 3 seconds and release to unlock the touch screen...
- Page 29 On your Smart Device: Tap the circle beside “Confirm indicator slowly blink” and tap “Next”. On the next screen tap “Go to Connect” and select the “SmartLife-XXXX” network. Go back to the InverGO app and it will add the Heat Pump and register to your account. Once the heat pump connects to the Wi-Fi successfully will stop flashing on the touch screen.
- Page 30 a. App Operation – Heating Mode b. App Operation – Auto Mode Note: The app is subject to update without notice.
-
Page 31: Warranty
11.Warranty Sensaheat warrants all products sold will be (under normal use and maintenance) free of defects in material and workmanship for a minimum period of one year from the date of original purchase by the customer as marked on the invoice. For specific product warranty periods please refer to the table below. - Page 32 AQ43ASC-R32-P2 REV0923...
Need help?
Do you have a question about the TDX Series and is the answer not in the manual?
Questions and answers